

I thought this merited it's own thread because I'm sure it's a problem many of us have faced.
In our street we all have 6 ft high fences round our back gardens which we erected around 30+ years ago, once the builders had completed our houses. So, unsurprisingly, their posts are all starting to rot off at ground level. The posts are 8ft 4"x4" so 6ft above ground with 2ft set in concrete below ground. Over the last year or so I've dug up 4 of these and reset new posts into the ground. Almost as quickly as I'm digging them up I find another one broken - there are another 4 I know of right now and there are 25 posts in all and I know the whole lot will need doing in the near future. Anyone who has dug out concreted in fence posts will know why this though is depressing me, it's jolly hard work!
I've been looking at "unconventional" solutions on line and came across one I really liked the look of this solution: https://www.homedepot.com/p/Simpson...e-for-4x4-Nominal-Wood-Post-FPBM44E/202563551 but they are very hard to find in the UK and quite expensive too. Then I came across the Post Buddy: https://www.youtube.com/watch?v=OTAmK5vI1Kg which looked interesting. However I wasn't completely convinced so didn't buy. My neighbour then mentioned in passing that he was thinking of tackling some of his posts and, having seen me doing mine, asked me how difficult it is to do. This chap is nothing like as fit as me. He's carrying quite a lot of weight and has recently had a heart operation so I advised him not to do it. He was still wanting to sort his fence though and was not prepared (maybe unable to afford) to pay someone else to do it and I've got enough on with my own to even think of offering to do his. Then I remembered the Post Buddy video I'd seen, mentioned my miss givings, and offered to install them if he wanted to buy a couple just to try on one post.
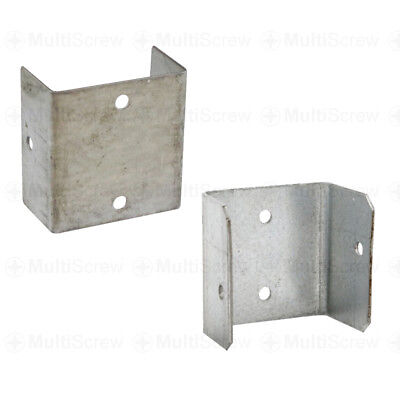
A few days later he knocked on my door with them so there was no wriggling out of my offer! Here's one just before I started to install it:

The end which goes in the ground is chamfered:

This chamfer is important in keeping the rod at the junction of the wood and conncrete so you have install it the right way round - it's marked though so you'd have to be a complete idiot to do it wrong.
The top end has one slotted screw hole:

Which is the first one you put a screw in after bashing the rod into the ground (by the way, this system will only work with concreted in posts. You won't get enough support in just earth). Screw the screw in until it's just a tad away from tight and then use your spirit level to square the post before fully tightening the screw. Be careful to place the screw in the middle of the slot so you have some give and take in the slot as you "true" the post. Then just fit the rest of the screws. I think putting the screws in at a slight angle will help to stop "fretting" when the wind tries to waggle the post.
The rods take quite some bashing to drive them home and I found that putting a block of wood between the post and the rod to make it lean out slightly made it much easier to hit. If you do this don't worry about the rod not going down between the concrete and the rest of the post underground as the chamfer on the end of the rod will keep it against the concrete. Also there is some sort of tough surface coating on the rods which should delay rusting.
Here are the tools I used to get the job done:

D'you like my old Spear and Jackson "Never Bend" spade?:

The metal part is all formed - forged - from one piece of metal and is virtually indestructible:

The little support pieces for your foot also make extended digging much easier on your boots. I forgot to time myself but I recon around 20 minutes per spike would be easily achievable. Here's one of the rods after being installed - the second one can be installed either on the other side of the post, which I did here to avoid having to shift the fence panel, or at right angles as the chap in the video did:

I've given the post a really good "wiggle" and it feels very solid indeed. I suppose the proof of the pudding will come in the winter gales but I'm impressed enough I'm going to try with one of mine.
Until I started looking into this I'd always supposed the only effective way to do the job would be to replace the entire Post. What I hadn't understood is that the post, in most cases, only rots off at ground level where the combination of air, dampness and other factors like fungus and living organisms can get to work on it. I'd noticed before that the bit of post you dig out of the ground is still in good condition and not really rotted at all but I'd not thought about the implications of this and nearly always, unless very old indeed, the post above ground is still very sound. The rods are quite hard to drive into place but this is good because it means the wood further down is in good order and the rods are going to get a good anchor. If the rods are very easy to drive in then either the wood has rotted or, more likely, the concrete has split - or maybe there is no concrete at all? If they drive in very easily probably they are not going to get enough purchase to support the post. Most of my posts are done with hand mixed concrete as I did them at the same time and it's much cheaper to do it that way rather than the relatively expensive ready mixed bags. However I have a couple of posts which I put in later using the ready mixed bags and one of these broke of about a week ago. I've noticed the ready mixed product, which works very well, is much easier to break up with an impact hammer than the traditionally hand mixed batch. I'm wondering if it'll be prone to splitting when the rods are hammered home? So I'm going to try this one first. If it doesn't get a good purchase I'll just have to dig out these ones but I'll use the rods on the others with the batch hand mixed concrete.
To say I'm impressed with the result on this one post would be an understatement. I'm amazed at how solid the post feels. There's just one thing tempting me and that is that Toolstation sells heavy duty galvanised strapping I metre long by 30mm wide by 5mm thick which, if I carefully grind a chamfer on one end, might just do the same job for a fraction of the price?
In our street we all have 6 ft high fences round our back gardens which we erected around 30+ years ago, once the builders had completed our houses. So, unsurprisingly, their posts are all starting to rot off at ground level. The posts are 8ft 4"x4" so 6ft above ground with 2ft set in concrete below ground. Over the last year or so I've dug up 4 of these and reset new posts into the ground. Almost as quickly as I'm digging them up I find another one broken - there are another 4 I know of right now and there are 25 posts in all and I know the whole lot will need doing in the near future. Anyone who has dug out concreted in fence posts will know why this though is depressing me, it's jolly hard work!
I've been looking at "unconventional" solutions on line and came across one I really liked the look of this solution: https://www.homedepot.com/p/Simpson...e-for-4x4-Nominal-Wood-Post-FPBM44E/202563551 but they are very hard to find in the UK and quite expensive too. Then I came across the Post Buddy: https://www.youtube.com/watch?v=OTAmK5vI1Kg which looked interesting. However I wasn't completely convinced so didn't buy. My neighbour then mentioned in passing that he was thinking of tackling some of his posts and, having seen me doing mine, asked me how difficult it is to do. This chap is nothing like as fit as me. He's carrying quite a lot of weight and has recently had a heart operation so I advised him not to do it. He was still wanting to sort his fence though and was not prepared (maybe unable to afford) to pay someone else to do it and I've got enough on with my own to even think of offering to do his. Then I remembered the Post Buddy video I'd seen, mentioned my miss givings, and offered to install them if he wanted to buy a couple just to try on one post.
A few days later he knocked on my door with them so there was no wriggling out of my offer! Here's one just before I started to install it:
The end which goes in the ground is chamfered:
This chamfer is important in keeping the rod at the junction of the wood and conncrete so you have install it the right way round - it's marked though so you'd have to be a complete idiot to do it wrong.
The top end has one slotted screw hole:
Which is the first one you put a screw in after bashing the rod into the ground (by the way, this system will only work with concreted in posts. You won't get enough support in just earth). Screw the screw in until it's just a tad away from tight and then use your spirit level to square the post before fully tightening the screw. Be careful to place the screw in the middle of the slot so you have some give and take in the slot as you "true" the post. Then just fit the rest of the screws. I think putting the screws in at a slight angle will help to stop "fretting" when the wind tries to waggle the post.
The rods take quite some bashing to drive them home and I found that putting a block of wood between the post and the rod to make it lean out slightly made it much easier to hit. If you do this don't worry about the rod not going down between the concrete and the rest of the post underground as the chamfer on the end of the rod will keep it against the concrete. Also there is some sort of tough surface coating on the rods which should delay rusting.
Here are the tools I used to get the job done:
D'you like my old Spear and Jackson "Never Bend" spade?:
The metal part is all formed - forged - from one piece of metal and is virtually indestructible:
The little support pieces for your foot also make extended digging much easier on your boots. I forgot to time myself but I recon around 20 minutes per spike would be easily achievable. Here's one of the rods after being installed - the second one can be installed either on the other side of the post, which I did here to avoid having to shift the fence panel, or at right angles as the chap in the video did:
I've given the post a really good "wiggle" and it feels very solid indeed. I suppose the proof of the pudding will come in the winter gales but I'm impressed enough I'm going to try with one of mine.
Until I started looking into this I'd always supposed the only effective way to do the job would be to replace the entire Post. What I hadn't understood is that the post, in most cases, only rots off at ground level where the combination of air, dampness and other factors like fungus and living organisms can get to work on it. I'd noticed before that the bit of post you dig out of the ground is still in good condition and not really rotted at all but I'd not thought about the implications of this and nearly always, unless very old indeed, the post above ground is still very sound. The rods are quite hard to drive into place but this is good because it means the wood further down is in good order and the rods are going to get a good anchor. If the rods are very easy to drive in then either the wood has rotted or, more likely, the concrete has split - or maybe there is no concrete at all? If they drive in very easily probably they are not going to get enough purchase to support the post. Most of my posts are done with hand mixed concrete as I did them at the same time and it's much cheaper to do it that way rather than the relatively expensive ready mixed bags. However I have a couple of posts which I put in later using the ready mixed bags and one of these broke of about a week ago. I've noticed the ready mixed product, which works very well, is much easier to break up with an impact hammer than the traditionally hand mixed batch. I'm wondering if it'll be prone to splitting when the rods are hammered home? So I'm going to try this one first. If it doesn't get a good purchase I'll just have to dig out these ones but I'll use the rods on the others with the batch hand mixed concrete.
To say I'm impressed with the result on this one post would be an understatement. I'm amazed at how solid the post feels. There's just one thing tempting me and that is that Toolstation sells heavy duty galvanised strapping I metre long by 30mm wide by 5mm thick which, if I carefully grind a chamfer on one end, might just do the same job for a fraction of the price?


") They had used silly amounts of concrete so I had to get that out and use long posts and prop them up with 3 x 2s and clamps while the concrete went off. Thankfully, the lumps in the ground broke up easily enough and were carted off to the local tip in a trailer.
They had used silly amounts of concrete so I had to get that out and use long posts and prop them up with 3 x 2s and clamps while the concrete went off. Thankfully, the lumps in the ground broke up easily enough and were carted off to the local tip in a trailer.