Right then.
Most Cinq's and Sei's I've seen tend to have fairly Grubby Seats.
My method of dealing with this in my first 'Cinq was to attack the seats, wash the material (I'll call them covers from now on but I don't mean aftermarket cover covers, if you understand) and replace them.
On My Cinq and subsequently a Sei SX that I bought to sell on this was a godsend as the seats had been very badly soiled by dogs and stunk to high heaven.
I wish I had done a guide showing those seats as they were filthy! the ones shown in this guide are nowhere near as bad, but I decided to give them a go anyway as some of the foam had split slightly.
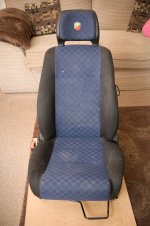
Here I've shown the passenger seat in question.
The basic principles can easily be applied to the rear seats too.
One thing to note is that each seat I've done, (Cinq 's' Sei 'sx' and Sei sporting) has varied slightly in the arrangement of the cords that keep the cover under tension.
However, as long as you work methodically and take good note of where everything goes before you rip it to pieces you'll be fine.
You will need:
1: A #2 Posi Drive screwdriver
2: Large flat Headed screwdriver of Pry-Bar
3: Foam adhesive (probably) - get this from any 'foam cut to size' place
no other adhesive is likely to work.
4: Plyers and Cutters
5: Cable Ties (about 200)
6: Patience!
I tend to do mine indoors with a large board on the floor to protect the carpet from grease.
It takes about 2-3 hours to do a single seat, or a day to do the lot and the seats themselves could easily be damaged in a workshop/garage area.
That's my excuse anyway, find somewhere comfortable to work where you won't be disturbed!
Most Cinq's and Sei's I've seen tend to have fairly Grubby Seats.
My method of dealing with this in my first 'Cinq was to attack the seats, wash the material (I'll call them covers from now on but I don't mean aftermarket cover covers, if you understand) and replace them.
On My Cinq and subsequently a Sei SX that I bought to sell on this was a godsend as the seats had been very badly soiled by dogs and stunk to high heaven.
I wish I had done a guide showing those seats as they were filthy! the ones shown in this guide are nowhere near as bad, but I decided to give them a go anyway as some of the foam had split slightly.

Here I've shown the passenger seat in question.
The basic principles can easily be applied to the rear seats too.
One thing to note is that each seat I've done, (Cinq 's' Sei 'sx' and Sei sporting) has varied slightly in the arrangement of the cords that keep the cover under tension.
However, as long as you work methodically and take good note of where everything goes before you rip it to pieces you'll be fine.
You will need:
1: A #2 Posi Drive screwdriver
2: Large flat Headed screwdriver of Pry-Bar
3: Foam adhesive (probably) - get this from any 'foam cut to size' place
no other adhesive is likely to work.
4: Plyers and Cutters
5: Cable Ties (about 200)
6: Patience!
I tend to do mine indoors with a large board on the floor to protect the carpet from grease.
It takes about 2-3 hours to do a single seat, or a day to do the lot and the seats themselves could easily be damaged in a workshop/garage area.
That's my excuse anyway, find somewhere comfortable to work where you won't be disturbed!
Step 1: Starting to strip seats
Right then, so you've removed your grubby seat from the car
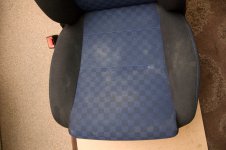
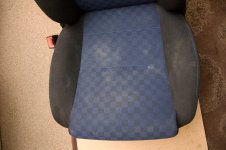
As I said this one isn's so bad, and probably could have been cleaned up to a lesser degree with upholstery cleaner.
Before we get going let me issue a disclaimer:
This is the method I've used with success on three occasions.
However you chose to rip your seats to shreds at your own risk!
Righty then.
First remove the two screws on the handle surround (one underneath handle)
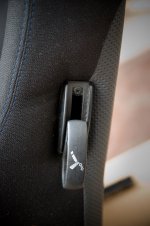
On an early 'Cinq the handle can be pulled off fairly easily, on Sei's it cannot and we will later work the material over the loosened surround.
Keep all your screws safe and take note where they came from
Next Pry off the round bit from the seat adjustment
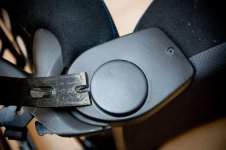
Take care not to damage the plastic.
This part needs to be removed next, (note the screw underneath) and then remove the surround.
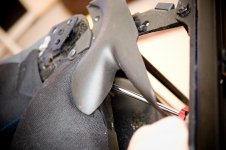
Repeat on the other side.
Removing the fabric
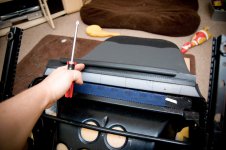
Turn the seat over, you need to remove this clip that holds the back of the seat to the bottom.
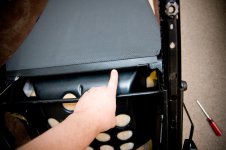
Go easy, don't lose your pateince, and try not to put a mark in it.
The best way is to get a round screwdriver in the very bottom (further down than in this picture) and gently pry downwards
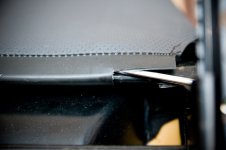
There you go!
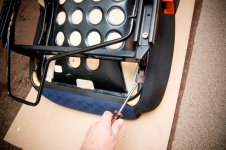
Next I remove the base.
Starting with the smaller section shown release the clips from the outside of the base
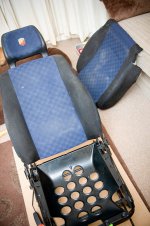
Ok, no turning back now...!
Keep Stripping!
In order to remove the seat back, you first need to relase this part at the bottom of the backrest, it's actually curled over itself and then tucked in.
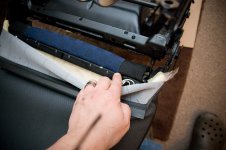
With pressure applied in the right direction it can be released WITHOUT significantly bending the metal out of the way.
REMEMBER! how it was held in place, as you will be putting it back!
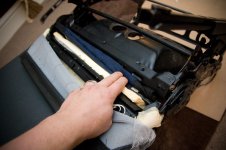
Then with that done you can release the cords that go through the seat back and provide tension to the front of the seat cover
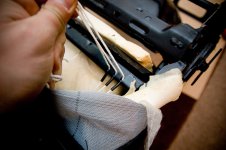
With these released on both sides, it's a good idea to familiarise yourself with where they go.
These Sei sporting seats are the simplest I've done, on a Sei SX and I presume later model Cinq the cords are threaded through a seam on the front of the seat before returning to the back.
On the Older Cinq's (standard seats at least) there are all kinds of cords clipped everywhere, you need to take your time and make sure you know where they come from otherwise you will ruin your seats!!
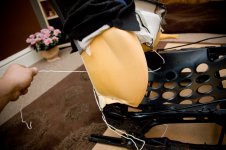
Before we can slide the seat material off, you need to tease it from around the handle surround we loosened earlier
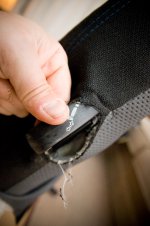
Don't go mad, gently pull the cover upwards about so far.
On Sei's and I presume later Cinq's you will see this elastic band stretched across the rear springs, remove it.
On older Cinq's the tension here was maintained via a cord with a plastic clip, which then inevitably made a small hole in the front of the seat where it rubbed over time.
Fiat clearly realised this and improved the design!
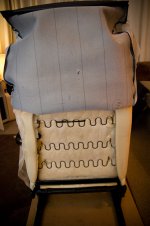
Towards the top of the rear of the seat there is a metal bar with nylon ends that needs to be removed.
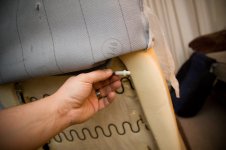
And then there are clips that hold the headrest in place, undo them and draw the headrest away.
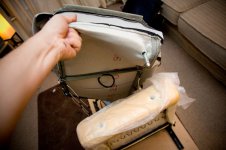
Now turning our attention back to the seat base we want to remove the material from the foam.
Now you will see your first 'HOG RING'
These are used by upholsterers to join the material to the foam.
You will need to snip. pry or twist the hog rings apart to release them. This is awkward, but great care MUST be taken not to rip the edges of the foam, as this will release the bars inside and your seat cover won't have any tension left in it when you re'assemble.
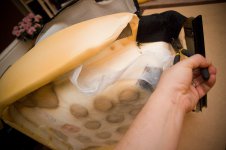
Here's a close up of a Hog Ring.
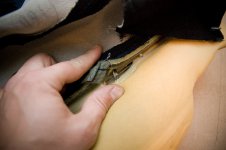
It holds a bar running through a sleeve in the cover to a bar running through the foam itself.
Fiat made them stronger in later cars too! I used to be able to clip them off with sharp plyers, but had to use a bit of prying on this seat.
Don't worry about keeping them intact, we will replace with cable-ties!
Here's the seat base cover removed.
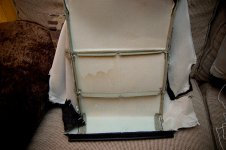
Next we need to release the ends of the bars to remove from the cover
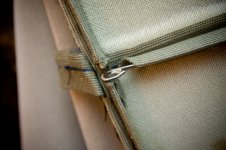
Pry apart and keep a note on which bars go where and which way up, it can make a difference to how well your seat fits back together!
Now once the bars are removed from their sleeve go and throw in the bath with some washing powder, whilst you remove the bars from the seat back cover.
You'll note that this seat wasn't that dirty but look at the colour of the water!
I have had it go really poo brown before with a particularly dirty set of seats that came up like new!
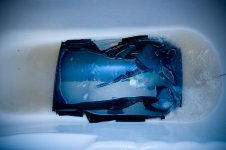
I have heard of people machine washing them, but I thought the potential for the plastic clips to snag the seat material was too great.
The Seat Foam
Whils your Seat covers are soaking repair any rips or smaller tears with the Foam Glue.
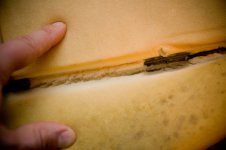
Although this isn't a problem, re-glueing here will ensure that the bar stays in the foam and will extend the life of the seat.
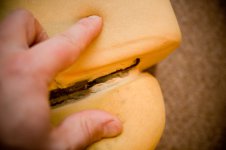
Often the bolster at the side, or the base (especially on Sporting seats due to the design) will have splits in the Foam.
If this is the case then you have to get some of that foam glue.
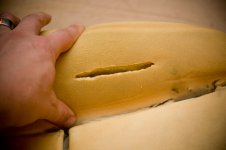
Even a split this size was making the bolster sag.
The Foam Glue is great stuff, and holds very strongly if used correctly.
Spray on, allow a while to dry and then give another coat or two before joining.
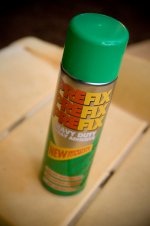
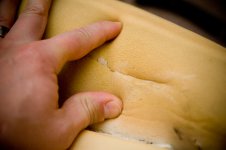
I've repaired a seat on which the side of the driver's seat was basically hanging off, and it held stronger than the foam itself.
Now would obviously be a good time to repair any damage to the seat frames (Ie on older 'cinq's when the frame snaps!)
Re-Assembly
Right,
After a good scrubbing, Soaking, rinsing, drying (I dare to spin dry then hang over a radiator, but line drying is best if you have the time)
It's time to put your seats back together!
First take the seat base material, and replace the bars you took out earlier, bending the ends back together with a pair of plyers
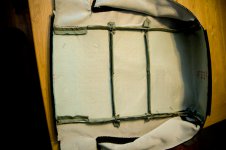
Then take your seat base and put the cable ties through the bars ready to meet the seat base cover.
TIP: have a think about which way round you want the cable tie, it's better ib the nobbly bit is towards you.
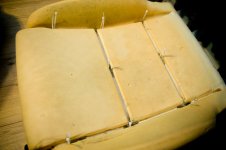
Then you can tie cable tie the seat cover in place.
Now time to do the Same to the Seat Back and start threading your cords back through the seat back,
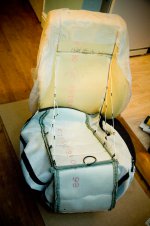
Don't forget to re-attach that elastic band or you'll be swearing in a bit!
Now as you draw the cover back onto the seat, it's at this point that your bar with the nylon ends goes back in.
Feel around for where it locates, it's a bit fiddly.
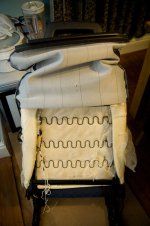
Re-assembly takes time, so work nice and slow and make sure you don't forget anything.
When you re-tighten these cords make sure you have them in the right place
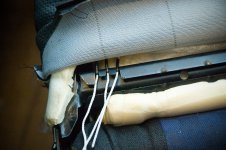
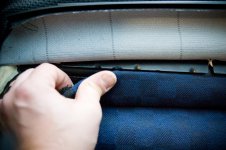
There will be times when you think it's not going to look right, don't worry! it will!
Remember how the bit at the bottom of the seat back doubles back on itself?
The Finished Product!
Eventually You will end up with this!
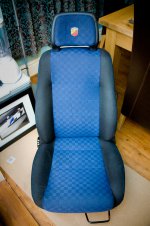
Ironically, this seat still needed a bit of upholstery cleaner, wheras the standard seats I've done previously that were in much worse condition came up better first time.
I think it's something about the material of these seats which leaves quite stubborn marks!
Anyway, one seat down two more to go!
Hope you enjoyed the guide and good luck!

