Page 2
Taking my time and with little adjustments this took me 35min in total. It took longer to type this guide
Anyway......
First park the car on an even level surface.
Next jack up the rear of the car and using axle stands place under the rear axle and drop the car onto the stands. Now place chocks under the front wheels.
If you don't have axle stands DO NOT TRY TO COMPLETE THIS JOB. You will be using force whilst lying under the car which if using a jack will without doubt drop the car ontop of you.
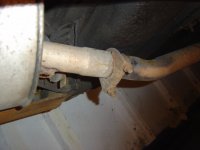
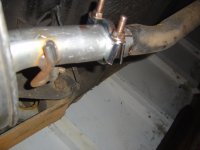
First remove the U clamp (13mm nuts) between rear & mid section.

Next using the blow torch heat the area where the clamp was positioned to expand the outer sleve of the rear section. when red hot see if the box can be twisted it will take a bit of force if not tap the front edge of the rear box towards the rear bumper with the mallet heat & try again.
The heat & tapping with the mallet will eventually loosten so the rear box can be removed.
Only now when the exhaust section can be removed can you take this section off of the mounting rubbers. If you remove the mounting rubbers prior to this it will weaken the front section and may cause fractures to the front pipe if old.
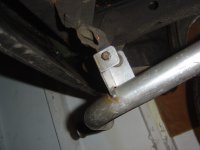
The rear mount is undone with loostening the 10mm bolt as shown. There is a good chance it will be rusty so I advise a good spray of wd40 prior to starting this. The nut for the bolt is welded to the opposite side of the mount and will almost deffinately break off so the grips at this time will come in handy.

Becarefull when removing the exhaust as the front part of the pipe will still be very hot. so maybe worth having a cig or a coffee to let everything cool as it doesn't take long.
Next when all is cool smear a very very light coating of copperslip or other compound over the first couple of inches of the front pipe this will make positioning later much easier, it will also burn off very quickly when on a run.
Slip the new rear section over the front pipe as far it will go and get the mounting rubbers attached immediately again to prevent stress on the front section. There are two mounting points.
Next put on a new U clamp, I covered the threads in copperslip to make loostening later much easier.

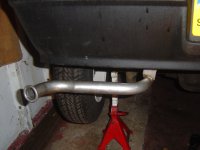
Tighten the U clamp lightly so it can be twisted with a little resistance as you now need to position the rear box so it is in line with the bumper the little touches are what makes the job look so much better.

Now the U clamp can be tightened fully.
Run the engine making sure all is in neutral and check for leaks on the new join. If all is ok jack up the car remove the axle stands & drop the car to the ground.
Now look at the car and take pride in a job well done.
You may have guessed that the rear pipe looks a little low, this is due to the rear mount on the chassis rail braking

