Strictly speaking this isn't necessary for a power feed since all accessory lines run from the same bus bar and 5 / 7.5 amp fuse so you could just splice a new wire into the power feed going to the cigarette lighter, but I wanted to do it since I'll be running a few extra accessories and you may need to do this if there is damaged wiring, you need the BCU out for repair, or you're fitting a 3rd party alarm.
Note - this all applies to a RHD car and mine is a 2015 Abarth so your wiring colours may be different. Check the service manual on yours to be sure...
Also note - do not attempt this unless you're reasonably au fait with automotive electronics, and aren't ham fisted. Any mistakes could lumber you with a very expensive repair bill indeed...
Firstly, disconnect the battery. There could be, er, consequences if you don't do this...!
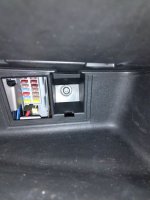
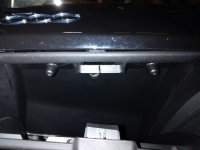
Then remove the fusebox cover, and flip down the little tray which should contain the workshop manual. Both have fiddly clips, but with a bit of gentle pressure in the right place they'll unclip without doing any damage. Once the workshop manual tray is down you'll be able to see 6x torx screws - 2 at the bottom, 3 in obvious places on the parcel tray top edge, and one hidden inside that little secret compartment. Then assemble a long extension, and undo the bolt next to the fusebox.


Next carefully pull the parcel try outwards to disengage the plastic clips marked below:

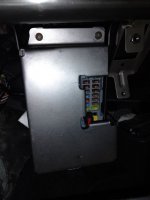
Once that's done, you'll see the fusebox / BCU, with three anti-tamper screws. Thankfully the screws are soft and have a large edge, so are easy to remove without needing to drill them out (I won't say what I used since they're presumably fitted to protect the bcu from tampering).

Once they're out, release the levers holding the connectors, push them all the way until they click, and carefully remove the connectors from the front. A little wiggle should release the clips holding the bcu / fusebox in place, and then you'll be able to carefully turn it, and unclip the rear connectors. Carefully wiggle out the bcu / fusebox, and you'll be able to reach the rear connectors properly.
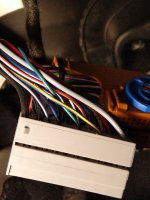
Locate the rear connector with the larger pins (mine has a green cover), carefully cut the cable tie holding the cables in place, and lever the two locking tabs outwards with your fingernails. Once that's done, you can push the main plug out from the clip assembly, to expose the plug.

Next, remove fuse 52 (the 3rd down on the right) and using a multimeter on the right hand connector for fuse 52, locate the pins connected to it on the rear of the fusebox / bcu assembly (mine were pins 4 and 5). Checking it back on the plug, there was a spare connector at pin 4, so I inserted a new cable / connector in there, reassembled the plugs on the fusebox / bcu, checked once again that the newly-added wire connected to the right hand terminal of fuse 52, then put fuse 52 back in and reassembled the fusebox cover.
Once done, reconnect the battery (making sure first your new wire isn't touching any metal bodywork), turn the ignition on, and make sure your new wire only shows +12v when the ignition is switched on. Once done, disconnect the battery again, route your nice new power feed to where needed (e.g. a 3rd party stereo), reassemble the parcel tray, and reconnect the battery.
Check you still have the switched +12v, and you're good to go.
Note - this all applies to a RHD car and mine is a 2015 Abarth so your wiring colours may be different. Check the service manual on yours to be sure...
Also note - do not attempt this unless you're reasonably au fait with automotive electronics, and aren't ham fisted. Any mistakes could lumber you with a very expensive repair bill indeed...
Firstly, disconnect the battery. There could be, er, consequences if you don't do this...!
Then remove the fusebox cover, and flip down the little tray which should contain the workshop manual. Both have fiddly clips, but with a bit of gentle pressure in the right place they'll unclip without doing any damage. Once the workshop manual tray is down you'll be able to see 6x torx screws - 2 at the bottom, 3 in obvious places on the parcel tray top edge, and one hidden inside that little secret compartment. Then assemble a long extension, and undo the bolt next to the fusebox.


Next carefully pull the parcel try outwards to disengage the plastic clips marked below:
Once that's done, you'll see the fusebox / BCU, with three anti-tamper screws. Thankfully the screws are soft and have a large edge, so are easy to remove without needing to drill them out (I won't say what I used since they're presumably fitted to protect the bcu from tampering).

Once they're out, release the levers holding the connectors, push them all the way until they click, and carefully remove the connectors from the front. A little wiggle should release the clips holding the bcu / fusebox in place, and then you'll be able to carefully turn it, and unclip the rear connectors. Carefully wiggle out the bcu / fusebox, and you'll be able to reach the rear connectors properly.
Locate the rear connector with the larger pins (mine has a green cover), carefully cut the cable tie holding the cables in place, and lever the two locking tabs outwards with your fingernails. Once that's done, you can push the main plug out from the clip assembly, to expose the plug.

Next, remove fuse 52 (the 3rd down on the right) and using a multimeter on the right hand connector for fuse 52, locate the pins connected to it on the rear of the fusebox / bcu assembly (mine were pins 4 and 5). Checking it back on the plug, there was a spare connector at pin 4, so I inserted a new cable / connector in there, reassembled the plugs on the fusebox / bcu, checked once again that the newly-added wire connected to the right hand terminal of fuse 52, then put fuse 52 back in and reassembled the fusebox cover.
Once done, reconnect the battery (making sure first your new wire isn't touching any metal bodywork), turn the ignition on, and make sure your new wire only shows +12v when the ignition is switched on. Once done, disconnect the battery again, route your nice new power feed to where needed (e.g. a 3rd party stereo), reassemble the parcel tray, and reconnect the battery.
Check you still have the switched +12v, and you're good to go.

