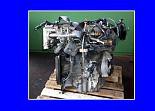
THIS GUIDE IS A RESULT OF ME SNAPPING A TIMING BELT RESULTING IN A RUINED CYLINDER HEAD. RATHER THAN REPAIR IT I FOUND ANOTHER ENGINE FROM A LOW MILER AND AVOIDED THE WHAT IF? SITUATION WITH REBUILDING. HOPE IT CAN BE OF HELP!!! ")
------------------------------------------------------
NOTE/ Left and Right references are from looking at the car from standing in front of it.
Before commencing ensure car is on firm flat level ground. Avoid gravel / grass as the engine alone weighs 185kg and thats not including cabling / ancillaries / gearbox etc. You will need to be able to roll the engine out from under the car either on a heavy duty low trolley or on a platform spanning the arms of a hydraulic engine hoist (which was my own method)
Read this the night before you tackle the job, get your can of wd40 out and soak all bolts you are going to remove.
On the day, take photos as you go.
An empty tool box with labelled compartments is handy for nuts / bolts etc as you go.
If you need your car on a monday, dont do on a sunday when all the shops are closed. Be prepaired for hitches and the need to buy parts where required etc.
Make sure you have someone with you to assist / for safety especially at the engine removal / putting back stage.
DISCONNECTING LOOM
1. Disconnect battery removing neg earth first.
2. Remove left hand upper 10mm bolt on battery hold down bar. Only loosen the right hand bolt partially to allow the bar to be swivelled out of the way.
3. Remove battery.
4. Remove the 3 x 13mm bolts at the bottom of the battery tray and lift out noting route of the water drain pipe at the bottom of the tray.
5. Remove 3 x plugs which connect onto the fuel filter (2 x front 1 x left). Then unclip the wiring from the bulkhead.
6. Reach into the scuttle area behind the fuel filter and remove the 2 x 10mm bolts holding the black splash cover over the ECU. The 2 x ECU plugs can now be taken out by, firstly, sliding the locks out each plug (left for left plug and right for right plug). Ensure you take the two plugs straight out as you dont want to bend the small pins on the ECU. Leave the ECU in situ but replace the cover if the car is outside.
7. Pull the cabling from the ECU into the engine bay by removing the 2 x 10mm round topped bolts from where it joins the bulkhead . Note where it routes under the wiper mechanism to prevent the wires fouling on refitting.
8. Look for the black box to the left of the fuel filter and remove the two plugs. One is for the glow plug loom which is a bunch of cable on its own.
9. To the front of the gear box, remove both the reverse switch and engine block earth. Tuck these out the way behind the nearside headlight.
10. Lift the black lid from the engine compartment fuse box then, using a flat blade screwdriver to the tags on the right hand side, lift the fuse box from its base. You will then need to remove whatever cabling exits the top of the fuse box. 1 x large plug and 1 x 50amp fuse. 2 x small plugs to the left hand side.
11. Separate the battery terminal wires so that what can stay with the car body does so and what can be kept with the engine does likewise. Dont worry, on reconnection these wires are all coloured red and black respectively so there is no doubt as to where they go.
12. Pull the plug(s) for the radiator fan(s) and unclip the cabling from the radiator. The cable can now be freed from the clip near the turbo and tucked behind the nearside headlight.
13. Pull the plug from the MAF sensor located mid way down the hose which leads from the top of the air filter housing.
14. If you have air con, remove the plug from the pump at the front left of the engine. This is due to the air con components having to stay with the car to prevent breaking the air con piping and losing your fluid etc.
ALL WIRING SHOULD NOW BE FREE. THE WIRING SHOULD NOW BE PLACED ON TOP OF THE ENGING AND HELD DOWN TO THE INTAKE MANIFOLD WITH CABLE TIES TO KEEP IT SAFE DURING REMOVAL. ALL OTHER PLUGS AND “ON ENGINE” CABLING CAN BE REMOVED ON THE GROUND WHERE ACCESS IS BETTER AS THE LOOM WILL COME OUT WITH THE ENGINE.
DRAINING COOLANT AND REMOVING ASSOCIATED HOSES / TANK / RAD / INTERCOOLER ETC
Try not to break too many of the permanent hose clips as you cant re-use them. Save you on buying loads of jubilee clips etc. Only remove hoses at one end if possible.
NOTE - If you have air con identify the pump at the front left of the engine. There are 4 x 13mm bolts holding it onto an allow frame. Firstly crack the nut with an open ended spanner at the top left of the pump. (the bolt which is against the gas nozzle) Then completely remove the other 3 bolts.
Now go back the the bolt you cracked firstly and turn it a bit at a time. The pump will slowly draw out as you go leaving the bolt trapped on the pump. Dont worry, the hoses, like brake hoses, are strong and the pump is relatively light.
1. loosen expansion tank lid.
2. place bucket under right hand side of radiator.
3. loosen and pull radiator top hose at the point where it joins the engine on right hand side leaving it attached at the rad.
4. loosen the radiator bottom hose at the bottom near the turbo. Remove slowly and prepare for spillage.
5. turn the bleed screw on the heater matrix double hose a couple of turns to ensure full drainage (situated under the diesel filter)
6. Slacken front road wheels
7. Now jack up the front of the car one side at a time. A trolley jack is best and get it as high as you can. Use axle stands on a decent height positioned under the large bolts which hold the subframe at their rearmost point (near the anti roll bar floor mounts).
ENSURE YOUR AXLE STANDS ARE IN PERFERCT CONDITION (NO CORROSION / RUST, INSPECT THE WELDS ETC) AS YOU WILL BE WORKING UNDER THE CAR.
8. remove both front road wheels (you will need these in a moment)
9. remove the arch liners by removing all the cross head screws. If any of these are rusted use a fine punch and a hammer to clean the heads out. It sometimes helps to tighten them slightly more to crack them. You may then find a couple of flat head screws holding the bottom of the liner onto the engine undercover. If the arch liners prove difficult to free it helps by grabbing them at the bottom centre and closing them like curtains. This helps free them from the wing and they should fall out.
10. Now remove the front bumper by firstly, from under the vehicle, removing the torx bolts along the width of the bumper.
11. Now remove the 4 x 10mm bolts securing the bumper to the front of the wings (2 on each side) You will see these by looking up into the sides of the bumper. On each side, one is at the bumper top point and the other is near the headlight.
12. Finally, remove the 2 x torx bolts at the top front of the bumper either side of the bonnet catch. The bumper should now draw forward and off.
13. Remove the two dark grey foams at either side of the front of the cross member to keep them safe as they are only pushed in.
14. Remove the top of the air filter housing at the front right of the engine bay by loosening the 3 x cross head screws ( the screws stay with the top and dont fully withdraw)
15. Follow the hose from the top of the lid you have just removed and Loosen or break the clip at the bottom of the MAF sensor. Lift the lid, hose and MAF sensor as one unit clear from the car. It is important you put cling film / rubber glove or similar over the end of the MAF sensor as it is sensitive to dirt. Without the MAF working you will have no turbo until full operating temperature is reached so store out of the way carefully.
16. Now remove the air filter housing by removing the 2 x 10mm bolts at the back of the housing. There unit is push fitted onto the small air trunk at the front so just pull it free.
17. Remove the large hose leading from the intercooler at the throttle body end leaving the other end attached to the intercooler.
18. Remove the other short hose leading from the intercooler at the turbo end. Both the intercooler and radiator should now be free.
NOTE – if you have air conditioning remove the 10mm bolt holding the air con cannister to the offside inner wheel arch and let it hang down.
19. remove the under engine splash shield. The front is normally released when the front bumper torx bolts are removed and the flat head screws are removed from the bottom of the arch liners. 2 x 13mm bolts secure the rear corners onto the subframe.
20. place the two road wheels one on top of the other and slide under the lower cross member where the radiator and intercooler sits.
21. remove the 10mm bolt holding the top of the intercooler onto the upper cross member.
22. Slacken 1 x 15mm bolts at the end of the lower cross member.
23. remove the bolt on the other side and let the lower cross member sit angled on top of the front road wheels.
24. remove the first bolt you slackened and allow the full cross member to drop onto the tyres.
25. work the intercooler and radiator off the cross member by levering at the bottom to release the rubber push fittings.
26. If your car has aircon, imagine there is a pivot or hinge on the left hand side of the radiator. Drop the radiator down and pivot it clock wise round 180 degrees so that the air con rad (which is anchored to the coolant rad) does not strain its piping. The rads can now sit face down with the fan(s) face up on the piled up road wheels to the outside of the offside wheel arch.
If your car is standard the radiator can be completely withdrawn from the vehicle and moved out the way.
27. Remove the small top hose leading from the expansion tank from the small copper pipe at the top left of the engine.
28. Remove the hose leading from the bottom of the expansion tank where it connects the pipe which crosses the top of the exhaust manifold.
29. Remove the expansion tank by removing the 10mm bolts front and back ensuring you note the route of the overflow pipe exiting the tank lid.
30. Remove the 2 heater matrix hoses leading from the bulkhead from the right hand side of the engine and cable tie them onto the brake lines or other suitable anchor point on the bulkhead.
DISCONNECTING FUEL LINES / FUEL FILTER ETC.
NOTE - There is no pressure in the electric pump driven low pressure fuel lines so dont worry about spraying fuel. It wont happen. The only high pressure, which remains so for a period of time after engine is switched off is within the high pressure mechanically driven common rail system and this circuit wont be broken any way.
1. Trace the fuel line which comes in just under the brake fluid expansion tank and remove it from the fuel pump. Tuck it up under the brake fluid expansion tank. No diesel should spill from it as it will be at its highest point from the fuel tank.
2. Remove 2 of the push fit fuel lines from the fuel filter which lead from the engine by squeezing the 2 x tabs on each hose end.. The incoming fuel line which is attached to the bulkhead is easier removed once the fuel filter is off its mount.
3. Undo the 3 x 13mm nuts from the fuel filter body.
4. Draw it off its studs and rotate it to the right to allow the 3rd fuel pipe to be removed. Store fuel filter upright to prevent loss of fuel.
NOTE- JTD FUEL SYSTEMS DONT NEED PRIMED SO IF YOU ACCIDENTLY EMPTY THE FILTER OR TAKE ANVANTAGE AND CHANGE IT, THE ELECTRIC IN TANK LOW PRESSURE PUMP WILL FILL IT BACK UP AGAIN WHEN THE KEY IS TURNED TO ACCESSORY. YOU WILL HEAR IT GLUGGING AS IT FILLS AND EXPELLS ALL AIR PRESENT.
OTHER ITEMS
1. Remove 2 x 13mm bolts securing the gear change weight and withdraw it from the gear box. This will prevent the gearbox snagging on the sub frame when the engine / gearbox is dropped down.
2. Pop both gear selector cables at their ends by twisting in one direction with a pair of pliers.
3. Remove both gear selector cables from their locations by levering up on the metal u shaped tags. The cables can now be cable tied to somewhere on the bulkhead.
4. Remove the 2 x 13mm bolts securing the clutch release hydraulic mechanism from the top of the gearbox. Once removed pull the plastic tip off and secure the plunger from popping out by putting a cable tie around it. Note the route the clutch pipe takes going under the gear box mount as you will need to know once the new engine goes back in.
5. Working from underneath the car, remove the 3 x 13mm bolts securing the exhaust downpipe to the manifold. This can now be bent to either the left or right and cable tied to the back of the subframe. Dont be shy to bend it quite far at the flexi, You need enough clearance so the engine does not crush it on the way down.
DRIVE SHAFT REMOVAL
1. Get a pin punch and prise up the security tabs on the hub nuts.
2. Get someone to sit in the car with the brake pedal pressed hard and slacken the drive shaft hub nuts on both sides of the car.
3. On one side at a time undo the 6 x allen bolts at the inboard ends of the drive shafts. These are tight, initially, so a ring spanner around an allen key should crack them.
4. Remove the lower 13mm ball joint pinch bolts from each side of the car by firstly removing the nuts then hammering the bolts through until they drop out.
5. If you have difficulty pushing the lower arms down due to the strength of the anti roll bar then you can drop the bar by, on both sides, tracing it back under the floor pan until you see the 2 x 13mm bolts which anchor it onto the floor on each side.
6. On each side pull out on the hub while hitting the shaft through the back of the hub.
7. Both drive shafts can now be withdrawn from the car.
IF THE HUB NUTS ARE TIGHT THEN THERE IS AN ALTERNATIVE AS FOLLOWS:-
1. from within the engine bay unplug the abs sensors. They are white cylinders. On the offside its at the upper rear corner of the inner wing and on the nearside its in front of the ABS motor.
2. pull both wires down, unclipping them where they are attached to the body and suspension strut and cable tie the wire near to the ABS sensors.
THE REASON I WOULDNT REMOVE THE ABS SENSORS AT THE HUBS IS THAT THEY ARE EITHER STUCK FAST EVEN WITH THE BOLT REMOVED OR YOU END UP WITH MALFUNCTIONS ON REFITTING. POINTS 1 AND 2 ABOVE AVOIDS ALL THAT.
PERFORM BELOW ON BOTH SIDES:-
1. Undo 10mm bolt holding the brake pipe to the suspension strut only enough to allow it to slide off its fork.
2. remove the 2 x 17mm bolts securing the brake caliper to the hub. These bolts are found at the rear of the calliper.
3. remove intact with brake pads still within and cable tie up out the way onto the suspension spring
4. Remove the lower 13mm ball joint pinch bolt by firstly removing the nut then hammering the bolt through until it drops out.
5. remove the 13mm nut from the steering track rod end and using a ball joint separator hammered into the joint, break the joint from the steering knuckle.
6. undo the 6 x allen bolts at the inboard end of the drive shaft. These are tight, initially, so a ring spanner around an allen key should crack them.
7. using a 15mm spanner to hold the bolts still, undo the 2 x 17mm nuts from where the strut connect the hub and hammer them through. (NOTE, to prevent the thread from being ruined keep the nut on the bolt on the last few threads before hammering through)
8. The hub and driveshaft can now be taken off the car on each side as one compete unit.
ENGINE / GEARBOX REMOVAL
NOTE- THE ENGINE / GEARBOX MUST BE REMOVED AS ONE UNIT ESPECIALLY HGT / JTD MODELS AS TO PREVENT TORQUE STEER AND TO KEEP BOTH DRIVESHAFTS EQUAL WEIGHT / LENGTH THERE IS A CARRIER SHAFT AT THE INBOARD END OF THE GEARBOX TAKING POWER TO THE OFFSIDE DRIVE SHAFT. THIS SHAFT IS BOLTED TO THE REAR OF THE CYLINDER BLOCK VIA A BRACKET.
ITS IMPOSSIBLE TO GET TO WITHOUT REMOVING THE ENGINE FIRST. MAKING GEARBOX REMOVAL A BIT MORE DIFFICULT THAN THE USUAL BOLTS AROUND THE BELL HOUSING ONLY JOB.
THE PUNTO IS DESIGNED WELL FOR ENGINE REMOVAL FROM BELOW ANYWAY AS THE UPPER FRONT CROSS MEMBER IS USEFULLY HIGH.
1. Crack the bolts securing the gearbox to engine but dont remove. There are 2 x large 17mm bolts at the top, 1 x 17mm bolt at the lower front, 1 x 17mm nut at the back beside the starter motor and
2 x small 13mm bolts at the bottom.
2. They best way to attach the engine to the hoist is by using a scrap piece of seat belt tied onto each side of the inlet manifold.
NOTE- If you have never considered a seat belt imagine the forces one of these endure in a crash when a 100kg person is brought to a sudden stop without it snapping. They have great friction too. Simply tying it a couple of times at each end will take the combined weight of the engine / gearbox with plenty of effort to spare.
3. Attach the engine to the hoist and take up the slack plus a little nudge
more just to prevent the engine suddenly dropping on release.
4. From under the car identify the engine anti tilt bracket.
5. Put a spanner on one side and remove the nut from the other before withdrawing the long bolt.
6. now remove the 5 x 13mm nuts holding the engine to the bracket on the offside inner wing. The bracket can be left in place if you wish.
7. Lastly withdraw the single nut holding the long threaded pin at the gearbox side to the other inner wing.
8. If you are using a hydraulic hoist with long lower legs extending under the car, place a suitable bridge between the legs. I used a few spare fence posts tacked together. Just anything strong enough to take 200+kg of weight.
I you are using a frame with block and tackle then lower the engine onto a heavy duty wheeled trolled so it can be rolled out easily.
9. Slowly lower the unit to the ground. The engine is flat bottomed so it should sit almost upright without needing tethered allowing you to simply wheel it out. If your car is not quite high enough you might find the oil dip stick tube snags on the cross member. If this is the case then half way down it, remove the 10mm nut and bend it to the right enough to allow it to pass under the cross member. Its made of a soft metal so it should not snap.
10. Once you have wheeled the engine out clear of the car, re-attach it to the hoist and lift it a foot or so up in the air to make is easy to work on.
WIRING / ANCILLARY REMOVAL
THE FOLLOWING ASSUMES YOUR DONOR ENGINE HAS BEEN SUPPLIED WITHOUT STARTER MOTOR, ALTERNATOR AND STILL INCLUDES THE INJECTION SYSTEM, INLET / EXHAUST MANIFOLD / DIESEL PUMP ETC AS MOST 2ND HAND ENGINES ARE SUPPLIED THIS WAY.
BEFORE PERFORMING THE FOLLOWING TAKE SEVERAL PHOTOS ALL AROUND THE ENGINE / GEARBOX TO ASSIST IN PUTTING THE PARTS ON THE NEW ENGINE.
1. Pull each of the 4 plugs from the injectors before unclipping and feeding the wiring down the space between the engine and throttle body.
2. Uclip the wiring for the MAF sensor plug and the adjacent plug which connects the small box where the turbo vacuum pipes go.
3. remove the red live cables and associated smaller wire from both the starter and alternator.
4. Pull the remaining plugs from the sensor on the inlet manifold / fuel rail sensor / sensor to the rear of the mechanical fuel pump / crankshaft position sensor / cam position sensor.
5. Remove the separate loom from the glow plugs which are right at the bottom rear of the inlet manifold.
6. Remove the loom from the engine by removing the 2 x 10mm nuts on the plastic housing under the fuel pump on the rear of the engine. Keep the housing with the loom as it helps keep the shape of the wiring to assist transferring onto the new engine.
7. the ECU seems only to prefer its own fuel pump sensor and fuel rail pressure sensor so remove these and transfer to the new engine. All other sensors / injectors / fuel pump etc will work anywhere so you can run the ones which came with the donor engine without issue. The fuel pump sensor is a cylindrical object secured by 2 x torx screws. The fuel rail pressure sensor is secured by a large nut . It is initially tight but will loosen easily after that.
8. Remove the alternator by cracking the bottom bolt then loosening the top bolt. Push the alternator towards the engine and remove the auxiliary drive belt before removing the alternator.
NOTE:- If your car has air con, the alternator is in a fixed position. Instead, belt tension is taken up by a tensioner pulley which is secured by 13mm bolt. Slacken this off and withdraw the belt before removing the alternator.
9. Remove the starter motor by removing the 3 x 13mm bolts from the gearbox.
10. remove the bolts securing the carrier shaft to the engine block ans slide the splined rod out of the inboard side of the gearbox. Plug the hole to prevent spillage of gearbox oil and the ingress of dirt.
11. Ensure the engine is hanging level and withdraw fully the engine to gearbox mounting bolts. The gearbox will now sit nicely on the thread on the back and the input shaft. Now slide the gearbox off the engine keeping it straight until the input shaft has fully cleared the clutch plate.
12. Unless your engine comes without exhaust manifold and turbo then you can now drop the old engine and prepare to attach the new one. Remember to recover all worthwhile parts as spares / sell etc.
FINALLY
NOW YOU HAVE WENT THROUGH ALL THIS HASSLE TO GET THE ENGINE REMOVED, IT IS STRONGLY RECOMMENDED THE CLUTCH IS CHANGED ON THE NEW ENGINE UNLESS YOU CAN GUARANTEE YOURSELF THE HISTORY OF THE ENGINE AND THE CLUTCH HAS BEEN CHANGED RECENTLY AND IS FREE OF OIL OR CONTAMINATION.
ALSO GET THE WATER PUMP / TIMING BELT CHANGED. THEY ARE CHEAP AND SO MUCH EASIER TO CHANGE OFF THE CAR. ENSURE YOU MAKE TIMING MARKS WITH TIPEX PRIOR TO REMOVAL IF, LIKE MINE, NO APPARENT MARKS WERE SEEN.
THE TIMING BELT, NO MATTER HOW NEW IT LOOKS, WILL STILL LOOK THE SAME PRIOR TO IT BREAKING. THE LETTERING SELDOM WEARS AWAY AS THEY SPIN AROUND INSIDE THEIR ENCLOSED DRY SPACE ALL THEIR LIVES BUT THE METAL CABLING AND FIBRES INSIDE THE RUBBER FATIGUES THROUGH CONSTANTLY BEING BENT ONE WAY THEN THE OTHER WHICH CANNOT BE SEEN.
NOTE- FIAT ENGINE AND ANCILLARY BOLTS ARE NOTORIOUSLY WEAK AND CAN SNAP SUDDENLY PARTICULARLY THE TIMING BELT TENSIONER BOLT. THANK FULLY THE THREAD CAN BE CHANGED. ONLY TIGHTEN THE TENSIONER BOLT TO 52NM. NO MORE / NO LESS. THIS SHOULD PREVENT THE BELT SLIPPING UNLESS OF COURSE THE TENSIONER FAILS.
NOTE- IF YOUR CAR HAS AIR CON AND THE DONOR ENGINE CAME WITH A CAR WHICH DIDNT THEN YOU HAVE TO CHANGE THE PLATE ON TIMING BELT END OF THE ENGINE WHICH THE ALTERNATOR ATTACHES. IT IS SECURED BY 3 X 15MM BOLTS AND 2 X 13MM BOLTS. YOU ALSO NEED TO TRANSFER A COUPLE OF PULLEYS AND YOUR AUTOMATIC TENSIONER PULLEY FROM YOUR OLD ENGINE.
ALSO , THE PLATE WHICH THE AIR CON PUMP MOUNTS ON WILL NEED TRANSFERRED OVER. IT IS ATTACHED WITH 5 X 15MM BOLTS. MAKE SURE YOUR CLEAN THE THREAD HOLES WHERE YOU ARE TRANSFERRING PARTS OVER IF THE DONOR ENGINE IS NON AIR CON AND YOURS IS AS THEY WILL BE FULL OF THE BEST PART OF 10 YEARS WORTH OF RUST / CRAP ETC AND WITH THE SOFT FIAT BOLTS ANY EXCUSE TO SNAP WHEN BEING TIGHTENED.
THE OIL FILTER IS ALSO EASILY CHANGED OFF THE CAR.
REFFITING THE ENGINE IS THE REVERSE ORDER OF REMOVAL ENSURING ALL CABLING IS BACK IN ORIGINAL ROUTING TO PREVENT CHAFING / BURNING ETC.
REPLACING ALL AIR / WATER / FUEL HOSE CLIPS WITH JUBILEE CLIPS OR SIMILAR.
ANY BOLTS WHICH HAD THREAD LOCK ON THEM, ENSURE YOU REPLACE THIS WITH SAME WHEN PUTTING BACK.
WHEN REFILLING THE COOLANT ENSURE THE BLEED SCREW I MENTIONED EARLIER BELOW THE FUEL FILTER IS OPEN TO HELD EXPELL AIR THEN CLOSED AFTERWARDS, OF COURSE.
ENSURE THE BATTERY IS NOT CONNECTED UNTIL ALL ELECTRICAL CONNECTIONS ARE MADE TO PREVENT THE ECU LOGGING FAULT CODES. IT IS COMMON FOR AN AIRBAG WARNING LIGHT TO STAY ON AFTER ENGINE SWAP BUT THIS CAN BE CLEARED BY THE USE OF A ODB2 CABLE, A LAPTOP AND A COPY OF FIAT ECUSCAN SOFTWARE.
ON FIRST STARTING, RUN THE ENGINE WITH THE EXPANSION CAP OFF UNTIL THE THERMOSTAT OPENS AND FILLS THE RADIATOR. THE COOLANT MAY DROP A BIT SO TOP UP AS IT FALLS .
REMEMBER THE PHOTOS YOU SHOULD HAVE TAKEN WILL HELP WITH EVERYTHING HOPEFULLY
ALL ABOVE IS FROM MEMORY SO IF I HAVE MISSED ANYTHING I WILL AMMEND. PLEASE LET ME KNOW IF ANYONE WOULD LIKE ME TO EXPAND ON ANYTHING.
I DID TAKE SOME PHOTOS FOR MY OWN BENEFIT BUT WISH I HAD NOW TAKEN MORE AS I DID NOT PLAN ON WRITING A GUIDE. I CAN TRY USE SOME OF THE PHOTOS OR EVEN TAKE SOME FROM MY COMPLETED CAR JUST TO POINT THINGS OUT IF REQUESTED.
CHEERS
EDD