If your door mirror has been twisted forward and appears to have broken off, then do not despair, it may go back together, with a bit of effort. Have a look through the photos in this guide, to see whether yours is broken or just come apart with no damage to the components.
By far the biggest part of this job is in making a special tool to apply pressure to the spring, whilst manoeuvring the parts back into position. The difficulty rating is more for the tool than the mirror removal, repair and refitting. If you are in the Cardiff area, I can loan you the tool I made.
If replacing the mirror assembly (rather than repairing), then follow steps 1-9, 26-33.
This guide was compiled when repairing the passenger side mirror on a 2012 Lounge TA, with electrically adjustable and heated mirrors and the outside temperature sensor.
I was greeted by this yesterday:
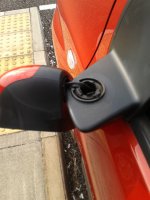

- Tilt mirror forward (so it reflects sky, or would if it wasn't hanging off), whilst still electrically connected.
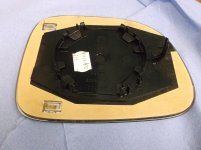
- Prise glass up along the bottom edge, to unclip it from the motor mechanism. I used a spatula to spread the force, as suggested by someone on another thread. Take care because it could crack.
- Unclip the two heated mirror contacts at the terminals on the glass.
- Prise off trim panel off inside of door, with the door open. It’s held on by three spring clips.
- Remove the four screws (8mm socket) holding the assembly to the door – take care not to drop any behind the door card (like I did :bang
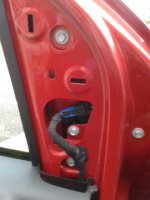
- Unclip the electrical connector. The mating connector is clipped into the metalwork, and can be pulled out to make it more accessible. To separate the connector, there is a locking clip which needs to be released by squeezing.
- Remove the assembly from door.
Disassembly
- Remove the four (cross-head) screws securing the motor mechanism to the housing.
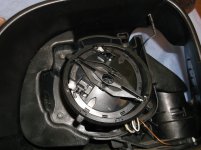
- Use long-nosed pliers to ease the cover off the housing, moving from clip to clip. There are five clips.
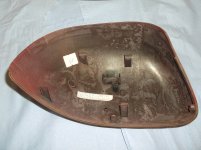
- Unclip the small plastic access cover on the bottom of the mirror housing.
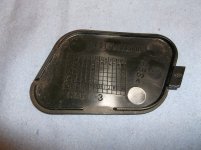
- Pull the electrical cable through the bracket, by reaching into the access hole, bringing the piece of foam with it. The mirror housing is no longer attached to the bracket.
- Pull the electrical cable through the metal tube, bring the foam with it. The metal tube and spring are now loose.
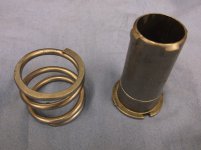
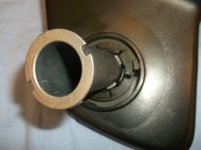
- Try fitting the tube, without the spring, into the bracket, to see how it should lock in place (and to check that the parts are not damaged).
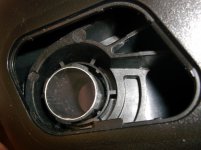
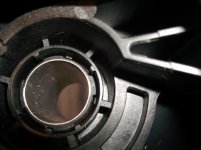
Assembly Tool
- The end of the tube has a lip with two cut-outs on opposing sides. The tool has to lock into these cut-outs, so that when the spring is compressed and the tube pushed through the holes in the mirror housing and bracket, then the assembly can be rotated so that the tube locks in place when pressure is released. (I think that understanding this needs reference to the photos).
- I used a length of M16 threaded stud, two M16 nuts, an M16 washer and a home-made locking plate. The threaded stud has to be long enough for the assembly to be pressed against it when held by the vice (i.e. 15cm or longer).
View attachment 143322
- I hacksawed and filed a piece of aluminium box section to create the locking plate.
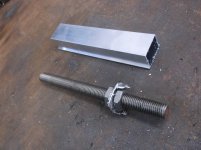
- Assemble the tool, and tighten the nuts.
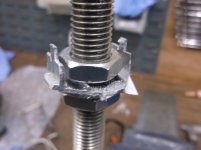
Assembly
- Clamp the tool upright in a vice.
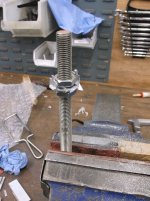
- Fit the tube onto the tool, so that the prongs on the tool fit into the cut-outs on the tube.
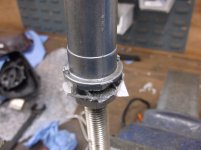
- Slide the spring over the tube.
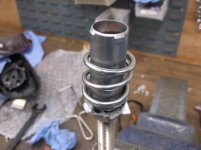
- Fit the mirror housing onto the tool, then line up the bracket on top of it. Make sure that the orientation of the mirror relative to the bracket is correct. Press down on the bracket and housing so that the tube protrudes through the bracket enough to rotate the assembly, so that the tube locks in place when pressure is released.
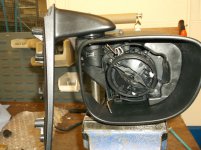
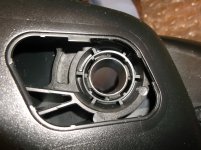
- Remove assembly from tool and check that the mirror folds and the assembly is securely held together.
- Feed the electrical cable back through the tube, refitting the foam in the middle of the tube.
- Feed the electrical cable back through the bracket, again refitting the foam where it came from.
- Refit the plastic access cap into the underside of the bracket.
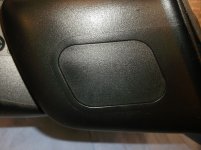
- Refit the cover onto the housing. (I refitted the glass first, but I think it would have been better to fit the cover first, so that the clips are visible whilst fitting.)
- Screw the motor mechanism to the housing, using the four screws removed earlier. Take care that the temperature sensor is correctly positioned, so that the nipple protrudes through the hole in the underside of the housing.
- Re-attach the heated mirror contacts onto the terminals on the glass.
- Clip the mirror back in place. This is a lot easier than unclipping it, with less risk of breaking the glass.
Re-fitting to Car
- Fit mirror assembly in place on the door, with the electrical cable through the hole in the door frame.
- Clip the electrical connectors together, and fasten the mated connectors in place, using the clip to the door frame.
- Screw the four screws in, to secure the assembly to the door.
- Re-fit the trim panel to the inside of the door, making sure the clips are pressed fully home.
- Enjoy the £150+ which you've just saved.

