The other guide got closed because I didnt attach the images... silly me :bang:
Here is attempt no. 2... and I'll admit it looks better this way!
----------------------------------------------------------------
So last night my dash looked like this:
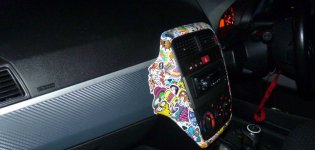
After about a week I was sick of the sticker bombs!
I had originally left it on when doing this, which proved to be really awkward and annoying so I decided to take it off to carbon fibre wrap it.. which turned out like this:
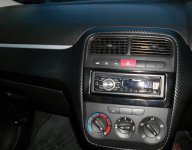
A couple of guys wanted me to make a guide so here it is . I hadn't taken any photos of me removing it originally so I went and did it again (which is why the photos are off me removing the carbon wrapped dash).
-------------------------Guide Starts Here---------------------------
So the tools you will need...
1. a torx screwdriver/or bit (I believe its T25 needed)
2. a flat screwdriver or some sort of wedge thing
the screwdriver bit...
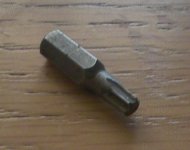
I used a socket instead of a screwdriver to hold the bit because some of the screws were awkward to get at so this gave me a better angle.
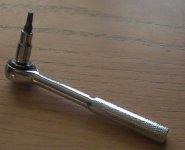
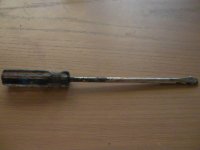
And then a big flat head screwdriver...
First thing you will need to do is remove the bit surrounding your speed dials.
This has 4 of these torx head screws - 2 in the top corners and 2 at the bottom behind the leather bit on the back of your steering wheel.
Shown below:
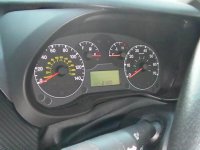
The top screws... one on each side
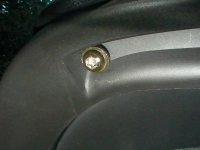
And the bottom screws... again one on each side (I had already taken this out before photo)
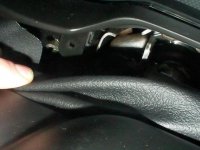
First part is now done!
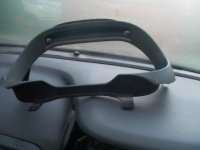
Second thing I did was remove the small part of the dash on the right side of the steering wheel
Grab it from behind (if you can) or use the screwdriver to wedge it off. It is held on with plastic clips or welds so you will need to break these but dont worry it will go back on with no problems!
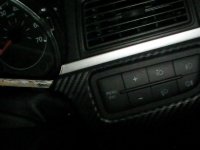
my advice is to take the silver strip off first in case it breaks - this is really easy to do, just gently pull it from either end of it until it pops off.
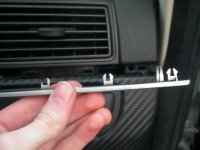
So when you have pulled this off you will see the controls are connected - now I didn't know how to remove this and didn't really want to pull at it too much.
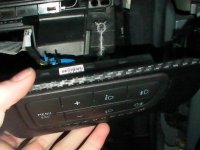
So I pushed it out of the dash (towards myself) then you really have to fiddle around to get it through the hole in order to remove the dash bit.
I didn't think it would fit but it does so you don't need to worry about disconnecting it or anything.
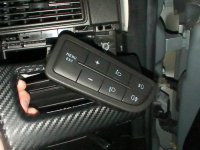
Once you have that bit pulled off it is then time to start on the main part.
first things first... remove the CD player and fascia (if its an after market CD player)
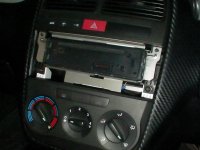
Next remove the dials for the hot/cold air - simply by lifting up the small black clips then gently pulling it off.
I did break a couple of these clips, it works fine but be careful!
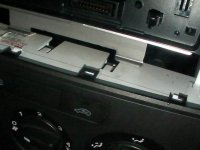
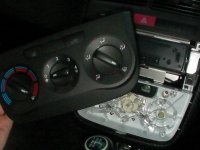
So now that's out its time to start the slightly more tricky bit - it is only tricky because you have to be gentle but apply a good bit of force at the same time.
I think the best way to approach this is by starting on the right hand side and working your way along the bottom to the far left using a screwdriver to wedge underneath and break the plastic welds (or clips/whatever they are).
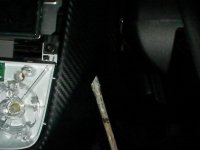
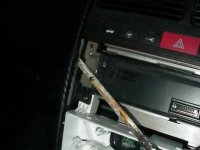
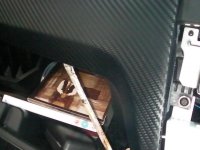
Once you have levered the dash off enough you should be able to reach behind it and give it more of a pull
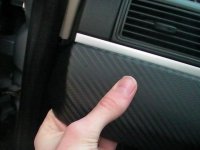
Be especially careful around these parts as they are thin and easily broken!
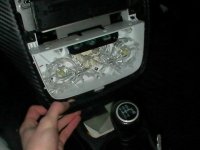
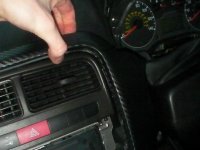
So you now have your dash off!
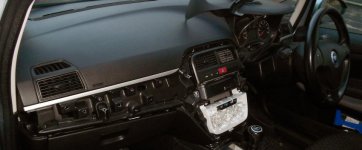
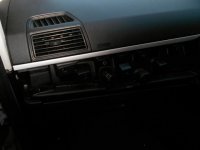
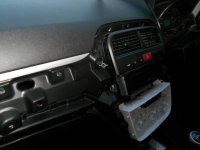
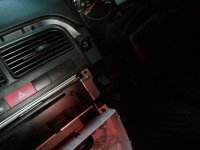
Getting the dash back in again!
so you have broken the plastic welds when taking your dash off... don't worry it will clip back in again just apply some force and it will stay on with no need to glue or anything!
And the end result?
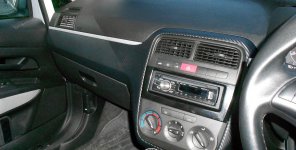
---------------------------------------------------
So maybe you fear taking it off in case you break it?
well I did break mine
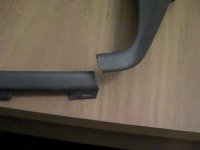
But a bit of glue...
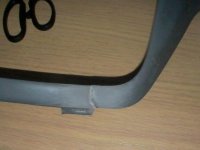
and with the vinyl over it you can't even tell!
I am no expert with vinyl or any of this I just thought I'd give it a go and it was well worth it
any questions feel free to ask me! and if you'd like to see more of my car or some of the pictures of me actually vinyl wrapping the dash (page 4) just visit my thread:
https://www.fiatforum.com/members-motors/291241-grey-grande-punto-coilovers.html
Here is attempt no. 2... and I'll admit it looks better this way!
----------------------------------------------------------------
So last night my dash looked like this:

After about a week I was sick of the sticker bombs!
I had originally left it on when doing this, which proved to be really awkward and annoying so I decided to take it off to carbon fibre wrap it.. which turned out like this:

A couple of guys wanted me to make a guide so here it is
-------------------------Guide Starts Here---------------------------
So the tools you will need...
1. a torx screwdriver/or bit (I believe its T25 needed)
2. a flat screwdriver or some sort of wedge thing
the screwdriver bit...

I used a socket instead of a screwdriver to hold the bit because some of the screws were awkward to get at so this gave me a better angle.

And then a big flat head screwdriver...

First thing you will need to do is remove the bit surrounding your speed dials.
This has 4 of these torx head screws - 2 in the top corners and 2 at the bottom behind the leather bit on the back of your steering wheel.
Shown below:

The top screws... one on each side

And the bottom screws... again one on each side (I had already taken this out before photo)

First part is now done!

Second thing I did was remove the small part of the dash on the right side of the steering wheel
Grab it from behind (if you can) or use the screwdriver to wedge it off. It is held on with plastic clips or welds so you will need to break these but dont worry it will go back on with no problems!

my advice is to take the silver strip off first in case it breaks - this is really easy to do, just gently pull it from either end of it until it pops off.

So when you have pulled this off you will see the controls are connected - now I didn't know how to remove this and didn't really want to pull at it too much.

So I pushed it out of the dash (towards myself) then you really have to fiddle around to get it through the hole in order to remove the dash bit.
I didn't think it would fit but it does so you don't need to worry about disconnecting it or anything.

Once you have that bit pulled off it is then time to start on the main part.
first things first... remove the CD player and fascia (if its an after market CD player)

Next remove the dials for the hot/cold air - simply by lifting up the small black clips then gently pulling it off.
I did break a couple of these clips, it works fine but be careful!


So now that's out its time to start the slightly more tricky bit - it is only tricky because you have to be gentle but apply a good bit of force at the same time.
I think the best way to approach this is by starting on the right hand side and working your way along the bottom to the far left using a screwdriver to wedge underneath and break the plastic welds (or clips/whatever they are).


Once you have levered the dash off enough you should be able to reach behind it and give it more of a pull

Be especially careful around these parts as they are thin and easily broken!


So you now have your dash off!


Getting the dash back in again!
so you have broken the plastic welds when taking your dash off... don't worry it will clip back in again just apply some force and it will stay on with no need to glue or anything!
And the end result?

---------------------------------------------------
So maybe you fear taking it off in case you break it?
well I did break mine

But a bit of glue...

and with the vinyl over it you can't even tell!
I am no expert with vinyl or any of this I just thought I'd give it a go and it was well worth it
any questions feel free to ask me! and if you'd like to see more of my car or some of the pictures of me actually vinyl wrapping the dash (page 4) just visit my thread:
https://www.fiatforum.com/members-motors/291241-grey-grande-punto-coilovers.html

