Preparation of the New Engine
Now you'll need to prepare the new engine for fitting. Assuming you're only starting with the 1242 block, and you've already checked the head and block for warping/scratches/damage, and had them skimmed if needed:
Fitting the Clutch
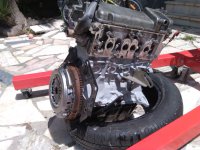
- Fit the flywheel you got from the Punto engine (or other). Torque the bolts correctly.
- Fit the clutch to the flywheel. Center it properly (a centering tool will help or you can do it by eye). Torque the bolts correctly.
- At this point, also fit the collector pipe to the water pump.
Fitting the Gearbox
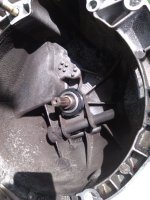
- Renew the clutch release bearing (it will clip into place only in two positions)
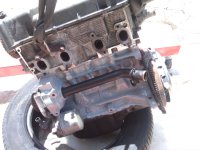
- Place the upper dustguard behind the flywheel. It will be kept in place by two dowel pins on the sides of the block.
- With the engine supported on the hoist, mate the gearbox with the engine. Keep the two large bolts on the front and backside of the block at hand, they're useful so the gearbox doesn't back out of the engine. Fit them as soon as you got it to mate well. Torque accordingly.
- Fit the lower dustguard. Bolt on the dustguard to the gearbox.
- Fit the upper bracket to the two upper bolts, and torque them accordingly.
Fitting the Head
- Make sure the block and head surfaces are perfectly clean. Use some brake cleaner on them.
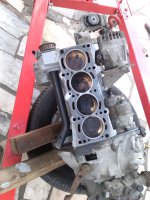
- Note the two dowel pins that you've saved earlier. Fit them to the block.
- Place the new head gasket on the block. One of the sides will read "Top" on the gasket itself. This side should be up, and facing the rear of the block.
- Place the head over the gasket gently, making sure it mates to the two dowel pins.
- Apply some copper grease to the head bolts, and torque them into place. Follow torquing instructions that come with the gasket.
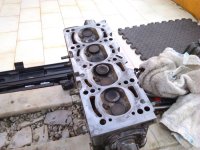
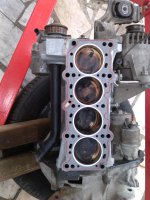
If using a P60 head and P866 cam
After fitting the head, if using the P60 head and if you have the P866 cam, now is the time to replace the cam:
- Remove the camshaft bearing bolts by undoing two bolts in each one. Mind the original place of these bolts.
- Gently remove the camshaft oil feed pipe.
- Remove the camshaft.
- Remove the shims from the lifters. Replace them with the ones where the P866 cam came from, in the same order they were in the donor engine.
- Fit the P866 cam and bearings. Check for clearance and replace the shims if needed. Then finally fit the oil feed pipe and torque all the bolts accordingly.
Notes on using the P75 head:
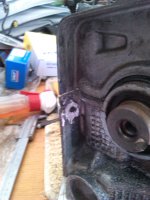
- You'll need to perform some work on the head for it to clear the timing nubs on the cam pulley (see photo below).
- If using the P75 head, you'll need to mount the cam pulley. Use an old belt, or a screwdriver through the pulley holes to lock it in place, and torque it accordingly.
- Despite sharing the bolt pattern, this head will NOT seal against the SMPI manifold. It's best to use the original Sei one. This can be fixed by fitting a P75 manifold gasket between the SMPI manifold and the head, however, since there is basically no mating surface in some points, it is a bodge.
Timing Belt Fitment Procedure:
I'm pretty sure you've read this on the forum countless times, but I'll explain how to set the timing properly.
- Open the small window covered by a rubber on the gearbox bellhousing. You should see some teeth and a scale.
- Using a 13 size wrench, turn the crankshaft clockwise until a notch on the flywheel lines up with the 0º tooth.
- Turn the camshaft clockwise until the notch on the cam pulley lines up with the notch on the back of the head.
- Place the timing belt tensioner in place, do not tighten it yet.
- Place the belt around the pulleys, making sure it's properly stretched on the side that goes through the water pump. Do NOT turn the pulleys.
- Use pliers to apply tension and tighten the timing belt tensioner.
- Turn the crankshaft around 720 degrees (two turns) clockwise. Undo the tensioner, apply tension and tighten it again.
- Test for the correct tension by twisting the belt between the cam pulley and water pump. It should twist around 90 degrees by hand, no more and no less.
- Align the notch on the flywheel with the 0º mark again. Make sure that after doing this, the camshaft pulley is also aligned.
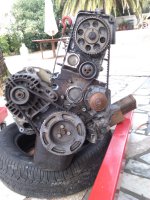
There. Now your engine is timed.
Refit the accessories:
- Refit the timing belt covers.
- Refit the crankshaft harmonic damper / timing pulley (you can use the Sei one, it's lighter, same timing spec and sizing, no harmonic damper).
- Refit the alternator and belt. Test for correct tension using the 90 degree technique. Tighten alternator bolts.
- Refit the engine mount. Torque bolts accordingly. The manual is missing torque specs for the smaller nut, and notes that the bigger ones are torqued to 51Nm. I used 30Nm for the smaller one.
- Refit the Starter Motor.
- If you're doing the C526 to C514 gearbox swap, you'll need to crush and remove the dowel pin from the middle bolt hole on the starter motor. Fit this motor to the C514 gearbox using only the two outmost bolts. Ideally, you should get a proper fitting one from a Punto or so. I reused mine. See photos below:
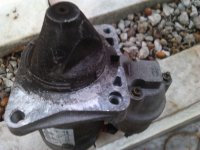
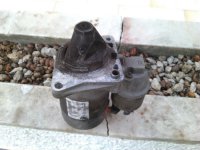
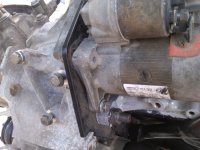
Finally, at this point, your engine should be all set and ready to go. If you haven't already, now is the time to renew the thermostat, and the spark plugs. It's a breeze with the engine out of the car, although you can do these later.

