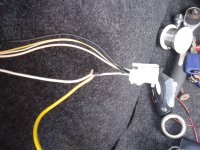
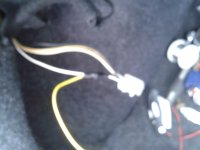
Time to Start Splicing and Wiring
Since we are going to be soldering bare wires, pop the bonnet and disconnect the battery negative terminal, last thing you want is a spark and potential fire risk
Remember which wire is which? Yes? Good
So take the wiring loom for the reversing kit and locate the 2 thin wires for power
Red = Positive - Attaches to the Reverse light
Black = Negative - Attaches to an earth
I pulled the connector inside the car - it just feeds back in without a hitch. Removed the plastic coated furry insulation to expose as much wire as possible
So carefully with some wire cutters - break the insulation down enough. You do not want to cut the wires.
make the 2 cuts about 7 to 10mm apart
Then with a very sharp knife run a line down between the 2 cuts
Allowing the copper wire to be exposed
Simply then strip about 15 to 20mm of the red positive wire and wrap this around the cars wiring loom
Using a soldering iron and solder - ensure the 2 wires are soldered nicely together.
Once Soldered, Wrap the join in electrical tape as tightly as you can.
Don't go mad, just cover it up nice and tight


You may now ask - why is mine yellow?
because i'm wired in a quick release connector instead, so should i wish to disconnect the kit - i can without leaving bare wires
Now depending what you do depends where you put the negative wire. If you are doing this on the cheap, repeat the step for the positive wire, except join the 2 black wires together
I didn't join mine to this wire. Why? Because i attached mine to the earthing point in the boot, which the black wire joins anyway. using a ring terminal simply crimp the wire to it - undo the nut and pop the ring terminal on and tighten.
The earthing point is in the bottom corner where you are working you cant miss it to be honest.
Push the wiring back into the protective sleeves so it looks a factory fresh look / professional look.
So the Unit Now has power!

