1st!!
Remove the shaft from the car using a haynes manual for guidance, remember that the gearbox oil will leak when you do this, and DO NOT let the shaft hang down on it's own, you may well damage the CV joints and Boots.
There are many ways to check driveshaft wear without dismantling it, however I always choose to see it with my own two eyes. Also, once dismantled, you can replace parts if necessary.
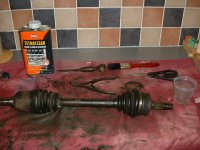
To do this I used:
Place the driveshaft ready on a protective sheet! Make sure all your tools are to hand, and prepare to get messy!
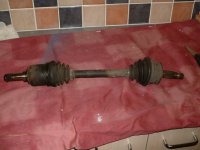
You'll need to remove the metal retaining clip from the large end of the CV boot. Be careful not to damage the rubber whilst doing this if you intend to keep the boot! (The boot may be secured using a cable tie, if this is the case, just snip it off!)
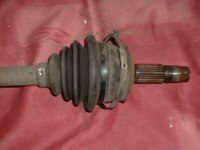
Repeat this process for the other 3 securing bands, and slide the boots towards the middle of the shaft.
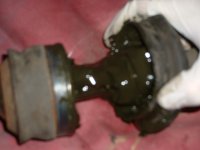
On the outer edge of the shaft (The threaded end) the Constant Velocity joint is of a ball and cage type, the inner is tripod type (see pic).
The inner end of the shaft should just slide off of the tripod. Store this to one side for a minute.
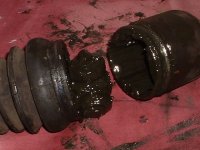
Next, you will need to find the circlip in the the cage.
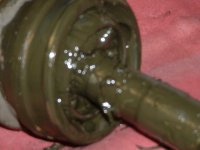
Shaft already removed to show the circlip on this one!
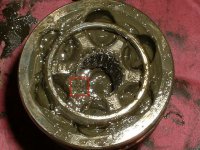
Mark the alignment of the shaft onto the cage (for re-assmbly), then open the circlip* and pull the driveshaft out of the cage. The circlip remains in positon. Pour gunk into the end of the driveshaft and soak for 5 mins, then empy and rinse, giving a good wipe out. (* Circlips are a pain and easily slip... BE CAREFUL! I used a screwdriver to help prise it open!)
Insert a screwdriver in where the drive shaft was, and move the cage around. There will be some resistance, but any really bad sticking points, or "Floating" metal, indicate excessive wear, and you will need to replace the shaft end, likewise a really sloppy cage with excess play may also need replacing as the bearings are probably over worn.
Returning to the tripod, clean the end using degreasant, and undo the circlip at the end and pull the tripod off of the shaft...
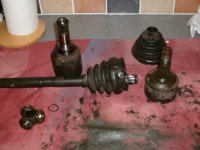
NOTE:before removing, mark the the alignment on the shaft using tip-ex or something similar! The tripod may be stuck quite tightly and may have to be pulled off using an extractor/puller. (DO NOT PULL ON THE ROLLER BEARINGS!)
Using Gunk/tetra, clean away as much of the grease as you can from the tripod. (I soaked mine in a container!)
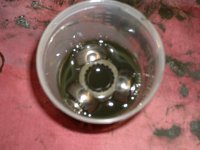
Using a brush to get into the bearings.
Once clean..
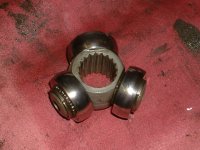
Spin the rollerbearings and feel for any grinding, also check for any obvious signs of wear (scratches etc...), replace the tripod if necessary.
Clean out the tripod cavity (end of the shaft) and also check for signs of damage/wear.
Once you are 100% sure all is ok, you can start to re-assemble, in reverse order. Ensuring both boots & cavity are tightly packed with grease and all alignment marks as correct.
Clean up and you're done!
With mine, it was simply that there was not enough grease in the cage, and it was sticking, so after a good clean, it has freed up nicely. Apparently, this is quite common with driveshafts with ball and cage, and is usually the best thing to attempt, in order to rectify any problems.
Note: Any suspected worn parts should be replaced... FIAT can usually get these in a day or two!!
Have fun, and remember, it's best to source a spare shaft from a scrappy so you still have use of the car if needed!
Oh and don't forget: Use a new hubnut when re-fitting the shaft to the car!
Happy motoring!!
Remove the shaft from the car using a haynes manual for guidance, remember that the gearbox oil will leak when you do this, and DO NOT let the shaft hang down on it's own, you may well damage the CV joints and Boots.
There are many ways to check driveshaft wear without dismantling it, however I always choose to see it with my own two eyes. Also, once dismantled, you can replace parts if necessary.
To do this I used:
- A spare driveshaft (so i can still use the car!!)
- Flat Headed Screw driver, about 5mm in width
- Scissors
- Circlip Pliers
- Engine Degreasant (Gunk/Tetro)
- Paint Brush
- Lots of space
- Plastic Container
- Plenty of patience
- Protective sheeting
- Paper towel/rags
Place the driveshaft ready on a protective sheet! Make sure all your tools are to hand, and prepare to get messy!

You'll need to remove the metal retaining clip from the large end of the CV boot. Be careful not to damage the rubber whilst doing this if you intend to keep the boot! (The boot may be secured using a cable tie, if this is the case, just snip it off!)

Repeat this process for the other 3 securing bands, and slide the boots towards the middle of the shaft.

On the outer edge of the shaft (The threaded end) the Constant Velocity joint is of a ball and cage type, the inner is tripod type (see pic).
The inner end of the shaft should just slide off of the tripod. Store this to one side for a minute.

Next, you will need to find the circlip in the the cage.

Shaft already removed to show the circlip on this one!

Mark the alignment of the shaft onto the cage (for re-assmbly), then open the circlip* and pull the driveshaft out of the cage. The circlip remains in positon. Pour gunk into the end of the driveshaft and soak for 5 mins, then empy and rinse, giving a good wipe out. (* Circlips are a pain and easily slip... BE CAREFUL! I used a screwdriver to help prise it open!)
Insert a screwdriver in where the drive shaft was, and move the cage around. There will be some resistance, but any really bad sticking points, or "Floating" metal, indicate excessive wear, and you will need to replace the shaft end, likewise a really sloppy cage with excess play may also need replacing as the bearings are probably over worn.
Returning to the tripod, clean the end using degreasant, and undo the circlip at the end and pull the tripod off of the shaft...

NOTE:before removing, mark the the alignment on the shaft using tip-ex or something similar! The tripod may be stuck quite tightly and may have to be pulled off using an extractor/puller. (DO NOT PULL ON THE ROLLER BEARINGS!)
Using Gunk/tetra, clean away as much of the grease as you can from the tripod. (I soaked mine in a container!)

Using a brush to get into the bearings.
Once clean..

Spin the rollerbearings and feel for any grinding, also check for any obvious signs of wear (scratches etc...), replace the tripod if necessary.
Clean out the tripod cavity (end of the shaft) and also check for signs of damage/wear.
Once you are 100% sure all is ok, you can start to re-assemble, in reverse order. Ensuring both boots & cavity are tightly packed with grease and all alignment marks as correct.

Clean up and you're done!
With mine, it was simply that there was not enough grease in the cage, and it was sticking, so after a good clean, it has freed up nicely. Apparently, this is quite common with driveshafts with ball and cage, and is usually the best thing to attempt, in order to rectify any problems.
Note: Any suspected worn parts should be replaced... FIAT can usually get these in a day or two!!
Have fun, and remember, it's best to source a spare shaft from a scrappy so you still have use of the car if needed!
Oh and don't forget: Use a new hubnut when re-fitting the shaft to the car!
Happy motoring!!

