Head-gasket job is not that hard, just messy and tedious. Not "rocket science".
Old "FIRE" family engines (most were "non-interference") are perfect "lab rats".
This Guide is based on my experimental repair (it was training, exercise).
Car will be (actually it is now) "totaled" (body rotten away, beyond repair).
Difficulty level is definitely NOT the 5/5 (this would be full engine reconditioning, pistons, crank shaft bearings and so on). I rate this 4/5. It is for folks with previous experience in similar repairs/servicing. You must be familiar with: timing belt job, valve clearance adjustment, valve stem seals replacement - will be NO guidance on those topics.
Car: Punto 55 S (1,1 8V engine), year 1994, "mileage" > 260000 km.
Age and mileage are not the only causes of head gasket failure. Other factors:
-> heater matrix leak and air in the cooling system, ignored for years,
-> flushing cooling system with tap water,
-> flushing system with aggressive descaling liquids (acids, alkalises),
-> adding water (deionised - but that will not help much) to the system,
-> excessive use of fuel additives, some from unknown sources,
-> faulty hot air intake thermostat (it will speed up gasket degrading process),
-> worn valve stem seals, increased oil consumption, carbon residue on valves,
-> thermostat failure, stuck in the closed position, most important factor,
-> spark plugs and leads not changed on time + dirty clogged fuel filter + leaky exhaust system = improper combustion.
0. Failure was developing for about 2-3 years. First it was small white smoke, only occasionally and very gently. So it was ignored. Then constantly, especially in winter time (OK, most cars will produce some vapour in such conditions, but when your car is making the biggest cloud, you have a problem). Last year it was overheating in traffic, sometimes (warning light). Last 3-6 months there was also exhaust gases and/or gasoline (petrol) smell in the coolant, plus oil started to mix in ("brown cream" in the radiator).
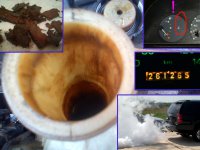
1. Fiat ditched this in later models. Good choice. It was always faulty. It is NOT the main cause, but will help to kill the gasket when failure has started. Do not ignore this mechanism. Repair this or plug it (block hot air permanently).
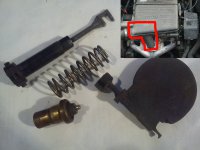
2. Pop the air filter box, camshaft ("rocker") cover, drain the coolant, and drop the manifolds (support the exhaust one to prevent flex joint breakage, put some brick, wooden block, etc.).
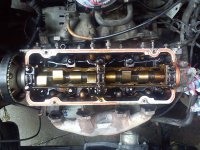
3. Drop timing belt, remove camshaft, shims and bucket tappets. Keep workplace "lean" ("5S").
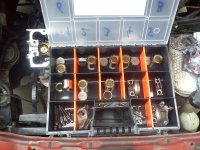
4. Camshaft uninstalled. Consider shaft seal replacement.
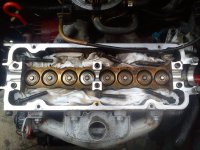
5. Undo head-gasket bolts (13 mm hex). Gently loose all bolts a bit. Then more and more, in small steps. And in sequence (reversed tightening order). Otherwise you can contribute to the head out-of-flat condition. One bolt is corroded (means there is a problem).
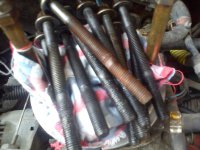
6. Engine block with head-gasket. What a mess...
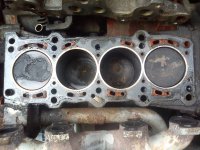
7. Engine head. A lot of residue and oil (fresh and burned).
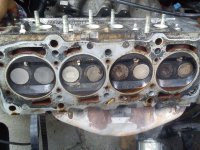
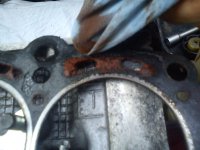
8. "Shot" head gasket. Worst around cylinders 1 and 4.
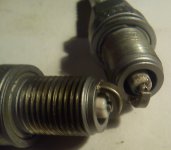
Spark plugs suffered too. One has broken, fractured ceramic, other glazed (melted). Damage popped out only after fine sand blasting ("glass beading").
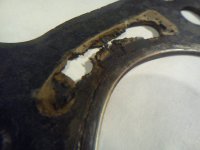
9. Junk head gasket, close-up.
10. Next remove the valves. To release locks, make a DIY tool or buy one, whatever. If they (locks, retainers, whatever you call it in English) are resisting (when you just push slowly), gently tap, shock them (impact), and remove with magnet (in theory bad thing, engine parts should not be magnetised).
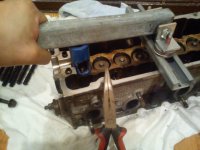
11. Valve stem tip unlocked. Do the next one.
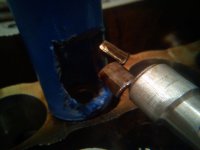
12. Engine head without valves.
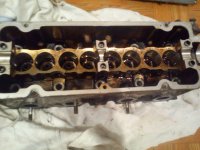
13. Keep parts in order, track where they belong (cylinder number, intake, or exhaust).
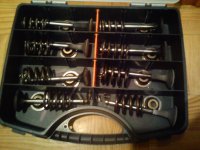
14. Remove thermostat. Inspect, check it. Note that thermostat bolt holes are crossing the head gasket bolt holes (so thermostat can leak coolant on the 2 head bolts). If it's a coolant, then OK, but if you experimenting with some chemicals (descaling), they can attack the bolts, weaken them.
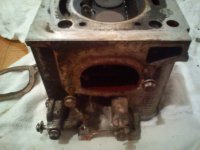
15. Old faulty thermostat (seized in closed position).
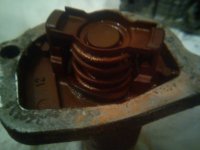
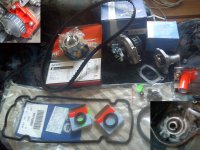
16. By the way. Check this out. Two thermostats. Can you spot the difference? One is a bad design, prone to leak (close to one of the holes, there's a thin wall, too thin).
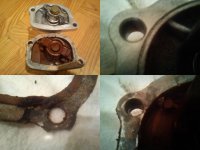
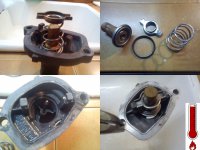
17. Note, you can disassemble thermostat and clean it, check operation (in boiling water). Sometimes they "seize", and after cleaning can be fully operational again. So in emergency situation you can try to revive it. Normally don't bother, buy a new one.
18. Scrape old gasket remainings from engine block and the head. Gently, don't cut metal.
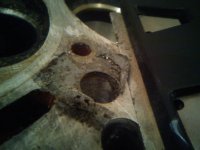
19. Clean the head. Carefully, with brushes, hand and/or rotary. Don't cut (round, "roll") sharp edges (like combustion chamber edges, valve seats, spark plug hole threads, oil and coolant holes). Mechanical and chemical cleaning is preferred, limit use of abrasives!
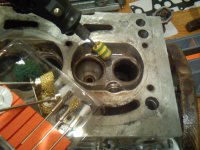
20. Clean the valves. In my case, none of the chemical solvents worked (brake cleaner, paint thinner, kerosene, paint remover). Alkalines or acids did worked. For example rust remover (phosphoric acid based). Avoid mechanical, more precisely speaking, abrasive cleaning. Because, this is NOT a "cleaning", it is a GRINDING (you are removing good material and spoiling valves geometry, shape, size). Most folks don't get it (they think it's a innocent "cleaning", and can do no harm - WRONG!).
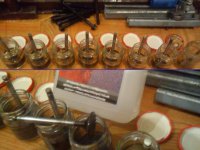
21. Clean the head, very good. Mind the valve seats and guides, corrosion.
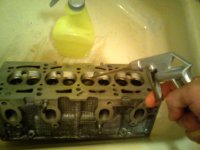
22. If you are not equipped to do this, outsource the job (engine shop). I will do flatness check and resurfacing myself, DIY style. Granite surface plate "blueing" (prussian blue).
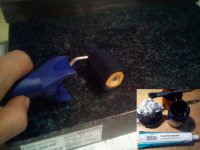
23. Engine head fits the smallest plates, like 400x250 mm.
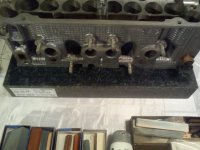
24. Gasket is not covering entire surface, there are regions "hanging in the air" (both ends, lengthwise). Such areas can be machined away if they obstruct the flatness "reading".
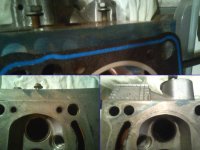
25. Other classic method requires proper straight edge(s). But long ones are not common and not cheap.
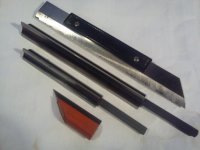
26. Note, that ordinary scales/rulers are NOT straight (if there is literally straight edge or flat surface, it was not intentional, manufacturer was lucky), do not assume they are. But you can modify such tools to serve as a straight edge. If you know how.
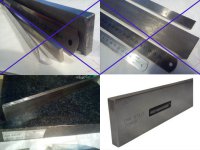
27. To quantify flatness error you need some feeler-gauges or some precise sheet/shim stock.
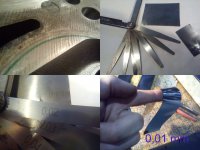
28. Early stage of resurfacing (hand stoning). Specs are confusing, some sources list 0,05 mm, other 0,10 mm flatness. Plus, some of these numbers are head only, other sum of head+block out-of-flat, you add worst numbers. Mine was about 0,05 mm on the block, and about 0,03 mm on the head (yes, head was better than the block). So it's about 0,08 mm total error. Light "skim" must be done (mostly, to clean up around the cooling channels holes).
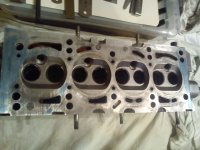
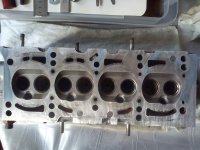
29. There are visible machining marks from previous job (or was this factory cut?). That's not the problem here. There is a "dip" in the surface, right in the middle. It fits machining marks. So what? Probably, machining was far from perfect. Of course, there is some distortion too.
30. Example of resurfacing machine out of adjustment and/or worn. Exaggerated.
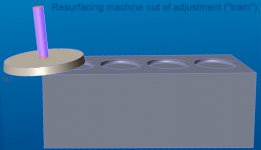
31. Resulting surface will be concave. Something like my engine head. What's the message here? Do NOT (ever) confuse the "look" with geometrical properties. Just because something was machined and looks shiny (or whatever), doesn't guarantee flatness, etc. This is the most common misconception (clueless folks think, that shiny = flat, that's very wrong). Do not trust machines, check, inspect, measure.

32. Resurfacing progress, almost done (about 0,02 mm out of flat).
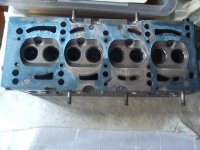
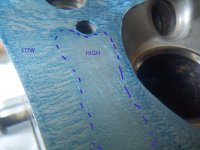
33. You can "read" the surface, where are high and low spots. You knock off the high spots, smooth area, clean, measure/check, and stone again. That's it.
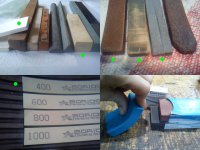
34. If you understand what's going on here, you don't need any Guide. But just to let you know, best stones are die/mould making ("finishing") stones. Other, general purpose/sharpening stones are not recommended.
35. Almost done, about 0,01 mm out-of-flat condition. Good enough for this engine.
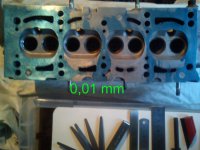
36. Areas not covered with blue, are in contact too, there are tiny traces/whiskers. So it will seal.
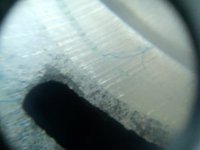
37. Flat, but not pretty (there's no "WOW factor"). It's not a beauty contest.
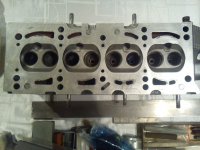
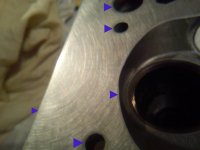
38. Some minor mistakes, classic ones (for a work done by hand). It is easy to round ("roll" off) the edges. This is low power gasoline/petrol engine, so you can get away with it. It will work fine. Note, there is intentionally introduced "texture", surface not too smooth, not too rough.
http://www.fme-cat.com/Docs/1423.pdf
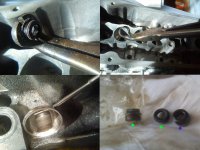
39. Go replace faulty/leaky valve stem seals. You don't need a guidance. Clean the head again.
40. Clean the engine block, flush cooling channels if necessary. Limit use of abrasives. Oil contamination is a number one engine killer. Oil change is obligatory after such job.
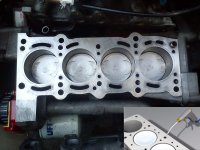
41. Clean the threaded holes. Degrease the block, gasket and head surface.
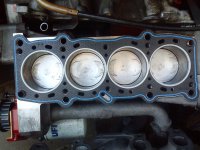
42. Torque and angle specs. Do not "eyeball" the right angle(s). Important.

43. Threaded holes in the block can be cleaned also with "thread chaser" DIY, from old bolt. New bolts should be lubricated lightly, drop of oil on the thread and on (under) the bolt head. Remove excess (paper towel).
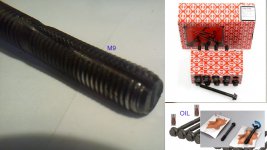
https://www.victorreinz.com/en/service-downloads/practical-information.aspx
44. Go and do the valve clearance check and adjustment if needed. You know how.
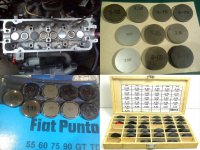
45. Timing belt job, with water pump. Flush the radiator and heater matrix.
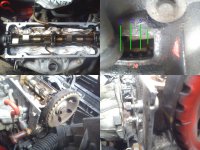
46. You don't need a guide, but quick remainder. Bolt manifolds (with new gaskets).
47. Another quickie. Most valve shims are case hardened, you can grind them just a little bit (not to disturb, distort them), but only one side (that altered side should go into tappet). DIY metallographic examination.
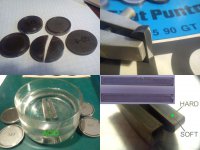
https://www.youtube.com/results?search_query=metallography+macroscopic+techniques
48. Engine started normally (like nothing happened). But that's not all...
There were problems with the valves (I end up replacing all 8). Check Page 2.
If your valves are OK, then Guide ends (should end in most cases) here.
Old "FIRE" family engines (most were "non-interference") are perfect "lab rats".
This Guide is based on my experimental repair (it was training, exercise).
Car will be (actually it is now) "totaled" (body rotten away, beyond repair).
Difficulty level is definitely NOT the 5/5 (this would be full engine reconditioning, pistons, crank shaft bearings and so on). I rate this 4/5. It is for folks with previous experience in similar repairs/servicing. You must be familiar with: timing belt job, valve clearance adjustment, valve stem seals replacement - will be NO guidance on those topics.
Car: Punto 55 S (1,1 8V engine), year 1994, "mileage" > 260000 km.
Age and mileage are not the only causes of head gasket failure. Other factors:
-> heater matrix leak and air in the cooling system, ignored for years,
-> flushing cooling system with tap water,
-> flushing system with aggressive descaling liquids (acids, alkalises),
-> adding water (deionised - but that will not help much) to the system,
-> excessive use of fuel additives, some from unknown sources,
-> faulty hot air intake thermostat (it will speed up gasket degrading process),
-> worn valve stem seals, increased oil consumption, carbon residue on valves,
-> thermostat failure, stuck in the closed position, most important factor,
-> spark plugs and leads not changed on time + dirty clogged fuel filter + leaky exhaust system = improper combustion.
0. Failure was developing for about 2-3 years. First it was small white smoke, only occasionally and very gently. So it was ignored. Then constantly, especially in winter time (OK, most cars will produce some vapour in such conditions, but when your car is making the biggest cloud, you have a problem). Last year it was overheating in traffic, sometimes (warning light). Last 3-6 months there was also exhaust gases and/or gasoline (petrol) smell in the coolant, plus oil started to mix in ("brown cream" in the radiator).

1. Fiat ditched this in later models. Good choice. It was always faulty. It is NOT the main cause, but will help to kill the gasket when failure has started. Do not ignore this mechanism. Repair this or plug it (block hot air permanently).

2. Pop the air filter box, camshaft ("rocker") cover, drain the coolant, and drop the manifolds (support the exhaust one to prevent flex joint breakage, put some brick, wooden block, etc.).

3. Drop timing belt, remove camshaft, shims and bucket tappets. Keep workplace "lean" ("5S").

4. Camshaft uninstalled. Consider shaft seal replacement.

5. Undo head-gasket bolts (13 mm hex). Gently loose all bolts a bit. Then more and more, in small steps. And in sequence (reversed tightening order). Otherwise you can contribute to the head out-of-flat condition. One bolt is corroded (means there is a problem).

6. Engine block with head-gasket. What a mess...

7. Engine head. A lot of residue and oil (fresh and burned).

8. "Shot" head gasket. Worst around cylinders 1 and 4.

Spark plugs suffered too. One has broken, fractured ceramic, other glazed (melted). Damage popped out only after fine sand blasting ("glass beading").

9. Junk head gasket, close-up.

10. Next remove the valves. To release locks, make a DIY tool or buy one, whatever. If they (locks, retainers, whatever you call it in English) are resisting (when you just push slowly), gently tap, shock them (impact), and remove with magnet (in theory bad thing, engine parts should not be magnetised).

11. Valve stem tip unlocked. Do the next one.

12. Engine head without valves.

13. Keep parts in order, track where they belong (cylinder number, intake, or exhaust).

14. Remove thermostat. Inspect, check it. Note that thermostat bolt holes are crossing the head gasket bolt holes (so thermostat can leak coolant on the 2 head bolts). If it's a coolant, then OK, but if you experimenting with some chemicals (descaling), they can attack the bolts, weaken them.

15. Old faulty thermostat (seized in closed position).

16. By the way. Check this out. Two thermostats. Can you spot the difference? One is a bad design, prone to leak (close to one of the holes, there's a thin wall, too thin).

17. Note, you can disassemble thermostat and clean it, check operation (in boiling water). Sometimes they "seize", and after cleaning can be fully operational again. So in emergency situation you can try to revive it. Normally don't bother, buy a new one.

18. Scrape old gasket remainings from engine block and the head. Gently, don't cut metal.

19. Clean the head. Carefully, with brushes, hand and/or rotary. Don't cut (round, "roll") sharp edges (like combustion chamber edges, valve seats, spark plug hole threads, oil and coolant holes). Mechanical and chemical cleaning is preferred, limit use of abrasives!

20. Clean the valves. In my case, none of the chemical solvents worked (brake cleaner, paint thinner, kerosene, paint remover). Alkalines or acids did worked. For example rust remover (phosphoric acid based). Avoid mechanical, more precisely speaking, abrasive cleaning. Because, this is NOT a "cleaning", it is a GRINDING (you are removing good material and spoiling valves geometry, shape, size). Most folks don't get it (they think it's a innocent "cleaning", and can do no harm - WRONG!).

21. Clean the head, very good. Mind the valve seats and guides, corrosion.

22. If you are not equipped to do this, outsource the job (engine shop). I will do flatness check and resurfacing myself, DIY style. Granite surface plate "blueing" (prussian blue).

23. Engine head fits the smallest plates, like 400x250 mm.

24. Gasket is not covering entire surface, there are regions "hanging in the air" (both ends, lengthwise). Such areas can be machined away if they obstruct the flatness "reading".

25. Other classic method requires proper straight edge(s). But long ones are not common and not cheap.

26. Note, that ordinary scales/rulers are NOT straight (if there is literally straight edge or flat surface, it was not intentional, manufacturer was lucky), do not assume they are. But you can modify such tools to serve as a straight edge. If you know how.

27. To quantify flatness error you need some feeler-gauges or some precise sheet/shim stock.

28. Early stage of resurfacing (hand stoning). Specs are confusing, some sources list 0,05 mm, other 0,10 mm flatness. Plus, some of these numbers are head only, other sum of head+block out-of-flat, you add worst numbers. Mine was about 0,05 mm on the block, and about 0,03 mm on the head (yes, head was better than the block). So it's about 0,08 mm total error. Light "skim" must be done (mostly, to clean up around the cooling channels holes).

29. There are visible machining marks from previous job (or was this factory cut?). That's not the problem here. There is a "dip" in the surface, right in the middle. It fits machining marks. So what? Probably, machining was far from perfect. Of course, there is some distortion too.

30. Example of resurfacing machine out of adjustment and/or worn. Exaggerated.

31. Resulting surface will be concave. Something like my engine head. What's the message here? Do NOT (ever) confuse the "look" with geometrical properties. Just because something was machined and looks shiny (or whatever), doesn't guarantee flatness, etc. This is the most common misconception (clueless folks think, that shiny = flat, that's very wrong). Do not trust machines, check, inspect, measure.

32. Resurfacing progress, almost done (about 0,02 mm out of flat).

33. You can "read" the surface, where are high and low spots. You knock off the high spots, smooth area, clean, measure/check, and stone again. That's it.

34. If you understand what's going on here, you don't need any Guide. But just to let you know, best stones are die/mould making ("finishing") stones. Other, general purpose/sharpening stones are not recommended.

35. Almost done, about 0,01 mm out-of-flat condition. Good enough for this engine.

36. Areas not covered with blue, are in contact too, there are tiny traces/whiskers. So it will seal.

37. Flat, but not pretty (there's no "WOW factor"). It's not a beauty contest.

38. Some minor mistakes, classic ones (for a work done by hand). It is easy to round ("roll" off) the edges. This is low power gasoline/petrol engine, so you can get away with it. It will work fine. Note, there is intentionally introduced "texture", surface not too smooth, not too rough.

http://www.fme-cat.com/Docs/1423.pdf
39. Go replace faulty/leaky valve stem seals. You don't need a guidance. Clean the head again.

40. Clean the engine block, flush cooling channels if necessary. Limit use of abrasives. Oil contamination is a number one engine killer. Oil change is obligatory after such job.

41. Clean the threaded holes. Degrease the block, gasket and head surface.

42. Torque and angle specs. Do not "eyeball" the right angle(s). Important.

43. Threaded holes in the block can be cleaned also with "thread chaser" DIY, from old bolt. New bolts should be lubricated lightly, drop of oil on the thread and on (under) the bolt head. Remove excess (paper towel).

https://www.victorreinz.com/en/service-downloads/practical-information.aspx
44. Go and do the valve clearance check and adjustment if needed. You know how.

45. Timing belt job, with water pump. Flush the radiator and heater matrix.

46. You don't need a guide, but quick remainder. Bolt manifolds (with new gaskets).

47. Another quickie. Most valve shims are case hardened, you can grind them just a little bit (not to disturb, distort them), but only one side (that altered side should go into tappet). DIY metallographic examination.

https://www.youtube.com/results?search_query=metallography+macroscopic+techniques
48. Engine started normally (like nothing happened). But that's not all...
There were problems with the valves (I end up replacing all 8). Check Page 2.
If your valves are OK, then Guide ends (should end in most cases) here.

Valves emergency repair.
In reality, there was also valve job performed. Simplified. Remember, repair was experimental, educational. Again - if you are not comfortable, don't have time to fool-around, outsource the job. This is NOT a full guide.
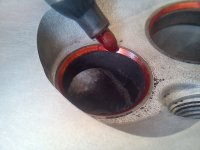
49. Valve seats visual check. Painting with marker. Then quick lap.
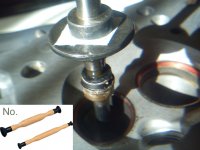
50. Old valves may be rough, so rubber valve tool ("sucker") will not work. Double-sided tape is better. Old valve seals protect the valve guides (against abrasive contamination).
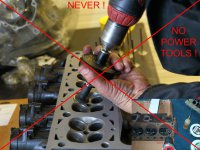
51. Do NOT use power tools, like drills, etc. It can (and it will) spoil geometry.
52. Typical valve grinding compound/paste. Use small amount, clean and "recharge" when needed.
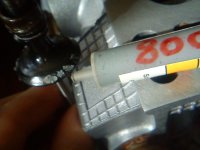
53. Other abrasives can be used too. Like diamond paste.
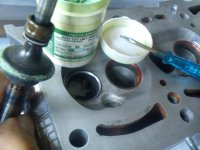
54. Quick lap (the quicker the better) cleaned valve seats. So, seats are OK...
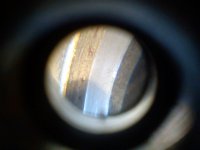
55. Valves (especially exhaust) not so much. Too big/wide contact "ring". Junk.
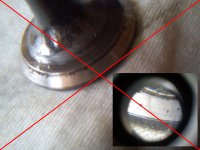
56. Interesting phenomenon. Diamond compounds cut more precisely, preserving geometry (shapes, angles, etc.). Not always, but generally that's the case.
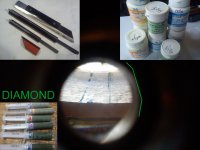
https://www.pistonheads.com/gassing/topic.asp?h=0&f=66&t=980840
57. On the other hand, classic valve compounds can be more tricky to master. There is a tendency to cut concave shape on the seat and valve. Looks like abrasive particles want to group in the middle/centre. That can spoil good valves. That's why "visual check grinding (lapping)" should be quick.
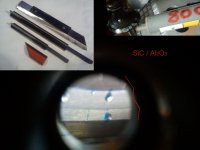
Purpose of the lapping is to quickly check (eyeball) machining work, if it will seal. Lapping itself does NOT produce sealing action in the valves.
58. Surprise. After cleaning and soaking in the kerosene for about 2 days, some valves turned out to be cracked!
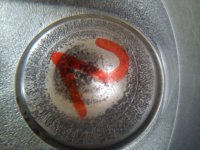
59. Obviously there was an overheating going on (a lot of residue, check picture 7 on the first page), plus some chemical etching (during engine work). Note, that cleaning valves with a drill + some abrasive cloth (or "scotch brite") can hide ("smear") such defects (and spoil geometry). Be careful.
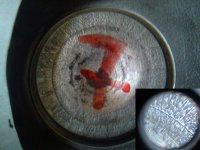
After head gasket and valves replacement there is a "break-in" procedure, kind-of, in practise that means you should ride gently ("eco-driving") for first week or so. Avoid high RPMs. There can be noticeable lack of power first day, don't worry, things will smooth out.
As you can see, it's not That complicated. Just another messy, exhausting (pun intended) job.

