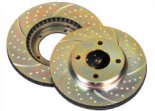
Front brake pads. Removal and refitting.
Tools you will need
Tools you will need
- trolley jack
- 15mm combination spanner
- 13mm socket or combination spanner
- 12mm deep 6 side socket or combination spanner
- file or wire brush
- pair of axle stands
- G-clamp
- High temperature grease or anti-sieze compound.
- Before jacking up your car apply the handbrake firmly and chock the wheels.
- Avoid getting grease on the disc or pad. If you contaminate the disc/pad clean them with brake cleaning fluid.
- Check your brake fluid level. You are going to force the piston back into the caliper. If the fluid level is too high you will spill brake fluid all over the back of your engine.
- Brake dust is nasty stuff. Do not blow it away with compressed air. Brush it off in a well ventilated area.
Removing the brake pads
- Secure the car and raise the jack to take most of the weight of the car. Use the correct jacking points or you risk damaging the underside of your car.
- Loosen the road wheel bolts while there is still enough friction between the wheel and the ground to prevent the wheel spinning.
- Raise the car until you have the wheel clear of the ground. Remove the bolts and then remove the wheel.
- Locate the 13mm bolts at the back of the caliper holder. It may be easier to work on with the steering turned to full lock.
- Using a 15mm spanner to hold the sliding pins still - undo the 13mm bolts using a socket or ring spanner.
- With the two 13mm bolts removed the caliper should be free to pull out from the caliper holder. Make sure to support its weight with string or wire otherwise you risk damaging the brake hose.
- Check the caliper boot, bleed nipple and brake hoses for signs of damage.
- Remove the brake pads by pulling them away from the centre of the disc.
- Cleaning the runners on the caliper holder that the pads slide on with a file and wire brush is a good idea.
- Examine the sliding pins on the caliper holder for movement. In out movement should be smooth with minimal side-side wobble.
- Examine the disc for wear. If possible use a micrometer or estimate from non-worn areas. Replace if below allowed thickness.
Removing and refitting the brake disc
- To remove the disc you first need to remove the caliper holder. This is held by two 17/19mm? bolts on the back. These bolts also hold in the heat shield which unless replaced and painted will probably have crumbled away into nothing apart from a little part around the bolts. I highly reccomend getting replacements and painting them with hammerite.
- Once the bolts are out the caliper holder can be removed from the hub carrier.
- To remove the disc you must remove the two 12mm locating bolts. These can be very difficult to remove. I reccomend using deep 6 sided sockets to avoid rounding of the bolts.
- Once unbolted the disc should come off easy. If required persuade using a mallet.
- With the disc off you can check on the status of your heatshield. The 10mm bolt on the trailing end of the hub carrier holds the heatshield to the hub. Clean up around the hub with a wire brush. Applying a thin layer of anti-sieze paste around here will make changing the disc easier next time.
- Replace the disc. If new make sure it has been thoroughly cleaned with white spirit/brake cleaner to remove the storage grease. spin the disc around on the hub to ensure its flush against the hub.
- Screw in the locating bolts paying attenting to avoiding cross-threading them. Tighten to reasonable tightness.
- Position the caliper holder over the disc. The bolts should go through the hub carrier and the heatshield before threading into the caliper carrier. This can be tricky. These bolts should be rather tight.
Replacing the brake pads
- Slide the pads into position in the hub carrier. If the fabric shims have perished anti-sieze paste can help reduce brake pad squeel. Make sure to only get on the back of the pads.
- Using a G clamp, slowly squeeze the piston back into the caliper until it will fit around the pads.
- Slide the caliper into the caliper holder. Most pads are supplied with new 13mm bolts with threadlock already applied. Replace your old bolts with these new ones. Tighten accordingly.
- Rotate the wheel to ensure there isn't anything catching.
- Replace the road wheel. Hand tighten the road wheel bolts.
- Lower the car and tighten the road wheel bolts properly.
- Repeat for the other side.


