always disconect battery before working on airbag system
SYMPTOMS
Amber Passenger air bag switched off warning light occurring now and again. BEEP AIRBAG FAILURE and finally red air bag warning light coming on whenever someone sits on passenger seat but goes off again when you get off seat.
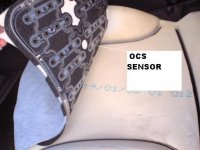
NB If you have intermittent airbag warning light regardless of whether anyone is in passenger seat which disappears if you waggle the wiring under the seats then this cure is not for you
SYMPTOMS
Amber Passenger air bag switched off warning light occurring now and again. BEEP AIRBAG FAILURE and finally red air bag warning light coming on whenever someone sits on passenger seat but goes off again when you get off seat.

NB If you have intermittent airbag warning light regardless of whether anyone is in passenger seat which disappears if you waggle the wiring under the seats then this cure is not for you
THE FAULT
OCS MAT - Occupant Characteristic Sensor in passenger seat – a kind of pressure mat that sits on top of seat foam and under seat cover- senses weight and size of passenger for intelligent deployment of passenger air bag. It’s a pretty sophisticated bit of kit- just look at the electronics
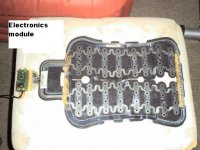
THE REPLACEMENT
The OCS sensor is integral with the seat base cushion so the whole lot is replaced as one although, the OCS is just stuck on the cushion with glue so it’s a bit of a con.
It may be worth testing that this is actually going to cure the fault by placing the new one on top the seat and connect it via the grey connector. Turn the engine on and sit on the seat plus new cushion. No beeps or warning lights now? OK that’s it then- time for action
THE JOB
Choose a place where you can open the passenger door to it’s widest point for access as you’ll want room to move the seat base out the door or (your choice) you could remove the whole seat to a workshop
REMOVING THE SEAT
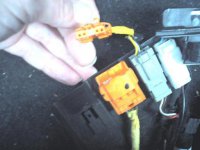
Undo the 3 electrical connectors under the seat front. One orange (side airbag), one white (seat belt on or off sensor) and the OCS sensor one which is grey.
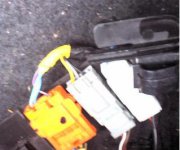
The connectors swing out for easy access on a tray by unfastening a plastic push clip. Move the seat fully forward and undo the two allen key seat rear securing bolts. You’ll need an extension tube for leverage if you’re just using allen keys. Then slide the seat fully back and remove the front two seat mounting allen bolts
You don’t need to remove the seat entirely out from the car, just carefully manoeuvre the seat base so it’s facing out the door.
You only need to move the seat cover back far enough for access to the bottom seat cushion in order to replace it. The cover is held in place by a corded band which is hooked over the seat metal frame in various places around its circumference and by two eye hooks at each end.
To gain access to the hook locations you need to partially release (but not totally remove) the seat plastic side covers. For the door side panel there are two screws at the rear and two at the front of the seat to remove, then you can lever the panel far enough away to gain access to the seat cover hooks
Unclip the two hooks at each end of the seat cover cord with a pair of pliers and working around, unhook the seat cover from the various securing frame hook locations. You’ll need to remove the under seat tray completely for access to the central front hook.
For more access you can release the seat rear cloth flap which is a couple of rubber bands with hooks on the end, attached to the seat base centre.
REMOVING THE UNDERTRAY
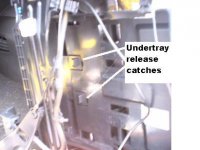
Remove the under tray first by pushing in two securing plastic releases catches shown. Then unscrew the tray slider which is held by 4 screws and remove the under tray carrier from the front. Now you can get at the front seat cover hook and release the front.
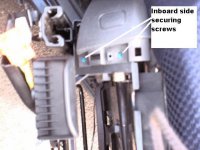
For the inboard side seat plastic cover you only need remove the front two screws, lever the cover out at the front and you’ll have enough access to unclip the inboard seat cover hooks.
Unfasten the OCS sensor wiring clips making a note of the wire routing.
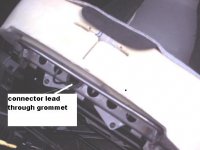
The cushion base is deep slotted underneath and is pushed down over the seat frame securing fins so you need to pull the cushion up to release it, extracting the electrical cable and connector through the seat grommet as you do.
REASSEMBLY
Reassembly is simply the reverse but make sure to secure the wiring to the seat underside using the cable clamps before refitting the seat. The tray is fiddly to refit and you need to depress the front metal clips whilst rocking the tray back in. Refit the tray slider and undertray before refitting the seat is sound advice although you can get it in with the seat in situ
Locate and just loosely fit the seat securing bolts to start with then fully tighten all of them
Reconnect the electrical connectors, turn on engine and test by sitting in the passenger seat. No warnings? Bliss!

