Technical Changing my front struts and links at the moment

Currently reading:
Technical Changing my front struts and links at the moment

torniojaws

New member
Joined
May 4, 2019
Messages
137
Points
40
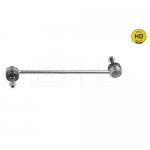
Alright, finally I have all the gear and time to start replacing the front struts and links in my 2008 GP :) It still has the originals!

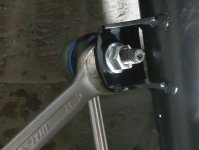
So, my first step was obviously to spray the pinch bolts with some penetrating fluid, in expectance of 11,5 year old nuts being wee tight...

But to my surprise, while my electric impact had some trouble (not really spinning it at all), I was able to get them fully loose without too much effort using a 18 mm socket and a 600 mm / 24 inch breaker bar. I mean, no tighter than any average nut or bolt! Was kind of surprised, but hey, awesome stuff :) Didn't try using the impact at max power though, it was at 2/5 to start carefully and not begin by breaking bolts.

I'm currently letting the penetrating fluid to soak in fully, to the links also, and then will continue.

I already assembled the struts earlier on and that was quite uneventful. I actually did them in my office room(!). Just compressing the spring with two lock-bolted spring compressors and a bit of elbow grease with a heavy ratchet. No real issues beyond beginner unthoughtfulness :p On the first attempt, the end of the compressor went inside the spring seat on the strut, so I had to use a second set to get it out :yuck: Must be due to being tired as it was close to midnight.

So, going to post more later, and I might make a quick amateur video out of the stuff I filmed. Mostly to cover some things that were kind of lost in a couple of professional videos I watched when planning, and also the OE numbers for all the parts, since I built the struts with all-new parts.

Here's by the way the best videos I found for an amateur like me. All of them are missing the OE numbers though, and even some torques :p


Last edited:
Getting there! But not without some adversity :p

While unplugging the wires from the old shock, one of the driver side wires cut in half. ABS, possibly - it only existed on the driver side. It had a plastic loom around it, and the cable itself was a tiny little thing with a small copper wire inside it. But I did cut a bit of the ends off and wrapped them together and checked there was still an electric connection with a multimeter, and then wrapped in inside a strong electric tape covering, and taped the plastic part that attaches to the strut also into the new tape. Should hold - let's see :p

And getting the bottom link bolt out turned out to be a handful! It felt like it didn't have the "inside" slot for a second wrench, but after some digging, I did find it (17 mm!), and got the 16 mm nut out - had to use an impact on the upper one, which was spinning around heavily. But got that also out with a 17 mm spanner on it.

But now I have the new links finger-tight, and the new shock finger tight from the top :) Next up, the pinch bolts and torquing the links.
 
While unplugging the wires from the old shock, one of the driver side wires cut in half. ABS, possibly - it only existed on the driver side. It had a plastic loom around it, and the cable itself was a tiny little thing with a small copper wire inside it. But I did cut a bit of the ends off and wrapped them together and checked there was still an electric connection with a multimeter, and then wrapped in inside a strong electric tape covering, and taped the plastic part that attaches to the strut also into the new tape. Should hold - let's see :p

Sounds like the pad wear indicator wire. There's a picture of it and a description of its function in this thread -

https://www.fiatforum.com/grande-punto/145646-wire-brake-pad-wear-sensor.html
 
Last edited:
Okay, all done and time for a test drive :) I'll edit the video later on, perhaps by next weekend.

The biggest challenge was tightening the lower link to torque. Pretty much impossible - there simply is no room for anything except a spanner, unless you first remove the swaybar itself :p But it tightened it pretty snug by hand and checked that the rubber thingy still looked fine.

The old links were "a bit" worn. I could almost move the ends around just by waving the link around :D So no wonder there was a clunk on bumps.

Also, I had all manner of "technical" tools for tightening the upper strut nut (in the engine bay) to torque. But yeah right. They might work in theory, but in the end I just bolted it in with the impact driver until the first sign of being "too tight". It's not a 2000 Nm impact, so I think it is fairly close to a good enough torque. I tried moving the strut assembly by hand and couldn't move it, and also the disc plate looked tight but not compressed to flat, so I guess it's usable.

Quite a fun little project, especially if it works :) Saved about 600 euros while at it.
 
Seems to be successful. Tried a couple of things like strong braking, bumpy roads, swerving around, and tight turns. Drives like new :) Unfortunately the clunking didn't fully go away, so I guess it must be in the control arm or CV axle. Probably the control arm bushings? But it is much quieter now, and only appears during medium or bigger bumps, unlike before when even a pebble would produce the sound.
 
Your confident the new drop links are nice and tight?...check the anti roll bar bushes..They perish and can allow movement which sound terminal.
 
Your confident the new drop links are nice and tight?...check the anti roll bar bushes..They perish and can allow movement which sound terminal.
Should be. The top parts are tightened to spec (50 Nm) and the hard-to-reach lower parts are firmly tightened to what felt like equal to the 50 Nm top parts and would not budge when I pulled them. The sway bar actually started to move rather than the link.
 
we talking about the same thing?..long bar with two pivoting ends that bolt to suspension leg at one end?..TIGHTENED WITH A 17MM SPANNER HELD STILL VIA A ALLAN KEY?...
 
we talking about the same thing?..long bar with two pivoting ends that bolt to suspension leg at one end?..TIGHTENED WITH A 17MM SPANNER HELD STILL VIA A ALLAN KEY?...
On mine, both the originals and the new ones had a slot for a spanner under the gaiter (rubber part). I attached a picture of what I was refering to :)

So, I held the inside part with a spanner, when I turned the outside nut with a ratchet. And in the lower part that attaches to the antiroll bar, I couldn't use a torque wrench, but tightened it quite well by hand with two spanners (one holding it, the other to tighten the nut). The top one that attaches to the strut, I held with a spanner inside the gaiter, while torquing the nut (facing outwards).

But tight enough that when I moved the link from the middle, it would not move at all. But the antiroll bar (the one that goes through to the other side wheel) started to move. So the link should be quite tight :)

The clunk could be coming from the tie rod, too, I think. They are also quite old. But since it only happens when going over bumps, not when turning, I would think it's more likely to be the control arm mounting.
 

Attachments

  • 183839.jpg
    183839.jpg
    36.9 KB · Views: 23
Last edited:
Yeah, it looks the same. Hmm, I've never seen any warnings or OBD errors from it anyway, so it is possible it has been broken for a long time anyway. The pads are quite old :)

The warning (worn pads) @ OBD would lit if the "sensor" built in the pad gets connected to ground - the disk itself - and will never do if the wire is cut ...

BRs, Bernie

If someone here helped You fix -or better, understand- your issue, hit the thanks icon @ bottom right corner, it's free and makes us feel helpy ;-)
Yup, as Bernie says, the worn pad light works by earthing the live wire to the disc. Must be one of the few, if only, sensors on a car which wont light a warning light if the wire is severed?

PS. Having done our Panda struts/springs/top mounts/etc a couple of years ago I greatly enjoyed reading about your "adventure". I wouldn't worry about that drop link nut too much. If you are competent enough to have done the work you have I would guess you have a good feel for how tight is "tight" and on the likes of a drop link nut - which will be a "nylock" most likely? - the worst that could happen is that it'll work slightly loose and give you a knocking noise. It's not going to drop off in a hurry.
 
Last edited:
Hmm, despite what many places said that you don't need alignment after changing just the struts and links, I think mine does. When going down a straight highway, the steering wheel must be at a fairly big angle to keep going straight. Somewhere around 2 - 3 cm (1 - 1 1/4 inches) off from horizontal.
 
Oh man, did a visual check at the parking garage at work, and when the steering wheel is horizontally level, the left front tire is very visibly toed-out, while the right front is straight. I guess the tie rod got somehow disturbed while changing the struts. Sent some RFQ's for alignment. Hopefully tomorrow I'll get it sorted.
 
How is that possible?
That's what I'm also wondering! :D The only time I was even near them was when tightening the lower nut of the links. But to the naked eye, the tie rods look completely undisturbed. Not even WD-40 splashes on them.

Edit:
Well, after some research, it appears the toe can go off when replacing just the struts, if the ride height changes considerably between the old and new strut assembly. Which I would suspect is true in my case, as I changed almost 12 year old strut assemblies into completely brand new ones (no reused parts). So the car probably rides a little bit higher now, at least until the springs have settled after some time (a couple of weeks?).
 
Last edited:
Back
Top