Technical Timing Belt- Too tight or too loose?

Currently reading:
Technical Timing Belt- Too tight or too loose?

When u say crank pulley do you mean the bigger pulley that drives the Crank and auxiliary belt or the smaller actual crank pulley behind it...

The crank pulley itself, not the phonic-wheel/accessories one.

Are you referring to the tool that is shaped like a magnifying glass

Yes it's that tool

And BTW that pulley doesn't need removal unless you want to do the front seal job aswell...

BRs, Bernie

If someone here helped You fix -or better, understand- your issue, hit the thanks icon @ bottom right corner, it's free and makes us feel helpy ;-)
 
Hey guys. I may not need it but better to be safe than sorry. Does anyone know the Phonic Wheel relearn process is you do NOT have Fiat software. Looking on forum but can only find people mentioning it but not actually how its done. Thanks in advance.
 
1. Take your time and read/watch things carefully and understand them.
You are asking questions already solved here and in the past, in many older forum posts (Search more).
2. Invest in the diagnostic cable, interface if you plan to do DIY maintenance. Nice addition to the toolbox.
3. Phonic wheel learn/reset is done using Fiat specific software (FES, MES, Examiner). Period. No more questions.
https://www.google.com/search?tbm=isch&q=fiat+phonic+wheel+learn
But this function is overrated, it doesn't do that much. Most of the time engines will run fine without doin' it.

Maintenance/repairs should be "mechanically sound", done correct way (hardware is most important).
Software gimmicks are the last thing you should care and use. "Sign of the times": people try to fix purely mechanical faults by messing with software. Don't fall into this trap (you have loose timing belt - why are you focusing on the phonic wheel?).
 
Last edited:
Hey guys. I may not need it but better to be safe than sorry. Does anyone know the Phonic Wheel relearn process is you do NOT have Fiat software. Looking on forum but can only find people mentioning it but not actually how its done. Thanks in advance.

OK, I think I see where you're coming from with this - Your question is "How do I do a Phonic wheel relearn if I don't have MES (or equivalent)"? Yes? I found myself wondering, slightly differently, "Does the ECU need to be reset in some way before performing the relearn"? I think both questions are rooted in the same area.

I've seen posts on the forum where people have been experiencing problems and tried to do the procedure with varying degrees of success. Of course I don't know how closely they've followed the recommendation but there seems to be a common thread, where mentioned, which is that most who have tried it when their MIL was flashing report success whereas those who did not comment about the light already flashing seem to be less successful? My guess, as I've said above, is that the ECU needs to be ready to receive the new parameters and it indicates this by flashing the MIL?

I have MES so I can look at all models in simulation mode. If I go into either of the program for my Panda (or my boy's Punto), select "ENGINE" and highlight the relevant ECU and click "simulate" I can then click on "Adjustments" where I find "Phonic wheel learn reset" with the option to "Execute". On the right side of the screen there is guidance (as there is with most of the procedures) which I'll now write out for you:

Firstly there is a warning that if you initiate this procedure you must follow up by performing the phonic wheel learning procedure - "Your car will beep and blink to warn you this is needed to perform"
It then lists the procedure:
1. Start engine, wait until engine reaches working temperature
2. Rev the engine up to 5000-6000 rpm and let engine restore idle speed. Repeat another 2-3 times.
3. Turn the key off
3. Wait 10 sec and start the engine

I went into one of the 16 valve programs but it didn't list a phonic relearn in it's Adjustments?

This is the procedure which you will see people talking about on our forum. I'm guessing that when you punch the "Execute" command what it's doing is resetting the learned parameters and preparing the ECU to accept the new values it learns by performing the steps 1 to 4 listed above. If this is true then I'm confused as to how people report success by performing the 1 to 4 steps above without any prior intervention? Then again some people do report having no success? But then the people reporting success seem to say they're MIL was flashing before they tried? so maybe the ECU was, in some way I don't understand, already prepared to accept new values?

So, don't know if that's clarified things for you. If you are going to be doing your own maintenance in any depth though, I would just buy a basic version of MES - You really can't go wrong. https://www.multiecuscan.net/ Give the guys at Gendan a ring, say the forum recommended them to you - we are well known to then - and have a chat. https://www.gendan.co.uk/# You'll learn a lot. If you decide to buy I would recommend being careful of some of the cheap options on the likes of eBay - there have been multiple reports of stuff which doesn't work right. I bought from Gendan and they were very helpful when my "stupid" elderly brain couldn't get itself around the likes of COM Ports and speeds etc.

PS. Having said all that, I didn't need to perform a relearn on either of our cars! So don't get too hung up about it. you may well find you don't need to do it.
Regards
Jock
 
Last edited:
1. Take your time and read/watch things carefully and understand them.
You are asking questions already solved here and in the past, in many older forum posts (Search more).
2. Invest in the diagnostic cable, interface if you plan to do DIY maintenance. Nice addition to the toolbox.
3. Phonic wheel learn/reset is done using Fiat specific software (FES, MES, Examiner). Period. No more questions.
https://www.google.com/search?tbm=isch&q=fiat+phonic+wheel+learn
But this function is overrated, it doesn't do that much. Most of the time engines will run fine without doin' it.

Maintenance/repairs should be "mechanically sound", done correct way (hardware is most important).
Software gimmicks are the last thing you should care and use. "Sign of the times": people try to fix purely mechanical faults by messing with software. Don't fall into this trap (you have loose timing belt - why are you focusing on the phonic wheel?).
Hey GP. Thanks for the info but let's tone it down a bit. Everything you suggested I have done. Search more. I typed in what I was looking for and 5 threads top to bottom looking for the answer. Don't know about u but I don't work hard I work smart. I'm trying to have a thread for myself / others that covers all aspects of this job
Better to have and not need 8t then need it and not have it. I am under no mind that a loose.timing belt is cured by a Phonic relearn. But upon my reading it seems having a timing belt change can cause things to wrong and this relearn is something mentioned a few times. I don't understand everything behind it just what I read. So apologies if you have been urked by question. I like to have everything I need to know about a job b4 doing it in the worse case event. I believe im in that group of people if something could go wrong it will with me. So fail to prepare , then prepare to fail.
 
There are no mention of phonic wheel relearn in eLearn's timing belt procedure for the 16Vs ... And as Jock said, there is no "reset" feature for it in MES.

BRs, Bernie

If someone here helped You fix -or better, understand- your issue, hit the thanks icon @ bottom right corner, it's free and makes us feel helpy ;-)
 
Hey guys.

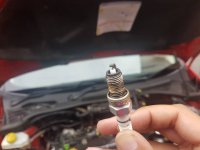
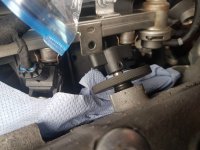
So Ive started on my timing belt job today. Only minor beginnings due to waiting on tools. I've stripped down the top engine bay to give me as much working and removed plugs and coils. I did notice that on my spark plug threads was some wetness / Oil. Cylinder one was the worst as it had.some oil residue in the spark.plug well. See pics + video. Is this anything I should be concerned about / looking t0 fix whilst this are disassembled?

Video: [ame]https://youtu.be/zWjFb_sOLAs[/ame] 20191022_114234.jpeg20191022_114100.jpeg
 
Just been reading everson's post and looking carefully at the pics. I may be wrong, but I don't think the questions being asked are about combustion diagnostics G.P.PL? - Examples of which you've kindly guided him (her?) to. No. I think he's much more concerned about the oil on that No1 plug threads/body?

I think he means there was oil in the spark plug recess before he pulled the plug and that the other plugs show lesser signs of the same problem?

OK, first off, from the limited look I can get at the "business end" of all four plugs they look pretty good in terms of combustion so the oil is almost certainly an external problem (ie not originating in the cylinders).

The No1 cylinder is right next to the oil filler hole. So I just wonder if someone has, perhaps when doing a service so the coils might have been out for plug access, spilt a little oil down that plug recess whilst filling with oil? Probably more likely though is that the cam cover (us "oldies" might call it a rocker cover) gasket is leaking around the plug recess. It can't be much of a leak yet though so I would be tempted to give it a good clean up, pop the plug back in and run it for a while. Then pull the coil pack and have another look to see if it is leaking. My youngest boy's Astra has a very similar design and it leaked oil, very slowly, into the plug recess. I cleaned it up for him at least 3 times in about 9 months before eventually removing the cover and fitting a new gasket. An added complication with the Astra is that it has a plastic cam cover which is known to warp when old. Thank goodness that was not the problem in his case as it at least quadruples the cost!

As regards the "dirty" plug threads. How tight were the plugs to remove? I've seen carbon deposits "creep" up the threads like this because the plugs were not correctly tightened and the crush washers not compressed enough to effect a proper seal so the products of combustion manage to "squirm" up the threads. Having said that, your threads don't look all that bad so I think you just need to take care to tighten the properly when you reinstall them/fit new ones.

Here's some useful info from a couple of the worlds biggest plug manufacturers:

https://www.championautoparts.com/Technical/Tech-Tips/Spark-Plug-Torque-Recommendations.html

http://www.ngk-sparkplugs.jp/english/techinfo/qa/q18/index.html

This last one is not, I know, involving a Fiat. But it's quite a good example of a DIY spark plug change. This chap is showing doing it with and without a torque wrench. At the end of the day - if you have plugs with crush washers - then what you are trying to achieve is a good crushing of the washer as you tighten it up. When you get used to doing it you can "feel" the washer crushing as you tighten it: First off snug the new plug (or the old one with a new washer fitted) down against it's seat. You'll feel it resisting turning at this point, but if you continue to apply moderate force you'll find it continues to screw in until (as the video shows) somewhere around 2/3 (two thirds) of a rev further it will strongly resist turning. That's the washer running out of "crush" and that's where you want to be. If you're inexperienced and don't yet have the "Magic Mechanic's fingers" I suggest using a torque wrench because if you go too tight and damage the threads it all gets nasty and expensive! Taper seat plugs - which don't use washers - are a bit of a different kettle of fish but, if you're interested, they are covered in the charts above. Don't think Fiat are so into taper seat plugs?
Anyway here's the video:


This chap starts "mucking about" with the spark gap. By all means check it with a specialized tool like his or just a simple set of feeler gauges but I must say it's been some years now since I've found a plug that wasn't pre-gapped correctly - you'll notice they now put a little, but robust, cardboard tube over the threaded end to protect it. I would tend to leave it alone unless it's obviously way out because the last thing you want to do is weaken that side electrode and maybe have it fall off later inside the cylinder! By the way, NEVER fiddle with the centre electrode. You can't adjust it in any way and risk damage to either it or the ceramic surrounding it.

Enjoy and good luck
Jock
 
Last edited:
Hey guys
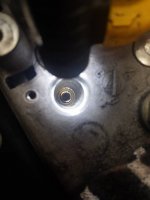
So currently timing my up my camshaft. I have put the tool in and it slid in nicely. But the hat of the tool does not sit flush on the engine block. It is pretty tight so don't believe it it's just turn it some more. Can anyone confirm if this is normal or should it be flush to the engine? Thanks 20191024_132806.jpeg
 
I must start by saying this particular 16 valve engine is not one I'm particularly familiar with but having said that, have you got the crank locked up or are you doing it with the rods down the plug holes? Whatever I'd be giving the crankshaft a wee "tweek" back and/or forward - so "rocking" the cams - to see if that tool will go further in. Once it's properly seated than gently bring the crank back to position but don't force it if it doesn't quite want to line up as you can reposition it once the belt is off. getting the cams locked so the valve springs don't cause rotation when the belt is slackened is the name of the game.

Because the crank/cam relationship is 2:1 I've often found (on different engines) that if you go for lining up the crankshaft first you will find the cam/s are just very slightly out. Line up the cam first then take a look at the crank position and you'll often find the marks are within a smidgeon of being correct. I've come to the conclusion that this is due to wear/settling of the belt and components over time. When the belt was fitted new the marks were lining up perfectly but now, maybe 5 years and 50,000 miles or so later on they will be just slightly out.

It's interesting to know that most engine ECUs can "learn" these anomalies (it's called adaptive learning) and in fact this is why, if you have an engine which requires it, the Phonic Wheel Relearn may be necessary.
Hey Jock.

Well my story gets a little worst for for wear. So in regards to timing I was using everything. Rotating the crank and watching the piston rods align, then using the cam timing tool in the back if engine. Originally the cam locking tool was going in nut the threads were not so you could not screw it down at all. I then did as u suggested and rocked it back and forth a bit and.managed to get the tool to bite, but it screw down all the way (previous picture) . Then whilst u was waiting for responses I thought I would test the crank locking tool. And all was fine but on the fine bolt that goes in place where the lower tim8ng belt cover screws in. The BOLT HEAD SHEARD OFF [emoji29][emoji29]. I used the bolts in the kit which seem to be much softer than the actual timing belt cover bolt (hindsight). So I just downed tools. As I'm a little stuck, as not sure if my overall timing is out from what I discovered before I even started. See video as it explains my plight: [ame]https://youtu.be/0YN2SYnHSvw[/ame]20191024_142435.jpeg
 
Hi Everson,

first of all I'm surprised you did not remove the front engine mount... Are you willing to replace the timing belt or not ?
Secondly, the set tools are intended to SET the various part positions, so IF the shafts were offset (for any reason), the tools would NOT FIT with the belt installed.
If we're starting from a running engine (not kaputt), the first thing is to align the CAMshaft "finding/locking" tool (because of the 2:1 ratio), then after loosening the camshaft coupling, adjust the CRANKshaft so the cran pulley locking tool can be fitted, this is when both piston's position rods are at same level. At this ONLY moment, the engine is timed, remove the old belt and tensionner, fit the new ones according to procedure, and once the job is done (2 engine turns, recheck, blablabla) BOTH tools should fit perfectly @ setup position (4 pistons @ same level) ...

BRs, Bernie

If someone here helped You fix -or better, understand- your issue, hit the thanks icon @ bottom right corner, it's free and makes us feel helpy ;-)
Hey Berne.

Thanks for response. In response to your questions.

- Yes I am happy to replace the belt, the issue was when I started the job I knew I wasn't going to get it finished b4 sun down. Meaning my car would of been on driveway being supported by a trolley jack over night on a driveway (possible vandals).

To understand my trail of thought this is my main problem. When piston rods are 'perfectly aligned' the Cam locking tool is slightly out and vice versa (keep that in back if mind)

- You mention about the cam shaft coupling. Not too sure if it referring to the 1.4 8v models where the cam pulley has a Torx bolt screw head that u need to take out but mine is the tjet. But I believe I get your theory. So correct me if wrong but here how my head is thinking / theory

1) Rotate crank pulley and get CAM locking tool in place. Whilst leaving crank pulley 180 degrees 'approximately' from RPM sensor to have it relatively in place/ time.


2)Then remove the tensioner and remove old timing belt

3) With belt and tensioner off. Then I can set the crank timing separately using piston piston rods and perfectly align them and then finallly locking it in place with the crank locking tool.

Is there anything wrong with this theory.i.e setting the timing for Cam and crank separately without the aid of the timing belt?
 
Hey Jock.

Well my story gets a little worst for for wear. So in regards to timing I was using everything. Rotating the crank and watching the piston rods align, then using the cam timing tool in the back if engine. Originally the cam locking tool was going in nut the threads were not so you could not screw it down at all. I then did as u suggested and rocked it back and forth a bit and.managed to get the tool to bite, but it screw down all the way (previous picture) . Then whilst u was waiting for responses I thought I would test the crank locking tool. And all was fine but on the fine bolt that goes in place where the lower tim8ng belt cover screws in. The BOLT HEAD SHEARD OFF [emoji29][emoji29]. I used the bolts in the kit which seem to be much softer than the actual timing belt cover bolt (hindsight). So I just downed tools. As I'm a little stuck, as not sure if my overall timing is out from what I discovered before I even started. See video as it explains my plight: https://youtu.be/0YN2SYnHSvwView attachment 204033
everson, My heart bleeds for you! you just seem to be having the most rotten luck!

OK. As regards that snapped off bolt (actually, if you want to be pedantic, it's a set screw - set screws are threaded all the way down, bolts are only threaded part way). It only needs to be installed finger tight as it's not holding the crank locking tool in place just preventing the crank from rotating. You can slip the tool back over it and put the 3 sprocket bolts back in to hold it and that will be OK. Hopefully it'll come out with a mole grip, or similar, when you've finished. I am wondering if you snapped it because it was too long for the hole and bottomed out before the head pinched up the tool? Perhaps you then kept on tightening it and it snapped? It's only a small diameter so would probably snap quite easily, especially if it wasn't a "proper" 8.8 high tensile steel. - I just popped into my workshop and checked out my "Neilsen" set for the 8 valve engines and they are all 8.8 however I bought a nice big box of assorted nuts bolts and washers in Lidls a wee while ago and they were all 4.8's, I'm using them for general work , certainly they won't be getting anywhere near the likes of suspension or engine components!

Now, what to do about lining things up? Well, with your spark plug rods level, your pistons are all half way up/down the bores (and the crank locking tool is further confirmation) so they've got a long way to go before those pistons can get anywhere near a valve. Your first priority is to get the cam locking tool properly engaged with the cam. You can wiggle the crank back and forwards quite a bit either side of your present position without any problem. If I were you I'd extract that bit of broken set screw and leave the crank locking tool installed on the crank because you can use it to "rock" the crank back and forwards - and therefore the cams - until you are sure that cam locking tool is fully engaged. You need to lock the cam because it could move under the influence of the valve springs when you slacken the belt. The same is not true of the crankshaft, it's not just going to start moving all on it's own. You've got all the spark plugs out so the crank is only going to turn if you turn it. From what you're telling us it's looking like once you've got the cam locked up you're going to find that the crank is slightly out of position and you may not be able to get the crank locking tool's little set screw to screw into it's hole (that's the one that has the broken bit in it just now) Don't worry about it. just carry on and slacken the tensioner and remove the old belt. Yes, I know, gets a bit scary if you've never done it before and are worried about the timing being correct but you've already got the cam locked and all you've got to do to bring the crank into "synch", after you've removed the belt, is to turn it very slightly 'till that wee set screw can be screwed into the hole on the front of the engine. In fact it can be handy to back the crank up for a half tooth or so when fitting the new belt if you're finding it difficult to get the belt over the sprockets. The really important thing is that once you've got the new belt on and tensioner set up and with the camshaft tool locking up the camshaft, then the crank tool, and/or the rods which go in the spark plug holes, should also be correctly positioned. (the rods and the crank holding tool are really doing the same job but in a different way so you don't really need both) When you've completely finished and all the locking tools/rods etc are removed, remember to very slowly and carefully turn the crank through at least 2 complete revs by hand (socket on crank sprocket nut) before using the starter just in case you've got it wrong and a piston tries to get "intimate" with a valve. If you feel resistance STOP! If your belt is correctly tensioned and the cam and crank locking tools line up then it has to be correct but still turn it over for those couple of revs "just to be sure" - I always do and I've lost count of how many belts I've done in my working life.

Was that helpful? I've just reread it and I hope it's not too confusing? Please do come back with any further questions. Please also be very sure of what you're doing because the result of getting this wrong can be very expensive. I have to say also that I'm giving this advice in all good faith but as I can't be there to monitor what you're doing, or clarify something which you've interpreted wrongly, then the outcome is on your own head. Sorry for that last bit, but I'm feeling just a bit anxious and worried about you having sheared off that set screw. Maybe it was just a weak/defective fixing though? Anyway, good luck!

Kind regards and work safe,
Jock
Well, I had to slip out and collect Mrs Jock and her friend from the theatre half way through composing my last "epistle". Bernie beat me to the punch - and I'm pleased to see we are both giving you the same advice but he has stated it much more concisely than I managed!
 
- install Cam tool: camshaft is aligned
- install crank tool: pistons are @ mid stroke travel
- loose cam pulley: so it's freed, to accomodate existing angular error
- install new belt & tensionner: straigth side of the belt opposite to tensionner !
- tight cam pulley: so it won't move anymore
- remove tools, hand rotate engine two turns: this "sits" the belt on the pulleys
- reinstall BOTH locking tools: they MUST fit TOGETHER, adjust camshaft pulley if needed.

Just to add some verbose: when the engine is in "timing" position:

- cylinder #1 is in expansion stroke, both valves closed
- cylinder #3 is in compression stroke, both valves closed
- cylinder #4 is in intake stroke, inlet valve fully opened
- cylinder #2 is in exhaust stroke, exhaust valve fully opened

Or the same but 180, 360 or 540° @ crankshaft shifted. Anyway there will ALWAYS be two valves at max opening !

BRs, Bernie

If someone here helped You fix -or better, understand- your issue, hit the thanks icon @ bottom right corner, it's free and makes us feel helpy ;-)
 
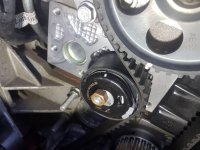
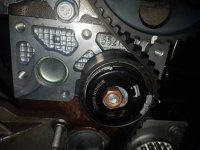
Hey guys.

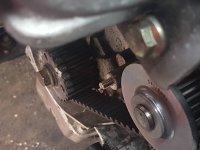
So just working away at the timing belt job. Thought I would share how the belt is currently tensioned. Seems as if it has not been tensioned properly . Also a bit of learning I'm trying to figure out on how they timed up my engine originally. So if anyone has any theories see video:

[ame]https://youtu.be/k77InVzaF7M[/ame]20191027_120153.jpeg20191027_120237.jpeg
 
Hey guys.

So just working away at the timing belt job. Thought I would share how the belt is currently tensioned. Seems as if it has not been tensioned properly . Also a bit of learning I'm trying to figure out on how they timed up my engine originally. So if anyone has any theories see video:

https://youtu.be/k77InVzaF7MView attachment 204084View attachment 204085

1. The tensioner is not tensioned. It should be aligned with the slot when stationary


2. Those DIY timing marks will only line up once for many rotations of the engine - assuming they were used to time the engine last time.
 
1. The tensioner is not tensioned. It should be aligned with the slot when stationary


2. Those DIY timing marks will only line up once for many rotations of the engine - assuming they were used to time the engine last time.

Teahthats what i tought.good job i decide to get in here and have a look. currently at fitting a new belt stage. further updates to come
 
Back
Top