General Eleganza Heater not blowing.

Currently reading:
General Eleganza Heater not blowing.

Optikal

New member
Joined
Mar 4, 2018
Messages
34
Points
12
Hi again.

I've already searched this forum, checked Google and Youtube but most only deal with the dial controls and mine has dual climate control. The other Eleganza threads don't have a definite solution.

My heater is doing the usual blowing at lowest power, occasionally blowing at full power but struggling.

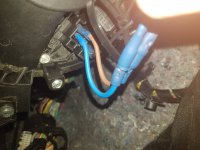
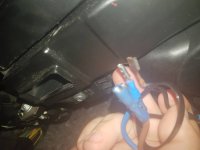
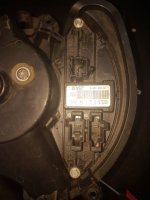
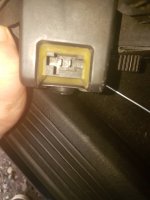
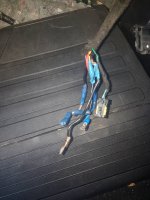
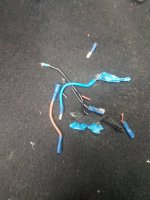
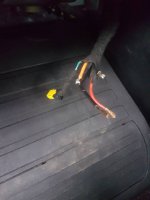
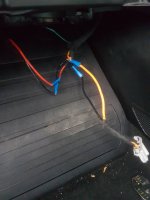
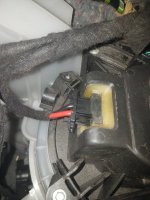
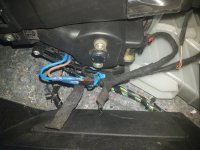
Anyways, I know the Eleganza doesn't have the resistor in other models but I thought to check the wiring anyway. The below images are what I found. It looks to be a pretty rubbish botch job.
20180320_124349.jpeg
20180320_124132.jpeg
20180320_124422.jpeg

My question is, are the 'repaired' wires the ones that control the blower? I've tried to remove the clips to check the wiring better but nothing seems work in pulling them apart. Any tips or advice on making it good?

Any assistance is greatly appreciated.
 
Turns out that there are no clips, just these four wires pushed straight in...

20180320_130811.jpeg
 
There are six wires total that come in and out of the blower controler:

- two that bring 12V from fuse box/ground (heavy gage)
- two that feed the blower, the one that have been repaired, originally red and black, heavy gage aswell
- two that bring the info from the climate control to the blower controler, probably thinner

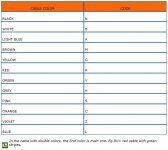
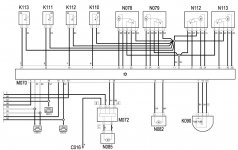
Here's the diagram where climate control is M070, blower controler is M072 and blower motor is N085 ...

BRs, Bernie

If someone here helped You fix -or better, understand- your issue, hit the thanks icon @ bottom right corner, it's free and makes us feel helpy ;-)
 

Attachments

  • Wires color codes.JPG
    Wires color codes.JPG
    49.8 KB · Views: 58
  • Heater wiring Auto AC.JPG
    Heater wiring Auto AC.JPG
    109.4 KB · Views: 61
Thanks for the assistance Bernie.

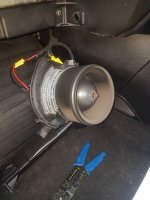
On further inspection I managed to remove the motor and have a better look. Turns out that it had been removed before and was only held in by the Torx screw for the duct and a single 5.5mm bolt. The other two had snapped off and brought part of the white casing with one of the bolts.

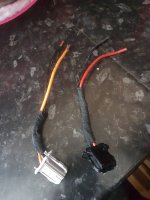
Having gotten the motor out if the car I can see that there are 4 ports, totalling 8 wires. One at the back for the black and red plug previously pictured. A smaller black and yellow plug with blue and green wires, which according to the diagram above is the connection to the climate control.

And two further ports, one for what was originally a red and black and the other an orange and black connection.

20180320_153758.jpeg
20180320_153812.jpeg

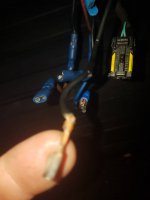
However, my wires have been absolutely botched and the red/black and orange/black were connected directly to the pins.

All four of these are in a poor state of repair, with an original red wire looking burnt before it was hacked and spliced and one other looking charred or rusted in particular.

20180320_154140.jpeg
20180320_154129.jpeg

All of the pins on the motor look fine.

So my next step is to try and locate some plugs to refit the wiring to a better standard, or to find an auto electrician to do the job.
 
It's a bit confusing that M072 and M085 share the same location ! That's why you see 4 ports and a total of 8 wires.

I'd recommend to REPLACE the red and black that connect the controler to the motor (the hacked ones), using crimp lugs as for the repair.
The other 'power' wires seem ok so doesn't need replacement, maybe just replacing the lugs with new ones and re-crimp.
The two smaller blueish are just for the command, Nothing to do here.
Before reassembly, clean the terminals at the ports (wire brush / paper nails-file).
Make sure the connectors are well crimped and tight on the terminals and everything sould be fine ...

BRs, Bernie

If someone here helped You fix -or better, understand- your issue, hit the thanks icon @ bottom right corner, it's free and makes us feel helpy ;-)
 
I've managed to source some clean replacement plugs from an identical model via a breaker on Ebay. Just awaiting delivery and should be good for next week. My only other head scratcher is how to best secure the unit into the car seeing as it's only held in with one screw at the moment.
 
Isn't there (maybe they're gone) any kind of plastic guide / slide or click-in stuff to hold the unit so the screw would just be there to secure it ??

BRs, Bernie
 
Hmmm not sure. To be honest working upside down in such a tight dark space causes enough issues.

Time for an update!

So my new plugs came in the post looking lovely and clean

20180329_143139.jpeg

So I got to work getting rid of the old bodge job.

20180329_171053.jpeg

And stripping back some clean wiring.

20180329_171100.jpeg

And made four tidy connections.

20180329_172946.jpeg

All fits nice and snuggly.

Finally I turn the car on, turn the blower on and....

Nothing.

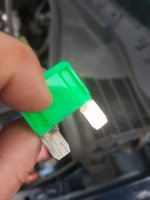
I am thinking that either the motor has blown or the fuse has gone. An online diagram told me that the 30amp big green fuse is the blower motor so I inspected it and it looks like this

20180329_174154.jpeg

Kinda scorched but I don't know how to tell if the fuse is blown or not by visual inspection. I'll probably just source a new one and then if that doesn't work try and find a blower.
 
Final update! It's fixed!

I decided to re-do the butt connectors with a larger size as I wasn't entirely happy. In doing so I also decided to remove the motor from the car again and see if I can re-seat it correctly.

Whilst it was out I noticed that it had been catching on ths white plastic housing so that was lucky! Also whilst I had it out I hooked it up to the improved wiring and turned it on.

20180330_162922.jpeg

Spinning like brand new! Now just to get it back in and sit it right. I managed to get a longer screw into the rear hole and secure it nice and snugly.

Wires tucked away neatly

20180330_164610.jpeg

I just had the glove box to put back on.

Job done!!

Thank you Bernie for your help. I feel like I've finally been introduced to my new car noe that I've completed my first repair! Hopefully this thread will be of use to someone else in the future.
 
Joined in March and already (well)made a tuto !!

Maybe a modo can verify this but I guess you established a new record.
BTW, congratulation for your approach of the job, documentation, method, patience, and right Tools: your experience will certainly be usefull for other Forumers ;-)

Kind regards, Bernie.
 
Back
Top