Technical Clogged drain / how to clean

Currently reading:
Technical Clogged drain / how to clean

Joined
Jul 13, 2016
Messages
640
Points
234
Hey guys

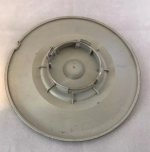
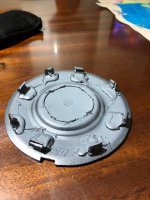
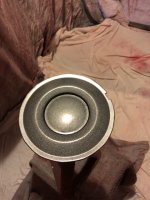
I have been told I may have a clogged drain as I have noticed water collecting in my undertray of the car and also when it rains it collects on the tops of my strut mounts (pics attached to help) IMG_1760.jpegIMG_1766.jpeg

My question is can anyone tell me where these drains are located to try and see as I do not have a clueIMG_1497.jpeg
 
The one on the drivers side is revealed when the scuttle panel is removed, wiper arms and three Phillips screws and two plastic rivet style fixings. When you look from above the drivers one is directly under the right end of the wiper motor(for reference). I modified mine using, hose pipe and some heater hose and a hot melt glue gun. The concept being attach a pipe to the outlet with out distorting the part that fits in the hole and run a drain to some where that isn’t the alternator. Here’s mine being made and the route across the bulk head.IMG_4857.JPGIMG_4858.JPGIMG_4860.JPG
 
The one on the drivers side is revealed when the scuttle panel is removed, wiper arms and three Phillips screws and two plastic rivet style fixings. When you look from above the drivers one is directly under the right end of the wiper motor(for reference). I modified mine using, hose pipe and some heater hose and a hot melt glue gun. The concept being attach a pipe to the outlet with out distorting the part that fits in the hole and run a drain to some where that isn’t the alternator. Here’s mine being made and the route across the bulk head.View attachment 186388View attachment 186389View attachment 186390
Hey moiomo

Thanks for doing this and sharing the pictures.

So to be clear if I wanted to try blowing it out it has.to be accessed from the top and move the bulk head and the wiper to see down in to it. I have done a video of my engine bay if u could possibly pin point say if I'm on the right track lol as I am moving across my engine bay / back of my engine.
 
[ame]https://youtu.be/jZ7jS1AzgnA[/ame]

Hey guys I think this link will upload as a video in here. But if it does if people could have a look and possibly pin point if I'm close by it lol
 
You are looking exactly where the water runs out, one outlet under where your finger is for the drivers side, and one in a similar place for the passenger side. You can only access them from above but you can feel the rubber outlets from underneath the scuttle section. The arrows show the approx locations of the drains but the black plastic scuttle cover has to be removed then looking into it you will see them easily.IMG_0051.JPGIMG_0053.JPG
 
You are looking exactly where the water runs out, one outlet under where your finger is for the drivers side, and one in a similar place for the passenger side. You can only access them from above but you can feel the rubber outlets from underneath the scuttle section. The arrows show the approx locations of the drains but the black plastic scuttle cover has to be removed then looking into it you will see them easily.View attachment 186419View attachment 186420
Hey mo appreciate you taken the time. That has helped.out a lot thanks man ??
 
The one on the drivers side is revealed when the scuttle panel is removed, wiper arms and three Phillips screws and two plastic rivet style fixings. When you look from above the drivers one is directly under the right end of the wiper motor(for reference). I modified mine using, hose pipe and some heater hose and a hot melt glue gun. The concept being attach a pipe to the outlet with out distorting the part that fits in the hole and run a drain to some where that isn’t the alternator. Here’s mine being made and the route across the bulk head.View attachment 186388View attachment 186389View attachment 186390
Hey moimo

I recently check my drain out today and actually saw what you meant by it just runs out on top of the alternator. Can I ask

1) How does your modification perform has it worked for you.

2) The black part of your modification is that the actual drain removed from the car.

3) How did u go about making this?

Thanks any help would be great.
 
It works great, no water anywhere above the steering rack, the black part is the original, I used a hot melt glue gun, put the hose in and filled the gap, that was as tech as it gets
 
It works great, no water anywhere above the steering rack, the black part is the original, I used a hot melt glue gun, put the hose in and filled the gap, that was as tech as it gets
Thanks mo.

When you filled the gap what did you use to fill. I assume you filled it so the hose didn't wobble everywhere?
 
I made it to 45 years old with a well furnished garage, but then I discovered hot glue, it is phenomenal, I’m sure you have seen a glue stick when solid, the gun melts it and gets it hot enough to bond to a lot of different surfaces. So not only does it stick, it is also great for filling areas, I stuck the hose in a vice slipped the original part over and glued it in place, once the sticking glue had set I just ran a couple of sticks into the gap and it fills it and sets like a plastic. I have also repaired loads of things when plastic breaks you can bond onto it and shape, drill etc, and you can buy the glue sticks in different formulas for different work, just the cheap stuff works very well though
 
The glue is the shiny translucent stuff you can see concentrically around the hose. I also used a bit of radiator hose as a reducer from the original drain bung to the hose pipe, which you can see in the picture, again stuck with the glue gun
 
The glue is the shiny translucent stuff you can see concentrically around the hose. I also used a bit of radiator hose as a reducer from the original drain bung to the hose pipe, which you can see in the picture, again stuck with the glue gun
Thanks for this mo. I will look to make one and let you know how I get on. Lastly I was told you can actually buy these 'fiat drain adaptors' on ebay I'm just curious to why you never opted for one and decided to make your own?
 
I’m an honorary Jock lol. If I have the option to buy or make I’ll always make,
 

Attachments

  • IMG_0049.JPG
    IMG_0049.JPG
    309.1 KB · Views: 21
  • IMG_0067.JPG
    IMG_0067.JPG
    381.3 KB · Views: 27
  • IMG_0064.JPG
    IMG_0064.JPG
    328.8 KB · Views: 27
The tabs where chopped off new bits stuck with the glue gun and they are rock solid
 
Lol, it’s a wheel centre but mine are old, I lost one, lots of places list the part but they are all obsolete, so I got the closest shape I could find and chopped it about, painted and hey presto.
 
Back
Top