V1C3M4N
New member
- Joined
- Jun 15, 2010
- Messages
- 17
- Points
- 9
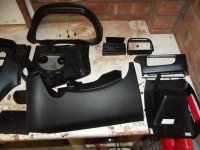
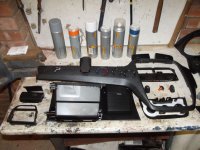
I've spent the weekend dismantling my dashboard ready for painting this week. There is one section on the left around the glove box that I know I will never get out because its massive and riveted/welded at some points.
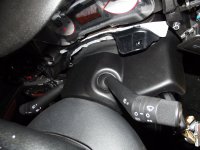
The only two other problems I have is the top half of the steering wheel cover that I had gotten loose but cant actually get off to paint, if anyone knows how to remove the indicator stalk to remove it, or another part to remove that will allow me to get it off, then that would be great.
The other is the radio face, I have the radio unit sliding out, but do not know how to remove the face part only for spraying, anyone know how to do this???
Much love for any help")
The only two other problems I have is the top half of the steering wheel cover that I had gotten loose but cant actually get off to paint, if anyone knows how to remove the indicator stalk to remove it, or another part to remove that will allow me to get it off, then that would be great.
The other is the radio face, I have the radio unit sliding out, but do not know how to remove the face part only for spraying, anyone know how to do this???
Much love for any help