

Introduction
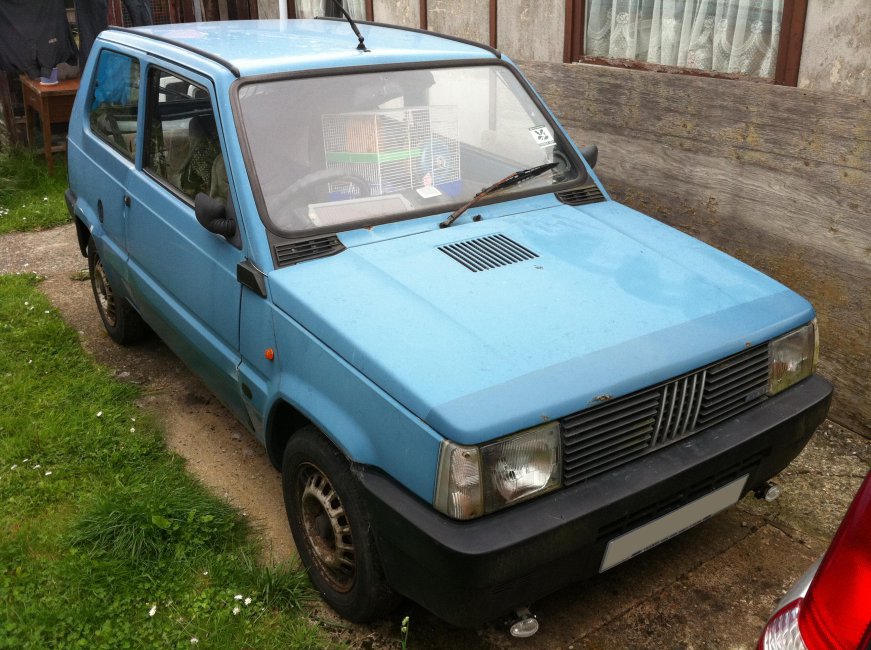
So here is our 750L Panda - Also know as Victoria.

Now as you all know I like all Panda's and all of ours are special in their own little way, but none more so that this 750L. It was our first ever Panda and started what has so far been a decade of Panda fun. It was also given to me by dad and was my first ever car so has a very special place in my heart, even if a lot of my mates thought it was a shed")
She was purchased in September 2000 from a very good family friend who purchased her as an ex-showroom demo from Thames Fiat in South London in 1989. We brought her for a mere £250 with some tax, MOT, and a full Fiat service history, no rust, and only 35,000 on the clock!! A bit of a bargain if you ask me, but at the time the used car market was at its worst and if we hadn't brought her our friend was actually going to scrap her!
So from September 2000 through to the summer of 2006 she was the family's second car, being used as a work horse during house moves out of South London to Norfolk, and then 6 months later for another move from Norfolk to Sunny Suffolk.
During the Summer of 2006 we spotted a Panda 1000CL for sale locally which was the identicle twin of the 750L. So we had to buy it. £80 later, it was apparent that she needed a lot of work for the MOT, but nothings inpossible and we then had a Father and Son 'Pandas R Us' Pair. In July 2006 I passed my driving test, and after a short adventure in Bolivia September came around and with 96,000 miles on the clock, dad handed me the keys and the 750L became mine
She gave me a year of trouble free motoring, and other than needing a new battery and centre exhaust section (she's had more exhausts in the past decade than I care to remember, but the majority have always been covered by one warrentee or other) cost me next to nothing to run, and took all the abuse that your average 17 year old lad could throw at her :devil:.
However, after nearly a year of ownership I spotted a bargain Selecta on eBay with 15,500 miles on the clock for a mere £350 with a years MOT. After a few minutes of thinking and then realising that the 1108cc Selecta had 50% more CC's than the 769cc the 750L had I hit the Buy It Now button and purchased it.
So since September 2007 the 750L has sat peacefully on the drive with 113,000 miles on the clock. Gradually she's started to look sorry for herself, and although she starts and moves fine, bodywork is slowly starting to perish, and there are a few odd jobs that need doing on her before she'll fly through another MOT.
These jobs include;
The Lights, Filthy Engine Bay, and Wiring that needs sorting


Another thing that needs doing is her body work though. Underneath she's fairly solid, and most of the shell is, although there are some nasty bits on the windscreen scuttle that I need to get done, and by the O/S rear window. The boot lid lip needs re-fibreglassing again also
When it come to panels the Bonnet although recoverable, needs some work doing to the leading edge. Drivers door however has had it and its so bad that the lower half now flaps! The Passenger door has started to go again since its last rust repair, but I believe it also is recoverable.
Both rear wheel arches could ideally do with a bit of work, rust is starting to bubble, from where both have been reversed into walls (not by me ) and although repaired to stop the rust, have never been properly painted to match the car.
So today, I thought I'd start with the bodywork. Badly faded and oxidised paint, to the point where I though all was lost andgreen growth down one side of the car due to nearly 4 years worth of attack from the elements, but with a good wash, I could already see lots of room for improvement Next came the Clay Bar, doing it bit by bit, followed closely by T-Cut, again bit by bit - took me a while to work out how best to use the stuff, but my god is it good! - and then finished off with a layer of wax.
So we started off with this


A close up of just how bad it was


The Badly faded paint, the bodged wheel arch, and a nice none faded bit from where I've removed a broken piece of wheel arch trim.

So I started off by hand washing the car with some B&Q Car Wash Detergent I found laying about in the outhouse, and its surprising the different it has made.
The washed section on the right, and unwashed on the left.

And from a different angle, you and see the cleaned section closest and the line between the two going through the reflection of the butterfly.


Then I started with the Claying, T-cutting and Waxing.
Here are some after shots, first the roof - Pictures don't do it justice.

And in comparison to the top of the boot.

Then I decided to do the boot - By far the worst panel on the car.
First the top section T-cut'ed

Then the rest T-cut'ed

And then the whole boot T-cut'ed and Waxed

A comparison with the Side of the car.

Then I moved onto the rear side panel.

Then drivers door and wing.

I've managed to get the bonnet done also, but it was getting to dark to take pictures, and the N/S will have to wait until Friday to get done, but I'm certainly very pleased with the results! :slayer:
Now as you all know I like all Panda's and all of ours are special in their own little way, but none more so that this 750L. It was our first ever Panda and started what has so far been a decade of Panda fun. It was also given to me by dad and was my first ever car so has a very special place in my heart, even if a lot of my mates thought it was a shed
She was purchased in September 2000 from a very good family friend who purchased her as an ex-showroom demo from Thames Fiat in South London in 1989. We brought her for a mere £250 with some tax, MOT, and a full Fiat service history, no rust, and only 35,000 on the clock!! A bit of a bargain if you ask me, but at the time the used car market was at its worst and if we hadn't brought her our friend was actually going to scrap her!
So from September 2000 through to the summer of 2006 she was the family's second car, being used as a work horse during house moves out of South London to Norfolk, and then 6 months later for another move from Norfolk to Sunny Suffolk.
During the Summer of 2006 we spotted a Panda 1000CL for sale locally which was the identicle twin of the 750L. So we had to buy it. £80 later, it was apparent that she needed a lot of work for the MOT, but nothings inpossible and we then had a Father and Son 'Pandas R Us' Pair. In July 2006 I passed my driving test, and after a short adventure in Bolivia September came around and with 96,000 miles on the clock, dad handed me the keys and the 750L became mine
She gave me a year of trouble free motoring, and other than needing a new battery and centre exhaust section (she's had more exhausts in the past decade than I care to remember, but the majority have always been covered by one warrentee or other) cost me next to nothing to run, and took all the abuse that your average 17 year old lad could throw at her
:devil:.However, after nearly a year of ownership I spotted a bargain Selecta on eBay with 15,500 miles on the clock for a mere £350 with a years MOT. After a few minutes of thinking and then realising that the 1108cc Selecta had 50% more CC's than the 769cc the 750L had I hit the Buy It Now button and purchased it.
So since September 2007 the 750L has sat peacefully on the drive with 113,000 miles on the clock. Gradually she's started to look sorry for herself, and although she starts and moves fine, bodywork is slowly starting to perish, and there are a few odd jobs that need doing on her before she'll fly through another MOT.
These jobs include;
- Changing Both Headlamp units - both have broken reflector units that don't sit on their mounts, and the reflectors have started to become a little less reflective (see pics).
- Investigate and change headlamp switch - I can't remember if this one has burnt out or not, but have a funny feeling it has.
- Change Coolant Pump Seal - The 'O' ring washer that seals the coolant pipe tube to the pump has gone / been ruined when I recently done a coolant flush and change - she now doesn't hold coolant for very long.
- Replace Rubber Exhaust Brackets - The rear Rubbers have perished and the exhaust is now resting on the rear axel. A nice and easy job.
- Degrease and clean engine and engine bay - A bit of a mess, and shouldn't take much to tidy it up
- Mount Alarm Siren correctly - For some reason this was cable tied in place when I fitted the system years ago
- Investigate and Fix Front Lights Wiring - Indicators seem to be a bit hit and miss and the wiring is a mess after being hacked about 7 years ago when an earth issue arose. So I need to check and tidy this up, I may just replace the whole wiring loom as I have a spare so it'll all look better under the bonnet
- Investigate Rear Wiper Motor - It runs really slow, I think its the motor, and have another so will see if current one is serviceable, and if not replace it with the spare.
- Investigate and Fix Temperature Guage - On dash guage has stopped working, was intermittant when I had her, so is probably just a wiring / connection issue, so will check wiring and if needs be change the sensor
- Fit Rear Wheel Arch Trim's - Old ones were damaged and faded, so for the sake of £10 a side I've brought replacements from Fiat.
The Lights, Filthy Engine Bay, and Wiring that needs sorting
Another thing that needs doing is her body work though. Underneath she's fairly solid, and most of the shell is, although there are some nasty bits on the windscreen scuttle that I need to get done, and by the O/S rear window. The boot lid lip needs re-fibreglassing again also
When it come to panels the Bonnet although recoverable, needs some work doing to the leading edge. Drivers door however has had it and its so bad that the lower half now flaps! The Passenger door has started to go again since its last rust repair, but I believe it also is recoverable.
Both rear wheel arches could ideally do with a bit of work, rust is starting to bubble, from where both have been reversed into walls (not by me ) and although repaired to stop the rust, have never been properly painted to match the car.
So today, I thought I'd start with the bodywork. Badly faded and oxidised paint, to the point where I though all was lost andgreen growth down one side of the car due to nearly 4 years worth of attack from the elements, but with a good wash, I could already see lots of room for improvement Next came the Clay Bar, doing it bit by bit, followed closely by T-Cut, again bit by bit - took me a while to work out how best to use the stuff, but my god is it good! - and then finished off with a layer of wax.
So we started off with this
A close up of just how bad it was
The Badly faded paint, the bodged wheel arch, and a nice none faded bit from where I've removed a broken piece of wheel arch trim.
So I started off by hand washing the car with some B&Q Car Wash Detergent I found laying about in the outhouse, and its surprising the different it has made.
The washed section on the right, and unwashed on the left.
And from a different angle, you and see the cleaned section closest and the line between the two going through the reflection of the butterfly.
Then I started with the Claying, T-cutting and Waxing.
Here are some after shots, first the roof - Pictures don't do it justice.
And in comparison to the top of the boot.
Then I decided to do the boot - By far the worst panel on the car.
First the top section T-cut'ed
Then the rest T-cut'ed
And then the whole boot T-cut'ed and Waxed
A comparison with the Side of the car.
Then I moved onto the rear side panel.
Then drivers door and wing.
I've managed to get the bonnet done also, but it was getting to dark to take pictures, and the N/S will have to wait until Friday to get done, but I'm certainly very pleased with the results!
:slayer: