

Hello, so, chances are if you are reading this, you either have A) an oil leak, or B) a bigger oil leak, so, today we'll try and guide you through the job of making the little blighter keep it's internal fluids in place ")
This isn't a scary job when you get into it, so don't panic bank on between 1-2 hours (oh go on them, an hour and a half), but the job is able to be done alot faster than that if bolts co-operate etc
so....
What you will need
Parts Required
1) clearly, you will need a Fiat 1.2 8v engine to work on. This is normally found in the car you intend to repair.
2) 1x Rocker cover gasket
3) 1x tube of silicone sealant (optional but highly suggested)
5) cam seal (only if you are needing/wanting to do the cam seal)
Tools required
1) 10mm spanner
2) 10mm socket+ Ratchet
3) small + medium socket extensions
4) small flatheaded screwdriver
5) gloves
6) a rag of some sorts
so...let's get started.
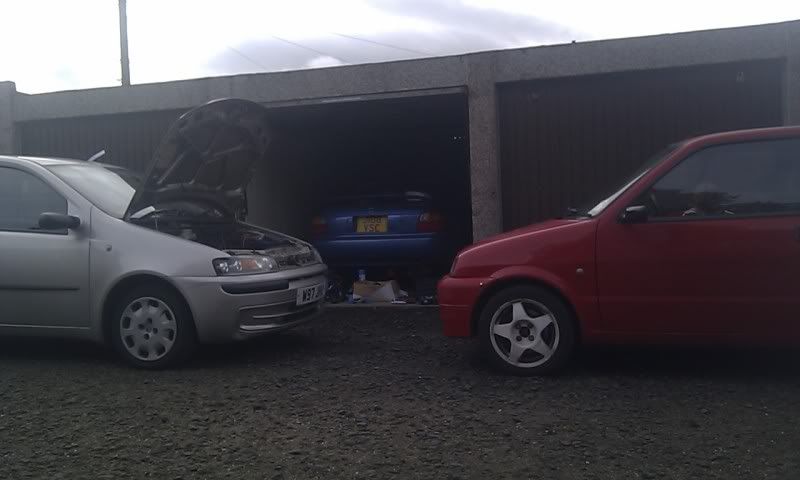
1) open the bonnet. this is highly reccomended as it strongly aids access to the area you are working on :laugh:
2) whip out your 10mm socket and undo the two bolts on the airbox, these are located at the top left and bottom right corners of the big bulky black plastic monstrosity that is the standard Fiat airbox. if you dont have this, congratulations, you've just saved yourself a few minutes
3) lift up the airbox gently, unlcip the big trunk to it's left from the bracket then undo the hose underneath (this just pulls off)
4) make sure the airbox seal is either still on the throttle body or on the airbox, put all to one side.
5) remove oil filler cap (this also just pulls off)
6) pull off the breather hose above the oil cap (again, this just pulls off)
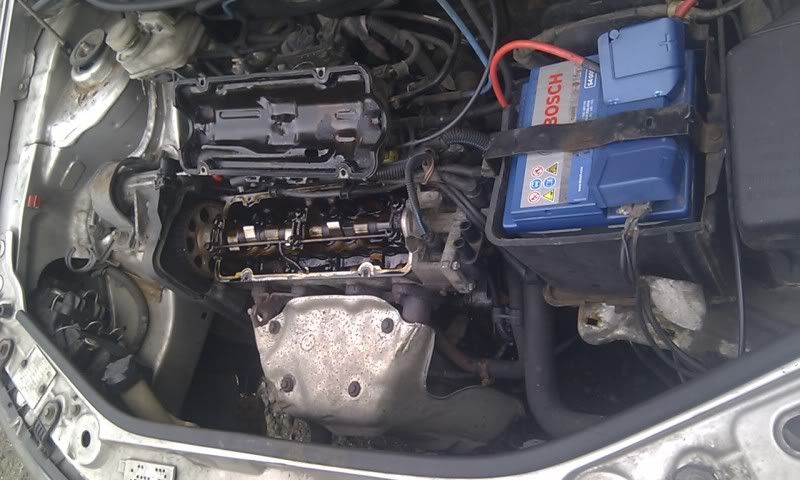
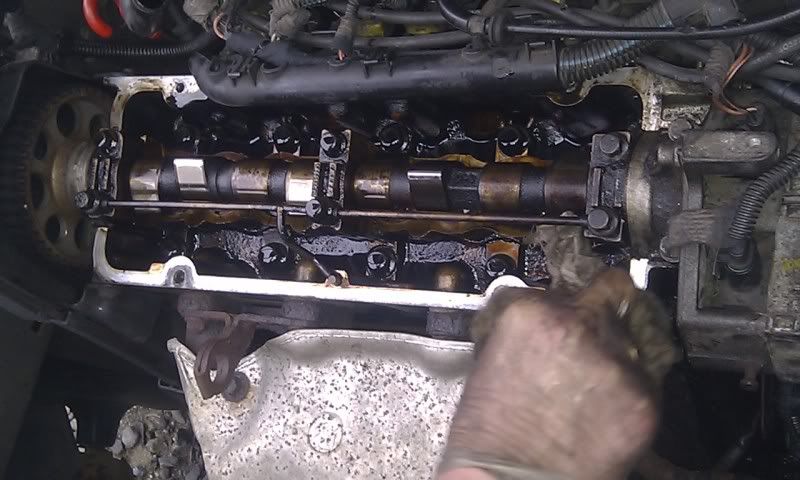
7) now you are faced with access to 4 bolts at each corner of the rocker cover glory be, happy days time to whip out your ratchet again with that trusty 10mm socket on the end, i suggest inserting the medium extension between the socket and ratchet for ease of use/comfort
which should look like this, minus the airbox of course
8) remove the 4 bolts, the top right is the first one i'd suggest taking off as on later engines, it's partially obscured by a fuel rail, either unclip this or just push to one side and force the socket in. from then on in, i always undo bolts in a diagonal pattern, so after top right i would do bottom left, follwed by top left then finally bottom right, no real reason to this, however in certain jobs it HAS to be done like this as it spreads the weight of what you are lossening/tightening, so it's a good habbit to get into
9) with all 4 bolts out (and safely put to one side) very carefully lift the rocker cover up. On earlier engines (SPI) you can now put the rocker cover to one side, on slightly later engines (MPI) you can either fold the cover back, like so...
or unclip the fuel rail (the better option in my opinion), leaving you with this...
if you are only doing the rocker cover gasket, please skip to step 19
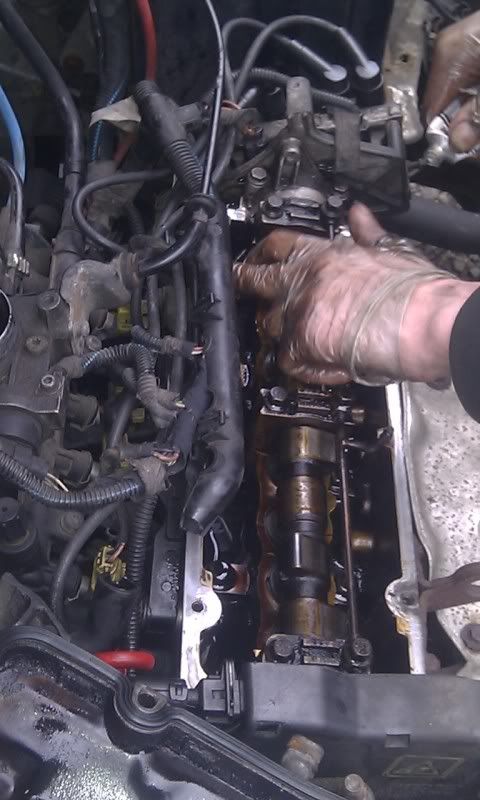
10) for those doing the cam seal only, unplug the bottom two ignition leads (noting what one goes where), and unplug the bottom feed wire to the left of them (this is just to aid access)
11) there are 2 nuts and one bolt that hold the coil pack in place, these are located
a nut on the top of the coil pack (hence the suggestion of unplugging the leads), a 10mm socket with a small extension is best for this one
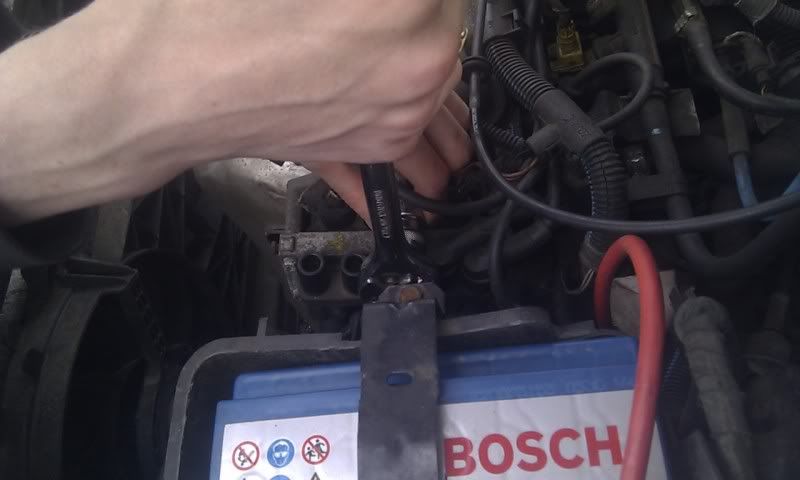
a nut underneath the coil pack, 10mm spanner is best
and to the rear or the coil pack, the final bolt is situated, again a 10mm spanner is best here.
on most engines, that bolt at the rear is obscured by a black plastic bracket held on by 2x 10mm nuts, i suggest removing that and binning it, however if you wish to refit later, put it to one side
12) with those nuts and bolt removed (and carefully placed to one side) slide the coil pack out and rest it on something (you can of course fully remove all leads and it's earth point, but it's not required for this job)
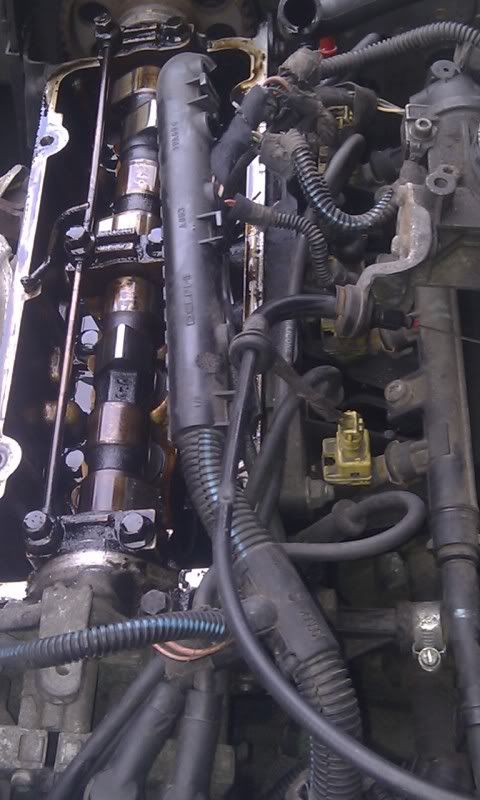
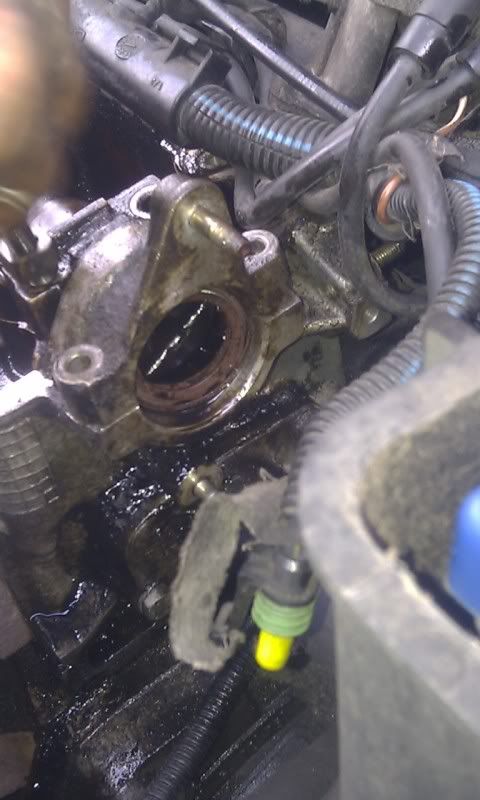
if your cam seal is shot (or in this case missing), chances are your coil pack will look like this....
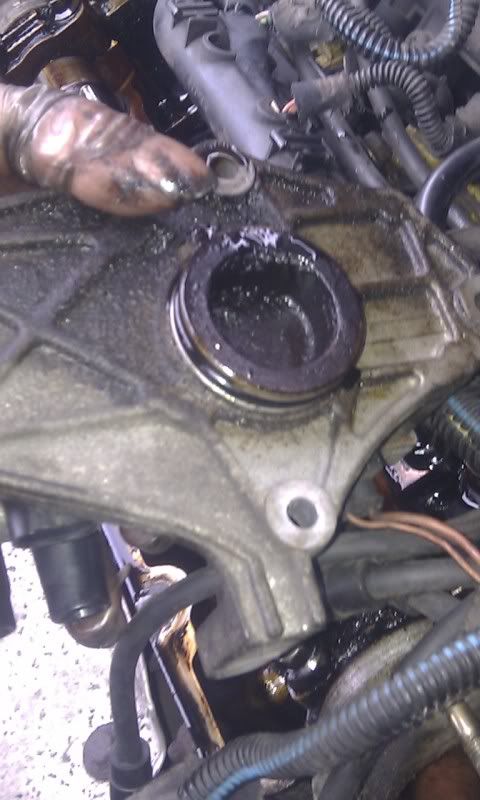
and where it sat will look like this
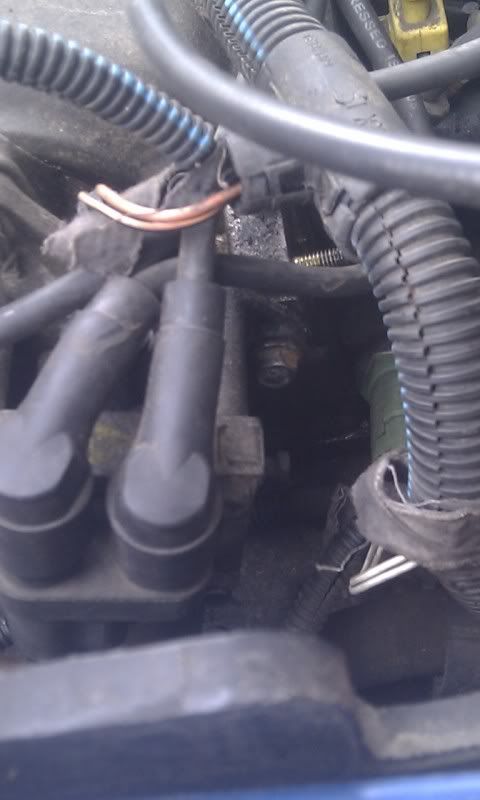
13) now, you can do this without the next step, but for best effect, i would (and did) do it as so...
with the rocker cover already off, undo the 4 bolts on the rearward cam guide
again, these are all 10mm, i suggest socket with a medium extention to save your knuckles
lightly bend the oil rail back a few mm
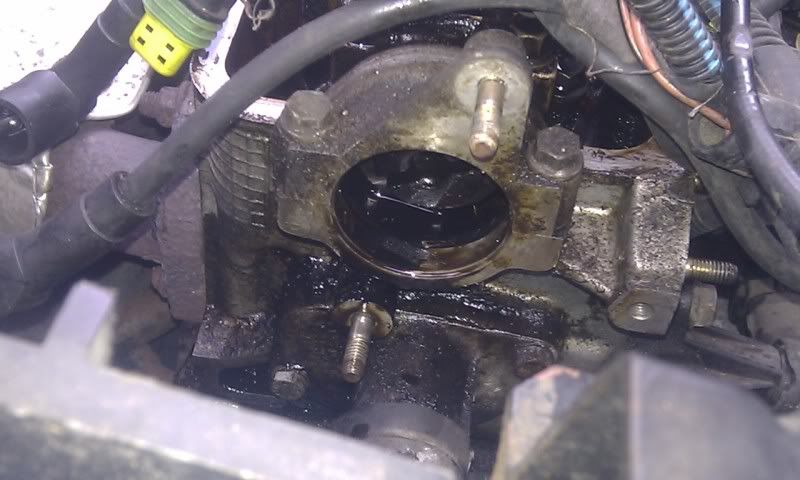
you can now pull it up and this should be what you have...
and if you have a seal in there, this is what you shouldn't
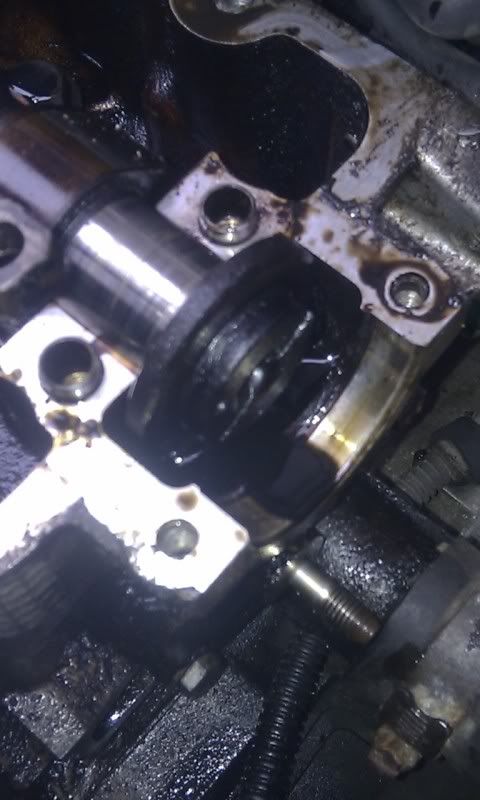
either remove the seal if it's there or tut and shake your head at this point if it isn't.
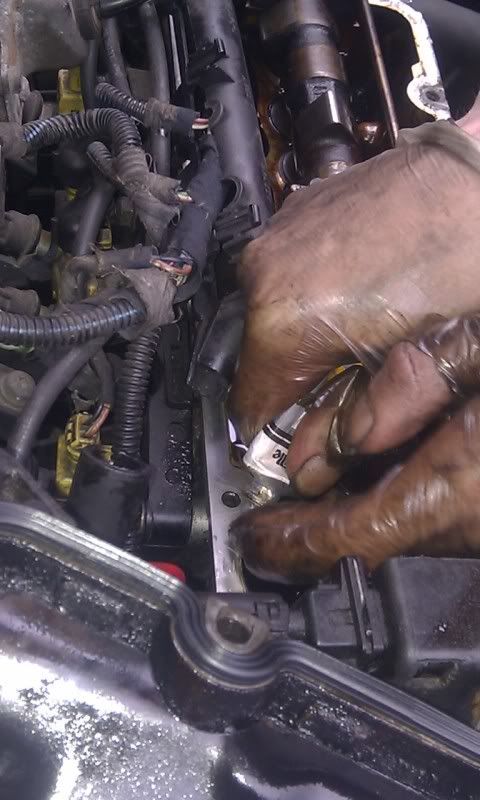
14) wipe excess oil from coil housing.
15) place the cam guide back on its lobes and put bolts back in(remember to bend oil rail back into place before tightening the bolt up!) , finger tighten very, very lightly up to a point where you can still wobble it around easily
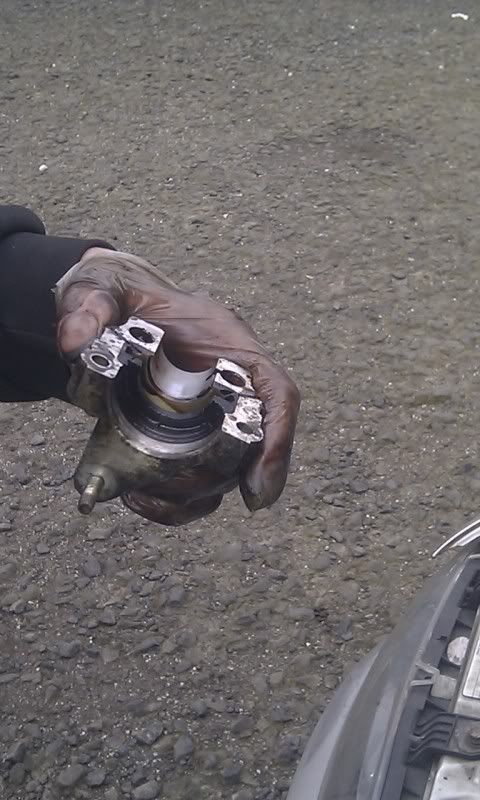
16) you now need one of these
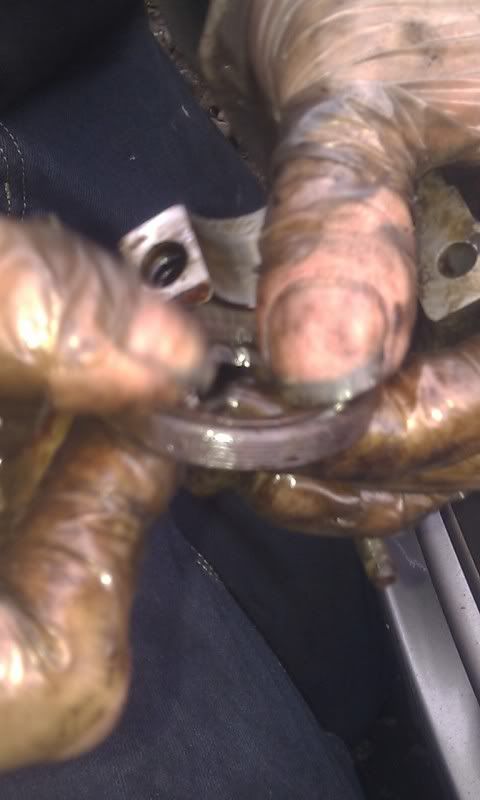
place it in between the cam guide and coil housing, push it in gently.
the seal can go in either way, facing coils or away from coils, however past experience and lateral thinking has made me put it spring towards coil, as the way the seal is built allows the coil pack to give it a better squeeze in my opinion and therefore a tighter seal to the coil pack
make sure it is sitting in flat
now re-tighten the cam guide bolts , making sure that once they are done, the seal is still nice and flat
17) now push the coil pack back in place firmly (replace the rubber o-ring if you wish), and replace the nuts and bolts, tighten up, the coil pack should now sit flush to the engine
18) re-plug in the coil feed and the ignition leads you removed you can now also refit that wire bracket with the wto 10mm nuts if you wish ro retain. congratulations, you have just replaced a cam seal
19) pick up the rocker cover and peel off the old gasket, throw in the bin
20) get the new shiney, clean gasket and push it firmly into the rocker cover, making sure there are no lumps and bumps in it
21) clean the excess oil from the top of the cylinder head
22)(optional) put some small spots of silicone sealant at each corner and at the edge of each bump of the cam guides ridge
smear a little around the bolt holes and the rest of the cylinder head where the gasket will sit
23) place rocker cover back onto engine and gently press down. put the bolts back in and tighten up finger tight
24) diagonally tighten the bolts up with your trusty 10mm socket and medium extension bar being very careful not to overtighten!
25)reclip fuel rail (if you have one) onto the rocker cover and replace oil cap
26) push breather hose back onto the rocker cover
27) pick up the airbox, push the last remaining bit of that breather hose onto its nipple on the bottom of it, push the airbox onto the throttle body making sure the seal is in place
28) put the two 10mm bolts back in and tighten, re-clip breather trunk.
29) start her up,leave a few minutes then give revs, go and look for obvious leaks, if all is well, skip to step 30...
if not, check you've not missed any of the above, any further issues feel free to post up in the forum
30) close bonnet. give yourself a big pat on the back, the jobs complete, well done
We hope you found this helpful, this is only a guide and FS or myself take no responsibility for any damage you may cause, happy motoring!
This isn't a scary job when you get into it, so don't panic
bank on between 1-2 hours (oh go on them, an hour and a half), but the job is able to be done alot faster than that if bolts co-operate etcso....
What you will need
Parts Required
1) clearly, you will need a Fiat 1.2 8v engine to work on. This is normally found in the car you intend to repair.
2) 1x Rocker cover gasket
3) 1x tube of silicone sealant (optional but highly suggested)
5) cam seal (only if you are needing/wanting to do the cam seal)
Tools required
1) 10mm spanner
2) 10mm socket+ Ratchet
3) small + medium socket extensions
4) small flatheaded screwdriver
5) gloves
6) a rag of some sorts
so...let's get started.
1) open the bonnet. this is highly reccomended as it strongly aids access to the area you are working on :laugh:
2) whip out your 10mm socket and undo the two bolts on the airbox, these are located at the top left and bottom right corners of the big bulky black plastic monstrosity that is the standard Fiat airbox. if you dont have this, congratulations, you've just saved yourself a few minutes
3) lift up the airbox gently, unlcip the big trunk to it's left from the bracket then undo the hose underneath (this just pulls off)
4) make sure the airbox seal is either still on the throttle body or on the airbox, put all to one side.
5) remove oil filler cap (this also just pulls off)
6) pull off the breather hose above the oil cap (again, this just pulls off)
7) now you are faced with access to 4 bolts at each corner of the rocker cover
glory be, happy days time to whip out your ratchet again with that trusty 10mm socket on the end, i suggest inserting the medium extension between the socket and ratchet for ease of use/comfort which should look like this, minus the airbox of course
8) remove the 4 bolts, the top right is the first one i'd suggest taking off as on later engines, it's partially obscured by a fuel rail, either unclip this or just push to one side and force the socket in. from then on in, i always undo bolts in a diagonal pattern, so after top right i would do bottom left, follwed by top left then finally bottom right, no real reason to this, however in certain jobs it HAS to be done like this as it spreads the weight of what you are lossening/tightening, so it's a good habbit to get into
9) with all 4 bolts out (and safely put to one side) very carefully lift the rocker cover up. On earlier engines (SPI) you can now put the rocker cover to one side, on slightly later engines (MPI) you can either fold the cover back, like so...
or unclip the fuel rail (the better option in my opinion), leaving you with this...
if you are only doing the rocker cover gasket, please skip to step 19
10) for those doing the cam seal only, unplug the bottom two ignition leads (noting what one goes where), and unplug the bottom feed wire to the left of them (this is just to aid access)
11) there are 2 nuts and one bolt that hold the coil pack in place, these are located
a nut on the top of the coil pack (hence the suggestion of unplugging the leads), a 10mm socket with a small extension is best for this one
a nut underneath the coil pack, 10mm spanner is best
and to the rear or the coil pack, the final bolt is situated, again a 10mm spanner is best here.
on most engines, that bolt at the rear is obscured by a black plastic bracket held on by 2x 10mm nuts, i suggest removing that and binning it, however if you wish to refit later, put it to one side
12) with those nuts and bolt removed (and carefully placed to one side) slide the coil pack out and rest it on something (you can of course fully remove all leads and it's earth point, but it's not required for this job)
if your cam seal is shot (or in this case missing), chances are your coil pack will look like this....
and where it sat will look like this
13) now, you can do this without the next step, but for best effect, i would (and did) do it as so...
with the rocker cover already off, undo the 4 bolts on the rearward cam guide
again, these are all 10mm, i suggest socket with a medium extention to save your knuckles
lightly bend the oil rail back a few mm
you can now pull it up and this should be what you have...
and if you have a seal in there, this is what you shouldn't
either remove the seal if it's there or tut and shake your head at this point if it isn't.
14) wipe excess oil from coil housing.
15) place the cam guide back on its lobes and put bolts back in(remember to bend oil rail back into place before tightening the bolt up!) , finger tighten very, very lightly up to a point where you can still wobble it around easily
16) you now need one of these
place it in between the cam guide and coil housing, push it in gently.
the seal can go in either way, facing coils or away from coils, however past experience and lateral thinking has made me put it spring towards coil, as the way the seal is built allows the coil pack to give it a better squeeze in my opinion and therefore a tighter seal to the coil pack
make sure it is sitting in flat
now re-tighten the cam guide bolts
, making sure that once they are done, the seal is still nice and flat17) now push the coil pack back in place firmly (replace the rubber o-ring if you wish), and replace the nuts and bolts, tighten up, the coil pack should now sit flush to the engine
18) re-plug in the coil feed and the ignition leads you removed
you can now also refit that wire bracket with the wto 10mm nuts if you wish ro retain. congratulations, you have just replaced a cam seal 19) pick up the rocker cover and peel off the old gasket, throw in the bin
20) get the new shiney, clean gasket and push it firmly into the rocker cover, making sure there are no lumps and bumps in it
21) clean the excess oil from the top of the cylinder head
22)(optional) put some small spots of silicone sealant at each corner and at the edge of each bump of the cam guides ridge
smear a little around the bolt holes and the rest of the cylinder head where the gasket will sit
23) place rocker cover back onto engine and gently press down. put the bolts back in and tighten up finger tight
24) diagonally tighten the bolts up with your trusty 10mm socket and medium extension bar being very careful not to overtighten!
25)reclip fuel rail (if you have one) onto the rocker cover and replace oil cap
26) push breather hose back onto the rocker cover
27) pick up the airbox, push the last remaining bit of that breather hose onto its nipple on the bottom of it, push the airbox onto the throttle body making sure the seal is in place
28) put the two 10mm bolts back in and tighten, re-clip breather trunk.
29) start her up,leave a few minutes then give revs, go and look for obvious leaks, if all is well, skip to step 30...
if not, check you've not missed any of the above, any further issues feel free to post up in the forum
30) close bonnet. give yourself a big pat on the back, the jobs complete, well done
We hope you found this helpful, this is only a guide and FS or myself take no responsibility for any damage you may cause, happy motoring!