Technical 2010 Qubo dashboard removal to change bulb

Currently reading:
Technical 2010 Qubo dashboard removal to change bulb

Thanks for your help! I will give it a try this weekend.

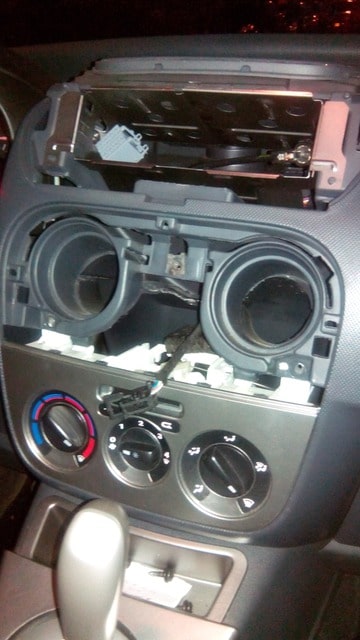
There also seems to be a loose part in the rear door that's rattling left and right in corners. The rear door has a huge plastic cover on the inside but a can't see how it must come loose. Anybody who knows the trick?

Is it just pulling harder or??

Hehe - when I got my Qubo, it too came with the rear tailgate rattle - and after shutting it at first 'it' will slide from one side to the other, then go quiet until next opening of the t/g and we start again. It must be a trim popper that has snapped and dropped down I guess. I will remove the trim for a gander in there to see if I can remove whatever it is. Since I've now got my new V5 with my own number plate on I can change those over so perhaps I'll need to remove it anyway to fit secure bolts.

I bought a trim removal tool from Machine Mart (for when I fitted secure lock plates to the van) and even though it's designed for the job, it's steel (??) and would still mess up the paint on the interior so I covered the prongs with a couple of layers of masking tape to protect the paintwork before using it and it does the job ok. I still had to assist it with a couple of screwdrivers though as you work along one edge at a time to get your fingers in to pop the poppers free.

Just out of interest, the rear wiper on mine doesn't do a very good job of the end 4" on the return sweep - the blade actually sits off the screen when parked. Since the blades on these cars are without backbone (unlike conventional wipers though I think the rear blade has a plastic spine so can't be bent to fit any closer) how do I make that last bit do its stuff better? I couldn't find a new blade for the rear in the Halfrauds catalogue either - eventually buying 2 separate ones for the front but there's just a dash for a part number in their listing booklet.

Sorry for the slight hijack of the thread..:rolleyes:

R-V-M
 
When I took my trim off the weekend I pulled it off with my fingers but then I have grippy mechanics fingers !!
Don't have that prob with my wiper maybe yours has had a poor quality one fitted at some point :)
 
Thanks for your help! I will give it a try this weekend.

There also seems to be a loose part in the rear door that;s rattling left and right in corners. The rear door has a huge plastic cover on the inside but a can't see how it must come loose. Anybody who knows the trick?

Is it just pulling harder or??

Having to fit my own number plates, I removed the originals to find that the (typical lazy) dealers had just drilled two holes in the plate and two corresponding ones in the STEEL tailgate (not level of course) so I took my plate (removed from the Red Fiorino) and its top holes matched the pre-punched nylon socket filled holes in the taligate. My dealers had only utilised the top two where the tailgate has FOUR (as do the barn doors on the van) so I did a paper template for my plate and drilled it accordingly using the correct fittings with screw head covers in yellow etc. albeit rather close to the edge but now I have a close fitting (flat to the metal) plate fastened on securely.

I took the opportunity to pop off the inner plastic cover to get at whatever was rattling inside. Once you have a corner worked loose (be confident as it fits tightly on the poppers and there are 12 I think including across the middle) then just work around the edges and up to the top from the bottom and off it comes. It was several coils of steel drillings from the previous reg plate fitter and also a few hard lumps of what looked like tar (?) but whatever they were, are now removed and cornering is once again silent! I had to feel around, remove, shut tailgate, re-open and thump it about three times in total to loosen everything and make it all reachable but it solved the rattle issue anyway. The front reg plate was also not level so that was realigned on new plate fitting - obviously an all plastic bumper so drilling was simple.

Awaiting a new Blue&Me centre console unit in the post today to sort out the issue of the damaged USB socket - no polarity guide in it, whatever the last owner had done..Heaven only knows. He was from Yeovil, apparently this Qubo was a Motability vehicle - not a FF subscriber I don't think :eek:

I've got my economy up to 58-60mpg now - the mileage in 2.5 years was only 19k so I think it was a shopper and not taken for long walks up to now ;)

Just need the remote boot lock switch, spare wheel mounting parts and CC and we're cooking! Mr Sturgess is v e r y quiet...

R-V-M
 
Last edited:
Having to fit my own number plates, I removed the originals to find that the (typical lazy) dealers had just drilled two holes in the plate and two corresponding ones in the STEEL tailgate (not level of course) so I took my plate (removed from the Red Fiorino) and its top holes matched the pre-punched nylon socket filled holes in the taligate. My dealers had only utilised the top two where the tailgate has FOUR (as do the barn doors on the van) so I did a paper template for my plate and drilled it accordingly using the correct fittings with screw head covers in yellow etc. albeit rather close to the edge but now I have a close fitting (flat to the metal) plate fastened on securely.

I took the opportunity to pop off the inner plastic cover to get at whatever was rattling inside. Once you have a corner worked loose (be confident as it fits tightly on the poppers and there are 12 I think including across the middle) then just work around the edges and up to the top from the bottom and off it comes. It was several coils of steel drillings from the previous reg plate fitter and also a few hard lumps of what looked like tar (?) but whatever they were, are now removed and cornering is once again silent! I had to feel around, remove, shut tailgate, re-open and thump it about three times in total to loosen everything and make it all reachable but it solved the rattle issue anyway. The front reg plate was also not level so that was realigned on new plate fitting - obviously an all plastic bumper so drilling was simple.

Awaiting a new Blue&Me centre console unit in the post today to sort out the issue of the damaged USB socket - no polarity guide in it, whatever the last owner had done..Heaven only knows. He was from Yeovil, apparently this Qubo was a Motability vehicle - not a FF subscriber I don't think :eek:

I've got my economy up to 58-60mpg now - the mileage in 2.5 years was only 19k so I think it was a shopper and not taken for long walks up to now ;)

Just need the remote boot lock switch, spare wheel mounting parts and CC and we're cooking! Mr Sturgess is v e r y quiet...

R-V-M


Yeovil just down the road from me :)
 
Here's an update on the dashboardlight-paradise:

Foto-O3UHDCKG-D.jpg

You don't need to remove the radio to remove the top panel...

Foto-MW8TMLCU-D.jpg

The lower panel is fitted behind the dashboard?? You're supposed to take out the entire unit.

Foto-XWR3IWEI-D.jpg

You can remove the top screws from here but seem to be 2 srews on the bottom as well. You can't reach those, probably not without removing the lower part of the dash, and the center column.

I didn't have time jet to remove this much, to be continued!

I found some information in this topic, no clear solution unfortunately...
https://www.fiatforum.com/qubo/335466-new-qubo-owner-needs-help.html
 
Succes! (y)

To acces the light bulb I had to remove about this much:
Foto-PJ43OMWD-D.jpg


The interior of the heater control unit looks like this:
Foto-87S6LV8W-D.jpg


The light bulb is really small, it says 12v/1.2 and then something i can't read:
Foto-ZOLQU8ON-D.jpg


The back side of the front:
Foto-BARLGKOL-D.jpg


What is did:
- You don´t have to remove the radio
- First remove the alarm button panel and remove 1 screw behind this
- Then pull out the top vent panel
- Remove 2 screws that fix the heater control unit and remove the black piece of EPS foam behind it
- Remove glove compartment and piece of plastic below steering wheel
- Remove piece of plastic around gear selector
- Remove center column
- You now have access to remove the 2 lower screws of the heater control unit.
- Move the heater control unit diagonal to access all the clips (it's difficult)

Tip: Get the bulbs before you start, I finished on Saturday after closing time of the shops so i had to put it back together and wait for the shops to open...

Tailgate cover is pop-off indeed, was not too difficult... Rattle is removed and rear view cam installed, together with my parrot asteroid smart :D
 
all that for 2 poxy little bulbs! (n) well that's half the weekend gone....
 
all that for 2 poxy little bulbs! (n) well that's half the weekend gone....

Maybe you could find a source for led replacements instead? They'd last longer.

I might have to do as much dismantling to lube the auto gear lever which after many changes is tight to move from the rest position.. Must be in the socket place with the gate but the shroud fits so closely round the chrome post I doubt trickling something lubey down it would reach the parts I need to (sure there's a joke in there somewhere..)

R-V-M
 
Back
Top