Technical Ducato 130 Aircon Control Panel Removal

Currently reading:
Technical Ducato 130 Aircon Control Panel Removal

BarrieAvis

New member
Joined
Mar 21, 2012
Messages
26
Points
8
I need to replace the heater blower speed control switch on my 2007 Ducato 130. (It's the left hand rotary switch in the attached photo.)

Does anyone know how to get the Aircon Control Panel out please?

I have bought a workshop manual but it is absolutely useless on this point so am completely stuck.

Thanks.
 

Attachments

  • Screenshot 2019-08-30 at 13.04.58.png
    Screenshot 2019-08-30 at 13.04.58.png
    339.2 KB · Views: 1,821
Last edited:
I need to replace the heater blower speed control switch on my 2007 Ducato 130. (It's the left hand rotary switch in the attached photo.)

Does anyone know how to get the Aircon Control Panel out please?

I have bought a workshop manual but it is absolutely useless on this point so am completely stuck.

Thanks.

Barrie, I replied on your original thread. Download eLearn as suggested.

Alternatively, I think you said that you bought an electronic copy of the Citroen Relay/Jumper manual. If so, look under Fascia and Panel assembly.

Operation "Jumper III - C5FG012ZP0 - Removing - Refitting Air Conditioning Control Panel"

It's actually clearer and easier to follow than the eLearn version, but it's a long operation which involves stripping out most of the fascia and dashboard assembly.
 
I have read somewhere that somebody found that their similar problems caused by the earth connection of cable from the Blower Speed Control Selector being corroded. Since my wife originally reported a burning smell, I guess this has to be a possibility in my case.

Does anyone know where the earth connection is located and how to get at it please?
 
Barrie,

I suggest that you consult either eLearn, or the manual that you purchased.

Select Electrical Equipment - Electrical Functions - Climate Control - Component Location. Look for Cxxx, then try to work out where the indicated location is. I would suspect somewhere close to the fan.

(On the eLearn for my x244, Cxxx designates an earth point.)
 
Thanks.
Unfortunately I could not get eLearn to work on my MacBook Air.
Barrie
 
Thanks.
Unfortunately I could not get eLearn to work on my MacBook Air.
Barrie


Here you go. The fan control is earthed to C16, which from the enlarged diagram is situated behind and just below the control switch unit, probably to the dashboard frame assembly, so still looks like a dashboard disassembly job to investigate.
 

Attachments

  • AC.pdf
    775.5 KB · Views: 232
Thanks for that.

The eLearn manual look to be infinitely better than the manual I bought. I's a pain that I could not get it to run. (I did download all 7 of the .rar files but when I tried to unpack them, all I got was a copy of the same files in a subfolder. I clearly do not understand how to do it! I'm sure I could have done it 15 years ago when I taught IT - but clearly am getting past it in my old age.)

I did look in the manual that I have and there is an earth wire to a point below the fan. But when I looked at it it was a very thin wire so could not possibly carry 40 amps - that being the rating of the Blower Fuse.

So the one you have now given me seems much more plausible.

I guess I might have to bite the bullet and attack the fascia!
 
Last edited:
Barrie,

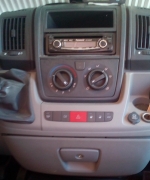
My curiousity was aroused, as to the location of the heater/aircon fan earth connection. Having delved into and under the dash of my x244 on many occasions, I could only recall 3 earth points, two just inside the wheel arches, and a third to the LEFT of the heater. eLearn indicated that C016 (same number as on x250) was immediately to the RHS of the heater. No earth visible in that location, and I have been under that area a lot recently, when changing the brake pedal switch.

I therefore applied a clip on DC ammeter to the earth wire at the left of the heater fan, and switched the fan on. Bingo! 10A with fan on full speed.

I appreciate that the x250 may be different, but it is probably worth a good look if you can get your head under there with a torch. All 3 of the original earth points that I have found are to M8 studs which also support the steel dash framework. Please note that Fiat have used M8 nuts requiring a 12mm spanner, instead of the more usual 13mm.


The two outer earth points are visible from under the dash, but not immediately accessible. However the heater fan earth, C016, is accessible on my x244 without any dismantling.

As regards wire size eLearn gives 2.5 sq mm for the x244. Probably about 3.5mm external diameter.

As regards eLearn, having found several errors in the electrical diagrams, and misleading component locations, I use it as a guide only.
 
Thanks ever so - I will have another look.

My Ducato is LHD with the heater blower on the right, above the passenger's feet.

The earth point below the blower is VERY thin wire - nowhere near the size you say.

I had thought the earth point for the blower speed selector switch must be below and behind the centre console. If so , that would have seemed to require the centre glove box to be removed.

But in view of what you have told me, I will have another look.

I was in the Fiat workshop in Cartagena earlier this week. They quoted be €71 for the selector switch and 5.5 hours of labour to change it (€375)

I can buy a selector switch on e-bay for £22 when in UK next month and my local Citroen Garage has said they need about ONE hour of labour to change it (i.e. for a Citroen Jumper)

Barrie
 
The problem turned out not to be the earth connection. It was in the connector that plugs into the back of the speed selector switch. The contact in the plug had got overheated, melted the plastic housing and caused the connector blades to no longer make contact with the blade on the back of the switch.

I bought a new switch on e-bay.

As the Fiat Ducato is identical to the Citroen Jumper, my local Citroen garage replaced the speed selector switch. They were able to do this by removing the cubby hole box above the radio, then the radio itself and the radio housing. They then used a mirror to see the holding screws for the selector switch, undid them and replaced the switch. They then cleaned up the blades in the connector and got it all working again.

So although according to the workshop manual they were supposed to have to remove the whole fascia, they were able to do it much more simply.
 
Last edited:
Many thanks for the update. I am pleased that you have the problem resolved.
 
Back
Top