You are using an out of date browser. It may not display this or other websites correctly.
You should upgrade or use an alternative browser.
You should upgrade or use an alternative browser.
General My Yellow Cinquecento 1.2 8v MPI Turbo Build
- Thread starter Lecook
- Start date
Currently reading:
General My Yellow Cinquecento 1.2 8v MPI Turbo Build
Not really but you know, always good to have spares of such things. lol
ive 2 sets of fronts and a complete red set
well i shall bear you both in mind when the next inevitable cento comes along.
So this is kinda soul destroying now.... ive been trying for what feels a lifetime... two different people and two let downs and im still wanting a turbo manifold.. ive emailed a few places and ive sent what feels like a thousand messages to various different 'custom exhaust' companies and it seems theyre greatly interested until i say its a cinquecento turbo... does anyone know of or is able to recommend someone with decent standards and the ability to tig weld a manifold up??
Lecook Somebody on the mig welding forum (http://www.mig-welding.co.uk) might be able to help you out, they love a good challenge!
You'll need the matching output shaft to match the bolt on crown wheel won't you? Unless you get very luck with the 5speed box
It's doable to fit the diff even with a welded diff in the box. Worth paying for and get he box build and checked at the same time!
I didn't do it, but Rallycinq had it sorted for me! For some reason i really like the standard cento box compared to the punto 16v 5 speed box!
Ming
So this is kinda soul destroying now.... ive been trying for what feels a lifetime... two different people and two let downs and im still wanting a turbo manifold.. ive emailed a few places and ive sent what feels like a thousand messages to various different 'custom exhaust' companies and it seems theyre greatly interested until i say its a cinquecento turbo... does anyone know of or is able to recommend someone with decent standards and the ability to tig weld a manifold up??
Well, to be honest, if they are real professionals, they'd never discredit any kind of car or project. I tuned and paid for welding work at well know tuners in NL (and Europe actually) typically dealing with full overhaul 500 HP+ projects and I never felt like my case was anything worth less attention (as long as I paid of course
Anyhow, a thought - having spent so much money on car stuff and (I am only guessing) having enough storage space - why not buy your own TIG welder and find your own way around it? If you are not planning on doing alu work then a DC machine will suffice and it is really not that difficult, me it took one week to get confident. By the time you have spent looking for welders and waiting for their services you could have been a relatively experienced TIG user. And it is an indispensable skill when you do car projects regularly and it is good to be independent of external (expensive and picky
Struttycento
New member
There is a place in Basildon, they will build any exhaust you want but you will have to take the bits you want remade. I will try and find the name of it for you.
Struttycento
New member
The place is called Hayward and Scott basildon, they will make anything for you
I think... ive got it sorted now.. A fresh new tubular mani will be on the cards for next year... blu73 put me in contact with a guy thats going to take the car away for a week or 2 two and build the manifold into the space available
For now...
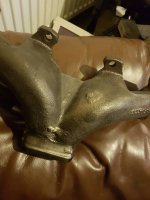
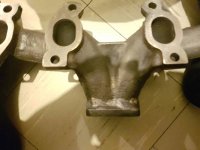
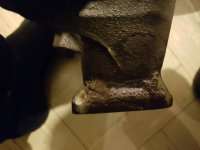
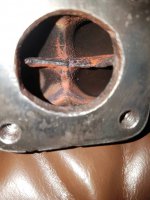
We have a temp repaired mani... ill look at supporting the turbo this time round to hopefully preserve the mani for this show season...
For now...


We have a temp repaired mani... ill look at supporting the turbo this time round to hopefully preserve the mani for this show season...
So at the weekend... this happened...
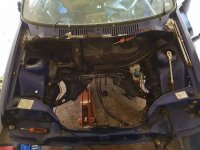
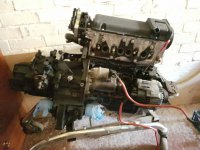
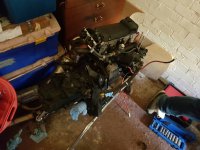
Engine and gearbox are out.. as is all the turbo gubbins...
This weekend i hope to be able to finish stripping the imola shell.. the wings need to come off... doors.. glass and bootlid.. gear selector and then i can call the scrap man...
i soo wish i could keep this shell to build a trailer but it just isnt happening for now...
So the yellow cinq is currently on daily duties as the better halfs Renault sport clio decided it doesnt want to be on daily duties anymore... so she is currently driving my yaris... and the cinq is looking after the work run, atleast until my insurance runs out at the end of april... that should give me time to empty and clean up the garage ready for the turbo engine to go in
Cheers
Lee
So alot has happened since the last update... nothing exciting mind... just tieing up some loose ends so the shell is ready to handle the extra power...
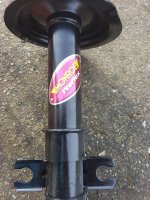
The front shocks were totalled... so a set of temporary shocks were brought
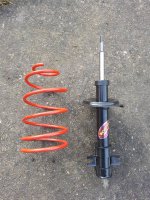
i actually had a set of these on one of my previous centos and i was genuinely impressed at the time.. however these seem... sloppy.. meh.. theyll be replaced by the spax psx shocks in due course
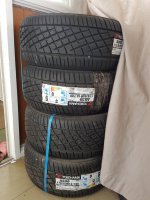
A set of yokohama A539s in 175 50 13 popped up brand new on eBay for a bargain price so they were snapped up and stuffed in the corner ready to be fitted to the standard cinq wheels once ive finished messing with the tracking and an alighnment has all been sorted
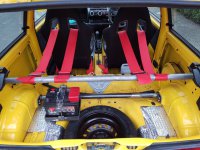
So after umming and arrrrring about how i was going to relocate the battery i decided i was going to build a lower brace bar both because its something i wamted to try and also the perfect place to mount the battery tray...
So i got to it...
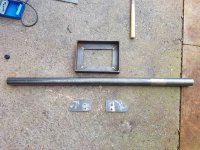
I pinched a bit of 6mm plate from a friend of mine that now does all my ali/stainless fab work and set to making the cardboard template for the end plates and a section of tube to weld between the two
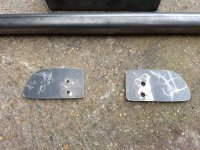
(This was a pic before i finished the plates and at this stage they were less than perfect)
I then set about making the battery tray from some offcuts that i got from a friend, this turned out to be massively overkill being 6mm angle but i wanted to make it mine so i got to it...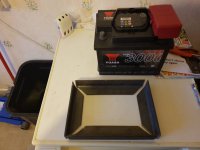
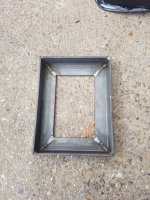
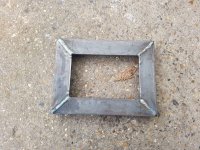
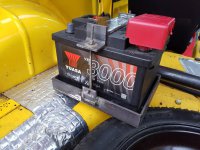
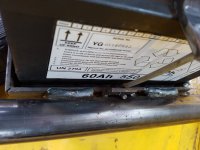
Again not perfect but i made it... hopefully itll look a little more presentable once its been powdercoated
And now the fun stuff... these arrived
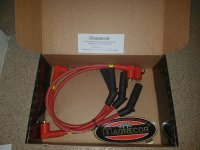
Along with a set of these...
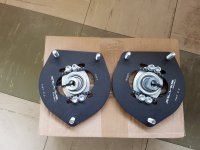
And... this..
Also today i got my turbo manifold back from the machine shop, a friend of mine welded it after i snapped it by bottoming out on a spirited drive... however as to be expected the flange was warped, its now back in my possession with a perfectly skimmed turbo flange...
So tomorrow i plan on making a start on the battery wiring, ive got the gauges to wire in and the aux fuse box to wire in (once ive found it)
This weekend i have a few bits to finish.....
Fit the sei pas rack with the new trackrod ends..
Fit new rear wheels bearings
Fit new rear shoes
Fit the wide band controller control unit
Fit the boost gauge sender
Swap out the leaky fuel tank for the new one
So watch this space... hopefully soon ill have the engine and gearbox home ready to go in..
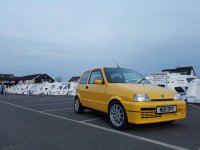
And heres a current pic of how its sat...
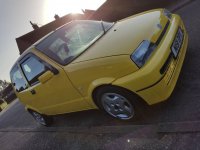
Cheers
Lee
The front shocks were totalled... so a set of temporary shocks were brought

i actually had a set of these on one of my previous centos and i was genuinely impressed at the time.. however these seem... sloppy.. meh.. theyll be replaced by the spax psx shocks in due course

A set of yokohama A539s in 175 50 13 popped up brand new on eBay for a bargain price so they were snapped up and stuffed in the corner ready to be fitted to the standard cinq wheels once ive finished messing with the tracking and an alighnment has all been sorted

So after umming and arrrrring about how i was going to relocate the battery i decided i was going to build a lower brace bar both because its something i wamted to try and also the perfect place to mount the battery tray...
So i got to it...
I pinched a bit of 6mm plate from a friend of mine that now does all my ali/stainless fab work and set to making the cardboard template for the end plates and a section of tube to weld between the two

(This was a pic before i finished the plates and at this stage they were less than perfect)
I then set about making the battery tray from some offcuts that i got from a friend, this turned out to be massively overkill being 6mm angle but i wanted to make it mine so i got to it...


Again not perfect but i made it... hopefully itll look a little more presentable once its been powdercoated
And now the fun stuff... these arrived

Along with a set of these...

And... this..

Also today i got my turbo manifold back from the machine shop, a friend of mine welded it after i snapped it by bottoming out on a spirited drive... however as to be expected the flange was warped, its now back in my possession with a perfectly skimmed turbo flange...
So tomorrow i plan on making a start on the battery wiring, ive got the gauges to wire in and the aux fuse box to wire in (once ive found it)
This weekend i have a few bits to finish.....
Fit the sei pas rack with the new trackrod ends..
Fit new rear wheels bearings
Fit new rear shoes
Fit the wide band controller control unit
Fit the boost gauge sender
Swap out the leaky fuel tank for the new one
So watch this space... hopefully soon ill have the engine and gearbox home ready to go in..

And heres a current pic of how its sat...

Cheers
Lee
So some of you may remember me mentioning ealier on in the thread about an unknown source of water getting in and soaking my drivers footwell.. there was some mention of the posibility of the battery tray being a possible cause... As i knew eventually id be binning the battery tray in the front and relocating the battery to the rear i figured id just leave it for now...
Well.. this weekend i finally got around to relocating the battery or more... removing the front battery and re wiring the ignition to run from the rear battery... so.. 6 spot welds drilled out and a short sharp tug of the tray and it was out...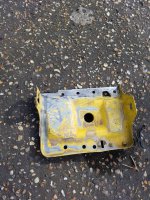
What i then found i wasnt ready for... it took maybe a 2 hour job of wiring in the ignition, starter and alternator to a full afternoon of repairs and welding... so... here it is..
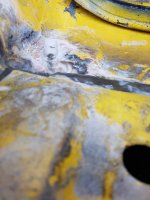
It turns out the battery tray was rotten... and there had been a previous 'repair' if you can call it that... basically someone had fasioned a bulge on the top of the bulk head from fibreglass filler... as with any fibreglass filler job thats covering rot turns out...
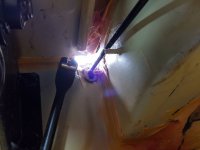
I could see outside from the inside... from somewhere i shouldbt have been able to...
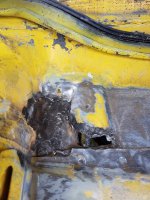
so yes... someone had buggered the entire job of repairing a bit of rot up.. by filling it full of poo... and underneath tgis was happening...
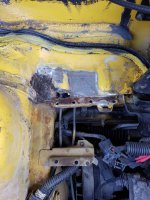
So i after removing the battery tray i then cut the fecker up to make a rough plate to cover said hole after attacking it all thoroughly with the wire brush on the drill... ill fire some cavity wax up from inside in the not so distant future but to cut a long story short.. its sorted for now... or atleast until i get the shell repainted
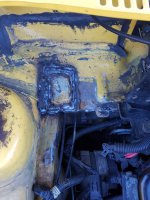
Its not pretty but itll do for now...
And then on to actually wiring the battery in.... a 190amp 3way splitter box was screwed to the bulkhead out of the way
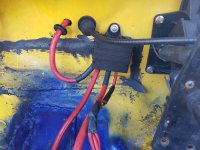
One wire was run through a gromit in the bulkhead to the rear battery one was ran to the alternator and one to the starter... the interior electrics were sorted by cutting up the old loom and terminating it so it could be plugged into the factory interior loom and a feed sent to the bullet connector that feeds power to the ecu...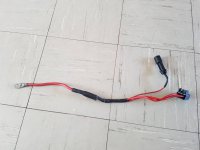
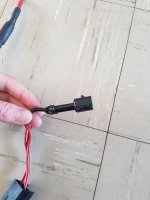
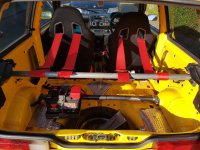
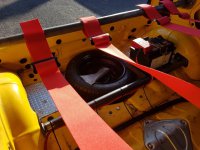
Then the battery was connected to the wiring via a renault megane +ve battery connector that has a inline fuse and two separate fuses that can be used at a later date for the fusebox i will use to power the gauges, their sendors and the innovate motorsport lc-02 wideband controller.. along with the power feed for the ecu map switch function and whatever else i so choose...
The battery was earthed via the lower brace bolt using the factory earth lead from the front..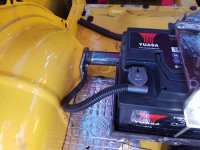
And although i didnt picture this i took the oppertunity to add an extra earth cable to the engine using the old earth boss that i removed the battery earth cable from.. you can never have too many earths right??
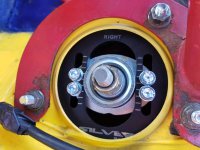
I also got the silver project camber adjustable top mounts fitted however i didnt take many pics as i was rushing to beat the lighting..
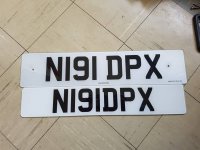
And i fitted my shorter front plate.. then i realised id not put a space between the first 3 numers and the last 3 letters... so ill be ordering another soon ??
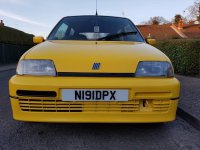
Oh and as some of you know... this happened recently...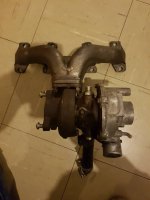 so the manifold is back from.the machine shop with a fresh skim... turbo is bolted back up and its almost ready to fit back together... i need to get the brake servo take off boss moved on the p75 inlet mani so it clears the bulkhead trim and then the engine should in theory be able to go into the bay...
This weeks jobs are fit the new driveshafts... fit new front wishbones and then fot the sei pas rack with new trackrods and rack ends... then hopefully on friday i can have the alighnment done and the new yokos fitted
How ots sat today...
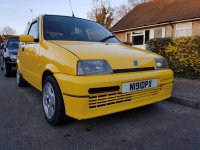
Cheers again guys and as always watch this space
Well.. this weekend i finally got around to relocating the battery or more... removing the front battery and re wiring the ignition to run from the rear battery... so.. 6 spot welds drilled out and a short sharp tug of the tray and it was out...

What i then found i wasnt ready for... it took maybe a 2 hour job of wiring in the ignition, starter and alternator to a full afternoon of repairs and welding... so... here it is..

It turns out the battery tray was rotten... and there had been a previous 'repair' if you can call it that... basically someone had fasioned a bulge on the top of the bulk head from fibreglass filler... as with any fibreglass filler job thats covering rot turns out...

I could see outside from the inside... from somewhere i shouldbt have been able to...

so yes... someone had buggered the entire job of repairing a bit of rot up.. by filling it full of poo... and underneath tgis was happening...

So i after removing the battery tray i then cut the fecker up to make a rough plate to cover said hole after attacking it all thoroughly with the wire brush on the drill... ill fire some cavity wax up from inside in the not so distant future but to cut a long story short.. its sorted for now... or atleast until i get the shell repainted

Its not pretty but itll do for now...
And then on to actually wiring the battery in.... a 190amp 3way splitter box was screwed to the bulkhead out of the way

One wire was run through a gromit in the bulkhead to the rear battery one was ran to the alternator and one to the starter... the interior electrics were sorted by cutting up the old loom and terminating it so it could be plugged into the factory interior loom and a feed sent to the bullet connector that feeds power to the ecu...


Then the battery was connected to the wiring via a renault megane +ve battery connector that has a inline fuse and two separate fuses that can be used at a later date for the fusebox i will use to power the gauges, their sendors and the innovate motorsport lc-02 wideband controller.. along with the power feed for the ecu map switch function and whatever else i so choose...
The battery was earthed via the lower brace bolt using the factory earth lead from the front..

And although i didnt picture this i took the oppertunity to add an extra earth cable to the engine using the old earth boss that i removed the battery earth cable from.. you can never have too many earths right??
I also got the silver project camber adjustable top mounts fitted however i didnt take many pics as i was rushing to beat the lighting..

And i fitted my shorter front plate.. then i realised id not put a space between the first 3 numers and the last 3 letters... so ill be ordering another soon ??

Oh and as some of you know... this happened recently...
 so the manifold is back from.the machine shop with a fresh skim... turbo is bolted back up and its almost ready to fit back together... i need to get the brake servo take off boss moved on the p75 inlet mani so it clears the bulkhead trim and then the engine should in theory be able to go into the bay...
 This weeks jobs are fit the new driveshafts... fit new front wishbones and then fot the sei pas rack with new trackrods and rack ends... then hopefully on friday i can have the alighnment done and the new yokos fitted
How ots sat today...

Cheers again guys and as always watch this space
Stefan Dieters
New member
- Joined
- Jul 30, 2015
- Messages
- 47
- Points
- 12
I know this is an old thread, but I was wondering what CR you are running this with?
Stefan Dieters
New member
- Joined
- Jul 30, 2015
- Messages
- 47
- Points
- 12
Alright. Ill asume he has the mk1 internals in there, but I will be running an entire mk2 bottom end which has a slightly higher CR then the mk1. What CR should I be aiming for? And how should I be able to calculate the CR? Because the p75 head I use hasnt been skimmed yet, meaning I could always skim some extra to up the CR to reach the ideal number.

