A simple guide to changing the LED's of the dash switches.
you will need solder, soldering iron, possibly a pair of scissors and patience.
2.5v 3mm LED's in any colour you prefer.
- Remove all the dash switches including the headlight switch. remembering where each one go's.
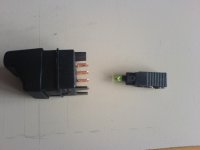
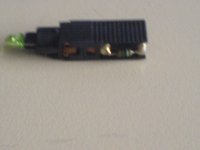
- on the push switches pull the bulb holder from the back of the switch.
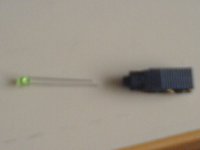
- pull the LED by the bulb and completely remove it noting the resistor on the bottom of the holder.
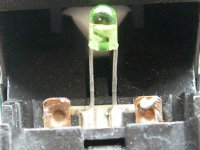
- with your new LED insert the legs into the guides. the longer of the LED legs go's with the resistor. THIS IS ESSENTIAL FOR THEM NOT TO BLOW.
- re-insert the holder into the switch. there should only be one way it will fit back in, but if not the resistor go's at the bottom.
- repeat for all push type switches and fit them back in the dash.
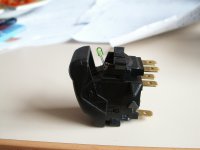
- with the headlight switch you will either need to de-solder or cut the existing LED out.
- you will also need to cut your new LED down to size but also make a note of which is the longer leg.
- the longer leg of the LED needs to be soldered to left contact(working from the behind the switch).
- finally solder the other leg and push the LED into the same position as the original.
BE CAREFUL NOT TO MELT THE PLASTIC OF THE SWITCH WHEN SOLDERING!
- re-fit into the dash and test.
the best LED's to use are diffuse ones as this lights the entire icon and doesnt concentrate the colour on one point.
Little Red Devil (L.R.D). Huge ice on its way. Not too far off 1242cc conversion. Still need a rear bumper. "its proper bo i tell thee!"
you will need solder, soldering iron, possibly a pair of scissors and patience.
2.5v 3mm LED's in any colour you prefer.
- Remove all the dash switches including the headlight switch. remembering where each one go's.
- on the push switches pull the bulb holder from the back of the switch.
- pull the LED by the bulb and completely remove it noting the resistor on the bottom of the holder.
- with your new LED insert the legs into the guides. the longer of the LED legs go's with the resistor. THIS IS ESSENTIAL FOR THEM NOT TO BLOW.
- re-insert the holder into the switch. there should only be one way it will fit back in, but if not the resistor go's at the bottom.
- repeat for all push type switches and fit them back in the dash.
- with the headlight switch you will either need to de-solder or cut the existing LED out.
- you will also need to cut your new LED down to size but also make a note of which is the longer leg.
- the longer leg of the LED needs to be soldered to left contact(working from the behind the switch).
- finally solder the other leg and push the LED into the same position as the original.
BE CAREFUL NOT TO MELT THE PLASTIC OF THE SWITCH WHEN SOLDERING!
- re-fit into the dash and test.
the best LED's to use are diffuse ones as this lights the entire icon and doesnt concentrate the colour on one point.
Little Red Devil (L.R.D). Huge ice on its way. Not too far off 1242cc conversion. Still need a rear bumper. "its proper bo i tell thee!"