2A8ED6C3-A719-4B50-AABE-7C6BEB07C16A.jpeg

Barchetta Lefty’s B - Progress Topic

Introduction

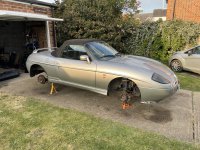
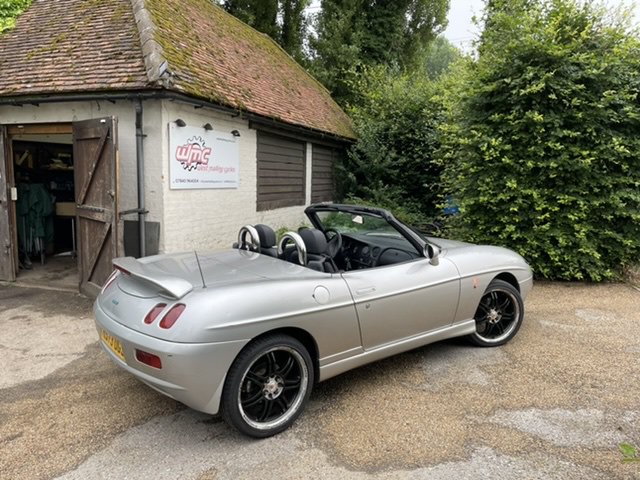
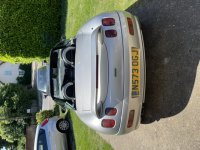
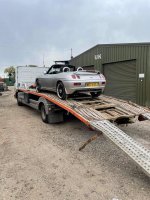
As most will have seen in my newbie post, I have inherited a Barchetta when my brother passed away earlier in the year.

The car has been in storage for 10 year and I now have it back at my house with an intention to get it running and street legal by the summer

First weekend of work was more investigative, but then went in to a bit of cleaning.

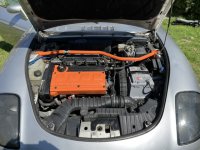
I took the spark plugs out and the engine turns freely :)

Generally, the rust is minimal and mainly surface rust

All brake pads would have been in serious need of replacement, even if it hadn’t been in storage.

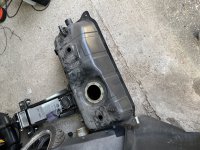
Fuel tank removed, about 1/2 gallon of fuel in it, but clean and no rust or debris.

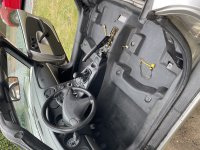
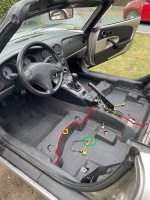
My 26 year old son wanted to help, so, as the passenger seat was out, he wanted to clean up the interior as it was in serious need of some tlc.

Parts ordered from local car spares shop (trying to help the local business where I can)

Timing belt kit including water pump and pulleys
Auxiliary belt
Rocker cover gasket set
Front discs and pads
Read discs and pads
Oil filter
Fuel filter
Spark plugs

Should all be with me during the week, so next weekend will be busy!
CC165F2D-57C2-42B1-B9A4-041839EBD257.jpeg
04221ADD-1E5C-4AD2-A739-1317C3C903BB.jpeg
B5EEBAC8-D86F-4FB7-9C62-99361E95E9C4.jpeg
D980F909-554B-4506-82F8-19E2C5AC4127.jpeg
5533D6F1-C230-41D5-9A65-5BF254AD1D8E.jpeg

This last picture is where I have a couple of suggestions.

Now you have the mats exposed you could think about making the cuts as shown in red.

This will allow the rear sections to be easily removed in the future for damp inspections, drying out etc. If done carefully the cuts are hidden by the seats except for the ends next to the fuel cut-off and the console. Even then with a clean cut you have to look hard and know they are there.

The hole where the wires come through the floor (green circle) is sealed up with a round black rubber patch and black silicon seal. (check wires will reach and allow seat movement - see next). This stops any water entering the rear footwell draining to under the mats.

The wires are routed to the yellow circle on the central rib. This keeps the connectors up off the floor where they are vulnerable to moisture/water. Often the cause of the dreaded airbag warning light!

While I did mine I also silicon/seam sealed the rear footwells off completely so any water getting in under the rear mats (99.9% of water ingress into a "B" can not migrate past the central cross member into the front of the car.

Just some suggestions.

It is never ideal to cut stuff but in my case I'm not the spring chicken I used to be and I wanted to make any future access work as easy as possible etc.

When you make the long red cut across then it is done on the vertical edge of the mat so that the part along the bulkhead overlaps / sit on top of the bottom part of the mat.
 

Attachments

  • mods.jpeg
    mods.jpeg
    3.2 MB · Views: 90
Last edited:
Thanks s130 that is an amazing bit of experience to pass on, I will look at that before I put it all back together.

Guess I need a new blade in my Stanley knife then!
 
Thanks s130 that is an amazing bit of experience to pass on, I will look at that before I put it all back together.

Guess I need a new blade in my Stanley knife then!

Well yes, new blade BUT I would always advocate "new thoughts and ideas".

I came up with my outlined solution to our "B" getting flooded after we replaced the original Fiat hood. The after market solutions (we have had two) are just not as good as Fiat's original.

I've also posted elsewhere how water, once it gets past hood to body/deck seals just runs/trickles in and migrates to the floor pan.

I've accepted that water ingress into the hood well area, and down the "B posts" and into the rear floor pan area is a fact of life. That given then easy inspection, mop up and dry out is my priority. I've even considered fully replacing the "B"s integral "one piece" flooring with a custom carpet easily maintainable (above and below) which will not hide damp issues etc. lurking below the threshold.

For now neatly splitting and sealing the front to back floor pan and floor liner sections (as much as I hate to do it) is working for me.

You may wish to dry out, clean up, etc. and leave everything as it currently is. At least you know how to get the seats out etc. so you can revisit in a years time (with full winter weather) and do a deep inspection for water ingress and damp.
 
My intention is to only bring the b out in good weather and keep it in my garage through the winter, so it may not be worth doing, but, in England, it could be sunny in the morning and serious rain in the afternoon

Will have a look at the weekend and then make a decision
 
If kept in garage, I would strongly advice against cutting the floor piece.
According to my own experience, water only becomes a problem when kept outside, or after parking in a long and heavy rain. Nothing will happen if you get caught by a random shower, or even after long drive in rain.
You can still check under the floor trim to be sure, just unscrew some screws on both sides and lift the floor, no need to remove seats.
 
I would concur with not cutting if you plan on being garaged. Our "B" has spent all it's life (16 years) outside and in a windy location. This last year we have put a top half cover on the car which is a vast improvement.

The other day it got well drenched and windswept, even lifting the cover off the wing mirror pocket!
 
I don't take mine out in the rain, or even when it looks like rain. Over the years I've had some pretty rapid journeys home when I've been out and about, and the rain clouds have started to threaten. The joys of owning a B!
 
Over the years I've had some pretty rapid journeys home when I've been out and about, and the rain clouds have started to threaten. The joys of owning a B!

Yes officer, I was trying to keep dry.

It is not your speed sir but your litter discarding.

?????

Is this your toupee / hat sir?
 
Toupee? Touché!

[That reminds me of one of my more embarrassing motoring moments.

I was driving down the legendary Highway 1 in California, along a stupendously dramatic stretch called the Big Sur, feeling oh-so-cool in my rented convertible, when my baseball cap flew off and hit a car coming in the opposite direction. The car was being driven, as it happens, by a very attractive woman. She screeched to a halt, and instead of high-tailing it out of there to spare my blushes any further, I reversed back to retrieve aforesaid cap, and to offer my apologies. The look she gave me haunts me still...

It was on that trip that I rediscovered the joys of driving a convertible, and it led me to buy my B, as a 50th birthday present to myself. I remember saying that I wanted to feel the wind in my hair again, while I still had hair to feel the wind in.

15 years on, I still have the B, and the cap. As for the hair... as the saying goes, hair today, gone tomorrow.]
 
Last edited:
C9549ADB-9F41-4D38-8673-6C93225EFD00.jpeg66FDA996-537D-4842-8044-7B015E0F93A8.jpeg4F7727F0-A4E0-4E21-9EA9-3E4C2EFDE72C.jpeg

Did some work today, couldn’t do the timing belt as the cam locking tool hasn’t arrived yet.

So, went to work on the brakes

First 3 went well, new discs and pads, compressed the calliper with the tool ok

It, the 4th one spoilt the day and I need some expert advice.

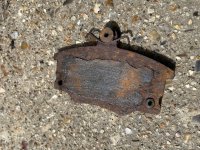
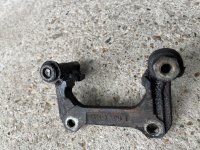
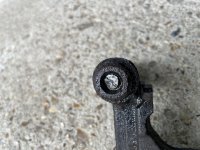
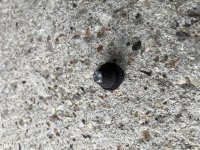
The bracket which holds the rear calliper has sprung fixings to balance the brake pads etc. One of these fixings was bent and seized stopping it from moving.

After loads of WD-40, brute force and ignorance, it broke leaving the piston part in the bracket (see pics)

Is this bracket available on its own, or is it part of a calliper?

Does anybody know the part number and description?
 
Back
Top