Technical Rust in the rear arch (pics)

Currently reading:
Technical Rust in the rear arch (pics)

andyrt200

New member
Joined
Jan 28, 2012
Messages
22
Points
6
Had a bit of a poke about in the rear passenger side arch, I could see the top box section looked to be going, but my finger went though here too!

IMG_1747.jpg

(looking at the front of the arch)


So got the screwdriver out:

IMG_1748.jpg

(n)


IMG_1749.jpg


As the the petrol filler pipes right behind there I don’t really want to go welding a patch over that. So seeing as the hole is not actually that much bigger than the rubber plug, I was thinking of cleaning the rust off & fibre glassing over the hole. I figure as there was a sizeable hole there anyway a slightly bigger one won’t hurt. What do you guys think?


Also I was thinking of using that hole by the petrol pipes to temporarily stuff some wet rags to block any sparks getting back down the box section in so I can weld up these holes:

Again the first holes were made with my fingers (this is looking to the top / rear of the arch):
IMG_1752.jpg


Then the screwdriver:
IMG_1754.jpg


This arch looked fine on a casual glance inside to start with!
 
Oh sorry that's odd was fine when I checked back after posting. Just checked back on a different PC & couldn't see them so logged in then they appeared :confused: - when I log in on my phone I still can't see them - may take a while to work this out!

Can you see this:
IMG_1747.jpg


Hmm I guess not as I cant see it on my phone.

how about this (sorry not B related!):
IMG_0180.JPG


I can see that on my phone so I'll try this new one:
IMG_1660.jpg


There's the B! hope you can see that ok...
 
Last edited:
Right lets try again, couldn't edit the first post - I guess as I'm new, I can now edit.

Had a bit of a poke about in the rear passenger side arch, I could see the top box section looked to be going, but my finger went though here too!

IMG_1747.jpg

(looking at the front of the arch)


So got the screwdriver out:

IMG_1748.jpg

(n)


IMG_1749.jpg


As the the petrol filler pipes right behind there I don’t really want to go welding a patch over that. So seeing as the hole is not actually that much bigger than the rubber plug, I was thinking of cleaning the rust off & fibre glassing over the hole. I figure as there was a sizeable hole there anyway a slightly bigger one won’t hurt. What do you guys think?


Also I was thinking of using that hole by the petrol pipes to temporarily stuff some wet rags to block any sparks getting back down the box section in so I can weld up these holes:

Again the first holes were made with my fingers (this is looking to the top / rear of the arch):
IMG_1752.jpg


Then the screwdriver:
IMG_1753.jpg


This arch looked fine on a casual glance inside to start with!
 
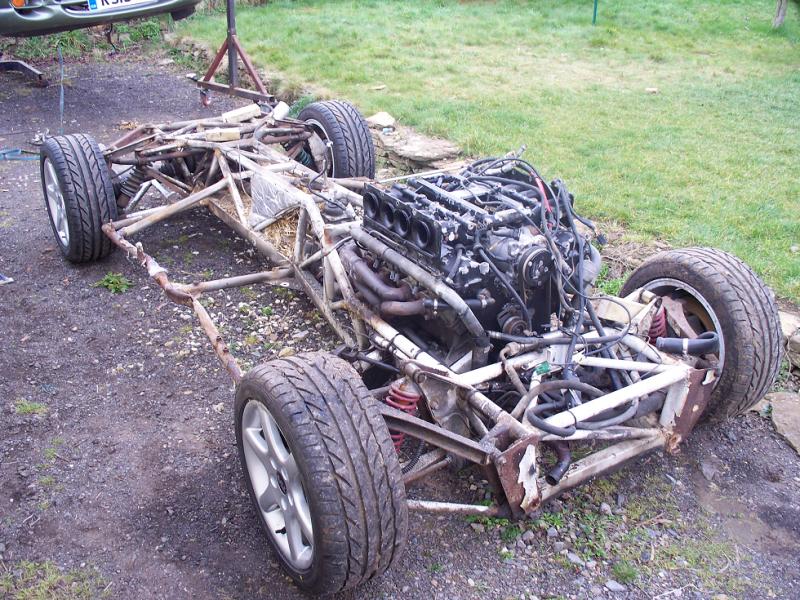
Cant help with the rust, but what is the photo of the rolling chassis , Looks quite interesting? :)

It's off my TVR Cerbera, it was about as rusty as the B is when I started working on it. Silly thing is it when it's on the road it costs about 30% less to insure than the B, but has some 400BHP & not a single driver aid - go figure!
 
Looks like you will need a complete innen wheel arch to replace the original with.
Nothing you would wel on would stop the rust mate.

It's too far gone to patch it up. Try removing as much as underbodycoating around those holes with an axle grinder untill you see bare not oxidated metal.


Have luck with it, it's a F***ed place to work on.
If you need to get access to the other side you will need to remove the panel behind the back seats.

Btw great rolling frame. look the dogs
I can see what work you had.
Looks like the b is a bit more rust proof

252733d1284016500-tvr-cerbera-ls1-t56-cerb4.jpg
 
Last edited:
DTR told me panels are very hard, if not impossible to get these days. I have no problem making some repair plates & welding them in though so that's fine. I have scraped the underseal back till I got to good clean metal, I always cut all the rust out before welding in any new metal, unlike the "pro" garage I did some work experience in once! Should have said that rather than 'I'll weld it up' ;)

Is the fuel tank easy to take out once that panel is out? That may be the best thing do, but then I'll probably find a leak on refitting it...

My TVR chassis looked very much like that on, quite a bit of welding & fabrication needed there.
 
The fuel tank is not that hard to get out once the plate is out. Four bolts I think, a few ties and it slides out.
 
The fuel tank is not that hard to get out once the plate is out. Four bolts I think, a few ties and it slides out.

Thanks for that, in the end I spent half a day poking about in the arch, trying to decide if I should use fibre glass or not, deciding it wasn't such a good idea I then spent half an hour getting that panel out - wish I'd realised just how easy the panel was to get out to start with! (Didn’t even have to take the seats out)

Once I'd got the panel out it became apparent the fuel tank it is in a separate compartment inside the car, so I removed the plastic filler neck from the inner wing (it was the welding right next to that I didn't want to do) then reattached it to the tank in side the car to re-seal the tank. Then I covered up the hole the filler neck came in to the car though, so the tank & filler were totally separated from the work area:

IMG_1807.jpg


Then I could get the power tools out with confidence to cut the rot out, staring in the boot:

IMG_1799.jpg


IMG_1800.jpg


Looking forward in the arch:
IMG_1806.jpg


To the rear:
IMG_1801.jpg


Close up of the top:
IMG_1802.jpg

I will cut all the rust out, but I need to weld something back in before cutting any more out!


I found the reason for the rust, it wasn’t obvious at first, but now I’ve cleaned it up a bit it’s clear to see there was no stone chip coating on the side of the box section (above) in the top of the wing, just the factory primer - no wonder they rust there. It starts in the unprotected area then gets under the stone chip coating & eats away under it, totally unseen. It is hard enough to get in to take a pic of that area, never mind spray stone chip on, so I can see how it was missed. DTR told me they all go there so I'd advice you to get under your arch now & hope the rust is still at a stage you can just paint something over!
 
Had to weld in the corner bit before cutting this last bit of rust out:
IMG_1815.jpg


IMG_1816.jpg


IMG_1823.jpg


Welding is a bit rubbish, it's always hard upside down, but mainly because I couldn't get my head in with the mask on to see what I was doing so it was mostly by guess work! Got some lovely big holes in my arms from the molten steal dripping down on to them too...


Had to cut out that end plate as the seams were full of rust.
IMG_1818.jpg


Welded it back with out any of the nasty water trapping overlapping seams:
IMG_1819.jpg


Looks better with a bit of primer & seam sealer on it:
IMG_1828.jpg


IMG_1826.jpg


Just needs a coat of rubberised stone chip making sure to cover the areas that the factory didn't, then on to the other side. I may actually get to drive the B one day!
 
Wow! Looks like you had your work Cut Out! :)
but seems youve made a good job of the work. (y)

Will have to have a good look under my arches too now..

Dont get her out in the rain but always have a good spray under the arches with the pressure washer.
 
Wow! Looks like you had your work Cut Out! :)
but seems youve made a good job of the work. (y)

Will have to have a good look under my arches too now..

Dont get her out in the rain but always have a good spray under the arches with the pressure washer.

I sure did ;)

The joys of a B that has been used all year round on the UKs salty roads. I know the guy who had it before, it was his only car he used it most days since he got it in 2001. If yours is a fair weather car it should be better, but I'm sure some extra protection wouldn't hurt...
 
A new baby stopped play in the garage for a while, but I’ve managed to get back out a bit so here are some more pics.

I slipped with the air chisel when cutting out all that rust & dented the outer wing, so had to give it a bit of paint there, luckily (?!) there was already a dent there before hand so I wasn’t too upset as it gave me an excuse to fix that too:

IMG_2004.jpg


Looks ok now:

IMG_2018.jpg


Top looks ok too, but those pics will be later.


It was very nice to take it out of the garage with the roof down in the sun for the first time, for all of 2 minutes while I turned it round…


So on to the other side. When I first looked the car over I thought this was the extent of the rust problems at the lower part of the front of the arch:

IMG_2029.jpg


At a glance it looked ok inside the arch, with just the lip being a little crusty:

IMG_2027.jpg


IMG_2028.jpg


But I’d learnt from the other side so wasn’t too surprised to find this after a go with the wire brush on the grinder:

IMG_2033.jpg


Note for anyone wanting to do the same: There is carbon canister or fuel swirl pot, what ever that little can with the petrol pipes going in & out is, that is in side the inner wing there, you'll see it once the hole is this big! It can just be unbolted & pulled back inside the car (once the panel behind the seats is removed) with all the flexible pipes still attached so it’s well out of the way for welding & grinding. Also the hole it came in though needs blocking off, the same as I did for the other side. I'd already done that when I took this pic.


What I wasn’t expecting was this:

IMG_2034.jpg


IMG_2037.jpg


(n) :bang:


It’s the same story as the other side, when they sprayed the original stone chip on they didn’t / couldn’t cover the outer faces of the arch, so it was just left in primer. The other side just had surface rust in this area, I was hoping it would be the same on this side….
At least this side doesn’t have the same reverse box section at the top, where they didn’t / couldn’t spray the stone chip, so it’s ok up in the very top.

So on with the cutting & making up new panels.


On a totally different note a friend came over & was interested to see what I’d been doing, turns out she loves the B so much (even in this state) that she really wants to buy if off me. She said she really wanted one when they were new, I didn’t pay much for it so though I may have been a bit cheeky telling her as a friend she could have it for £2,500. But that was what I thought it was worth if I was selling it to anyone else. Only I’ve just seen that link to the Sunday times article, arse! At least I can tell her she is getting a good deal now. She was very interested to hear about the days out you lot have, so if she does buy it I’ll send her this way!
 
It's scary to even think about looking:eek: You're doing an amazing job though. What is the damage to the outside of the wing?

Steve

Thanks :) The damage was caused when I was cutting out the rusty parts from the very top of the passenger side inner wing (is it still the OS with left hand drive:confused: I guess so for us in the UK) there is no room for a cutting disk, so it had to be an air chisel, but it slipped as it cut through the last bit & the outer wing is very close to the inner wing there, it put a small outwards dent in it that broke the paint, it knocked back with a hammer & dolly fine, but needed paint.
The metallic pupple / black of the Riviera is a very nice colour, it’s odd when spraying it comes out of the gun purple, but goes down looking black. It still needs a cutting polish as I broke my good gun & had to use the old one so the finish isn’t too great:

IMG_2054.jpg


Back to the drivers side.

I did cut the rust out before fitting this large repair:

IMG_2055.jpg


Must remember to cut a hole for the drain before painting it!


Cut the rust from the rear of the arch, the spot welds from what was left of the inner arch on the lip made a bit of a mess of the outer arch when I removed them:

IMG_2059.jpg


But all welded up ok:

IMG_2064.jpg


With all the inner arch fixed I moved back to the closing plate on the end of the sill reinforcing box section, chopping it out like the other side, so I can re-weld it back less the rusty bits:

IMG_2062.jpg


At least the factory rust protection inside those very important re-enforcing parts of the car is standing up very well on both sides. Actaully there is very little rust anywhere else on the car, it's just a shame there are these rust traps & missed protection areas in the rear arches :(


Getting there, just hope I can remember how to put the interior back together when I'm done…
 
Last edited:
Back
Top