Aug27_front_L.jpg

900 900t Restoration (Connie)

Introduction

Hi

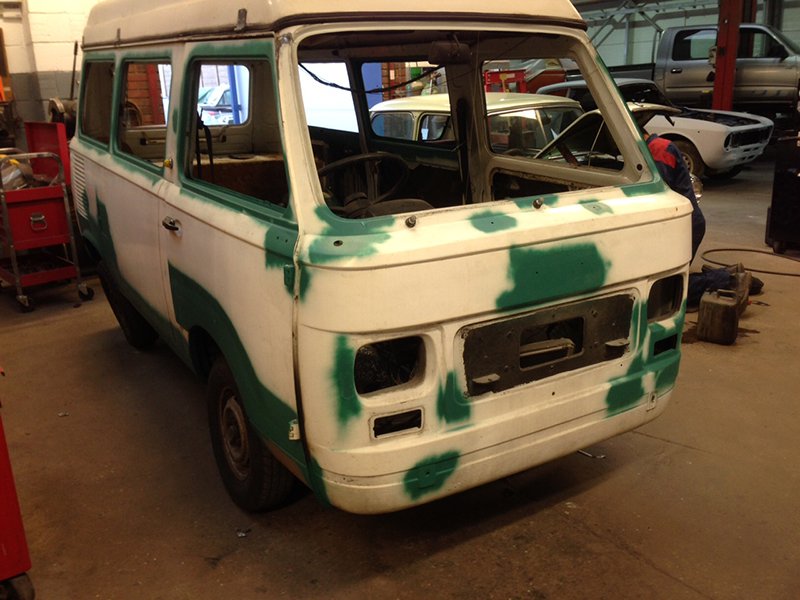
After having our 900T Amigo camper (Connie) for the last 14 years (off road for the last 10) we now have the time to work on the restoration.

Luckily for a 1978 Fiat she is surprisingly good condition, thanks largely to the Ziebart rustproofing.

Current status:

- Interior stripped, salvaged sink & cooker but rest was rotten.
- near side sill removed (practically fell off due to previous botched repair - pop-riveted on).
- Engine and gearbox out, largely out of necessity as rear wishbones had turned to paper. Local engineering firm laser cut the spring seats and rebuilt the damper mountings - now back on 4 wheels.
- Various panels sources many thanks to Ricambio.

Will be off to the welders in a couple of weeks to have all the welding done and generally made structurally sound (not much welding really).

Once back she will be stripped back to bare metal, rust-proofed and resprayed. Not sure what colour yet, probably stick to the original white.

I'll add some pic's to chart the progress soon.

I've posted a separate thread about how to upgrade the suicide brakes and would appreciate any suggestions.

Cheers
I was dubious of the 123 which I fitted to the 500 and used to take the spare distributor with me. But after more than 20,000 miles I now know that they're very reliable and make a big difference to the the smooth running of the car.

Hi Peter
Further to your comment on running/kerbside repairs. After 20,000 miles has there been any visible wear & tear on the 123? For example with the rota arm and distributor cap?

If yes have you needed to replace them?

(Just thinking about what to keep on hand in the spares cupboard.)
 
Hi Peter
Further to your comment on running/kerbside repairs. After 20,000 miles has there been any visible wear & tear on the 123? For example with the rota arm and distributor cap?

If yes have you needed to replace them?

(Just thinking about what to keep on hand in the spares cupboard.)
After all those miles I wondered that but there's no indication of any wear and year.[emoji16]
 
I've just been re-reading up on how to adjust the brakes - if I've read it correctly you have to adjust the top 'snail cam' first and then the bottom cam (this also holds the bottom of the brake shoe in place).

For some reason I was previously told that you only needed to adjust the bottom cam - probably explains why the brakes were never that great (although they used to pass the MOT).

I haven't tried the 'Haynes' method yet but hopefully this should improve the brakes - especially to stop the 'snatching' that used to occur from time to time (nearly ended up in a hedge once).

On my 900T I have the manual brake adjusters with aluminium shoes - £150 a set. Am I correct in thinking that the steel shoes (around £20 a set) are for the automatically adjusting versions?

If correct does anyone know if its an easy swap over to the auto-adjusters? And if the parts are readily available? The Haynes manual notes that you have to take the adjusters off the old shoes and transfer them to the new shoes.

I'm assuming that I'll need new back plates but hope that the existing drums will fit?
 
On a different subject...
When you fit an new exhaust/exhaust manifold and heat wrap, how long does it take for them to stop smoking?

They are somewhat smoky but not exhaust fumes - at least don't smell like exhaust. But they are filling the engine bay :(
 
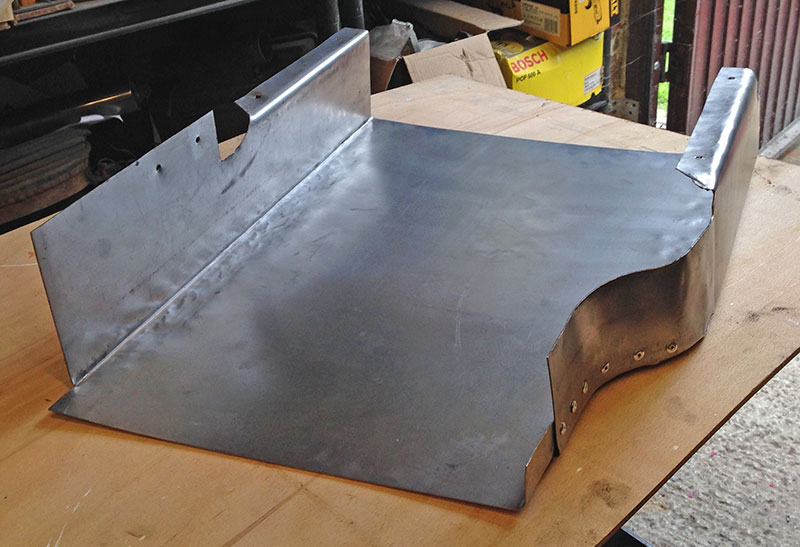
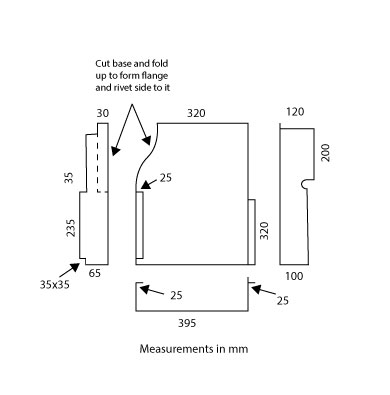
I've now fabricated and fitted the ducting to fit underneath the radiator outlet. The ducting starts just before the outlet, the theory being that when moving forward this will create a low pressure area toward the back and help pull the hot air out - helping to take the strain off the electric fan.

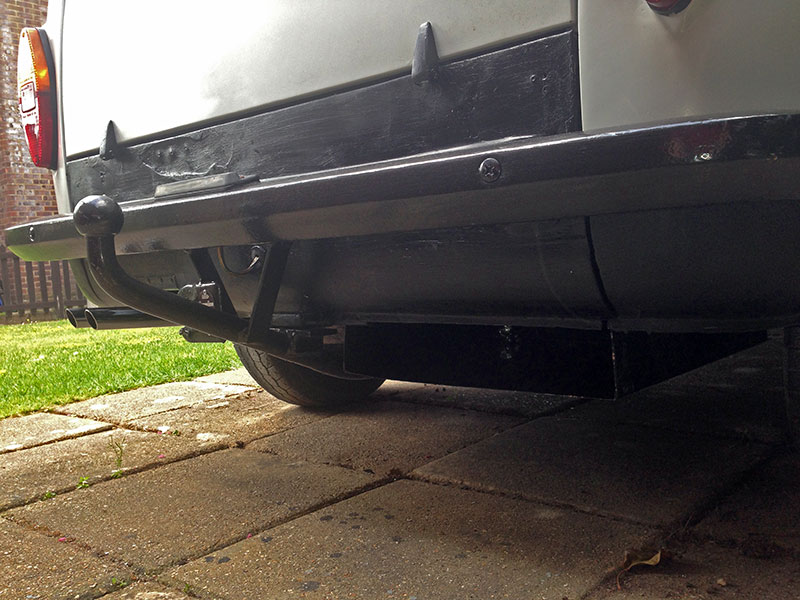
The ducting extends to the rear so the the hot air is dumped beyond the back of the van. This stops the hot air coming back into the engine bay. I've tested this on the driveway and this seems to work really well.

Here a few pic's and dimensions.

UnderTray1.jpg

UnderTray2.jpg

UnderTray.jpg
 
I've now fabricated and fitted the ducting to fit underneath the radiator outlet.

That's brilliant Gary; I assume this is all below the undertray? I'm about to make my version of the tray components and I'll consider an adaptation like that.(y)

You'll have answered your own question about how long before the exhaust stops smoking by now?
 
Last edited:
That's brilliant Gary; I assume this is all below the undertray? I'm about to make my version of the tray components and I'll consider an adaptation like that.(y)

You'll have answered your own question about how long before the exhaust stops smoking by now?
I made up a new under tray as the old one had been patched up several times. As I didn't have to worry about the fan cowling the new under tray is basically flat with a slight kink to dip under the radiator. I added a short piece of rubber strip to form a seal between the new under tray and radiator.

The new ducting fits under this to make a box section/ducting. The photo is a bit dark but you can see the ducting to the right of the tow bar - (picked the tow bar up on Ebay last year). Ground clearance is almost the same as just the normal radiator outlet. Unless you are familiar with the vans I doubt anyone would notice the ducting.

The exhaust is still smoking, I've managed to work out that it's the silencer paint that is still burning off creating the smoke - you can see the twin pipes in the pic.
 
I've found the source of my electrical woes - badly corroded fusebox :(

As a quick test I bypassed the fuses to check the instruments worked etc. - all appears okay.

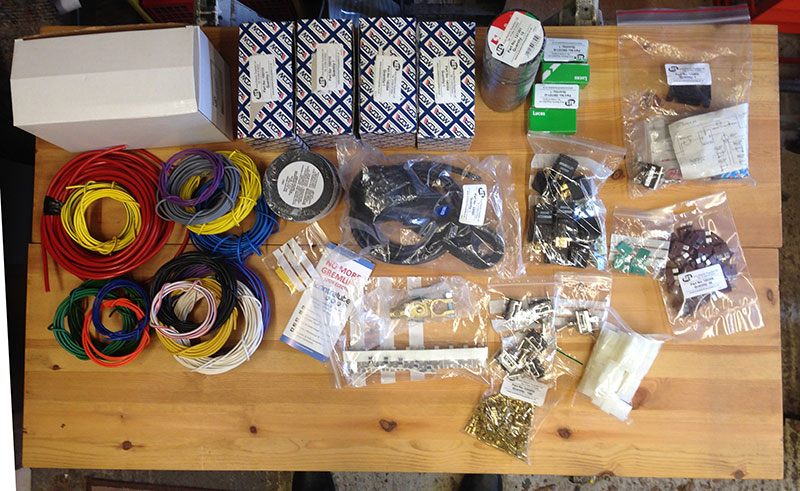
I inherited a mess of after-market wiring (hazard lights, rear demister, fog lights, etc.) so this is a good opportunity to tidy everything up into a single fusebox. I've found a modular system that should do the job - on order. I'll post photo's when installed.

I'm also replacing all the add-on switches at the same time so they all match (rather than the dogs breakfast I used to have). Hopefully, I should have a nice tidy dashboard when finished.
 
I've been doing a bit of tinkering with the electrics today (I'll share photos when I've progressed a little further). I also fired Connie up today for the first time in a few weeks (see notes on electronic ignition thread).

One area of concern is that there is a strong smell of petrol inside the van above the fuel tank. This only happens when the engine has been running for a little while.

I can't locate any leaks from the fuel lines however, the only way to get to the ones that go into the the fuel tank is to drop the tank - not a job that I'm looking forward to as a real pain. Especially if there is no leak and the time is wasted looking for a non-existent problem.

Anyone else come across a similar problem?
And if yes, was there a simple solution?
 
I've turned my attention to some of the smaller (and more irritating) jobs. These are quite time consuming relative to the outcome but are necessary. High on the list are the windows - the windscreen was refitted not long after the respray (with a new seal) but fitting the side windows are long over due.

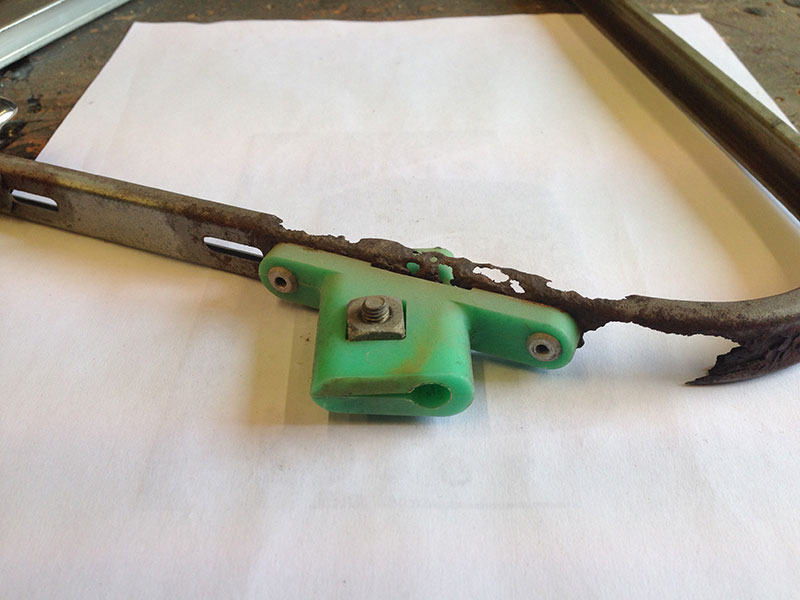
The drivers side quarter light frame was badly rusted at the bottom around the bracket for the quarter light glass but generally sound.

Qtr1.jpg


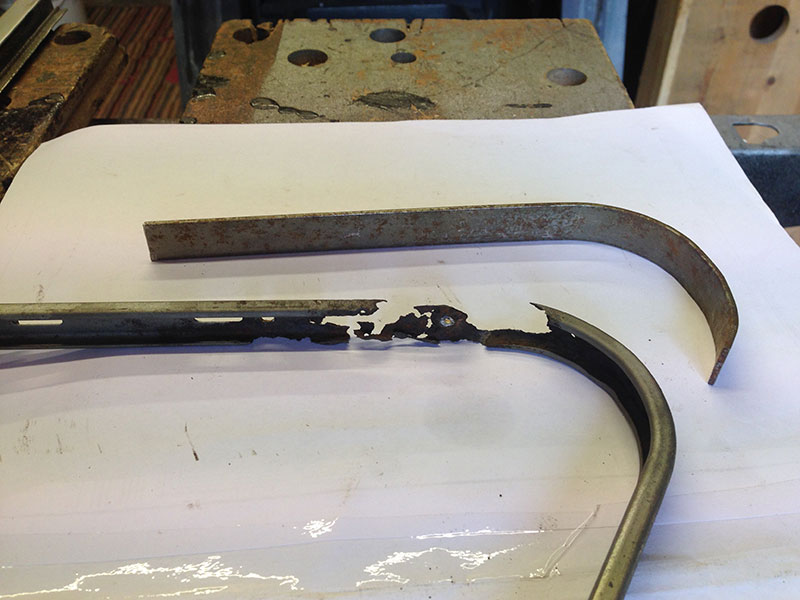
As you won't see this once the new rubber seals are fitted I opted for simplicity - pop-rivets (my welding skills are rubbish).

Qtr2.jpg


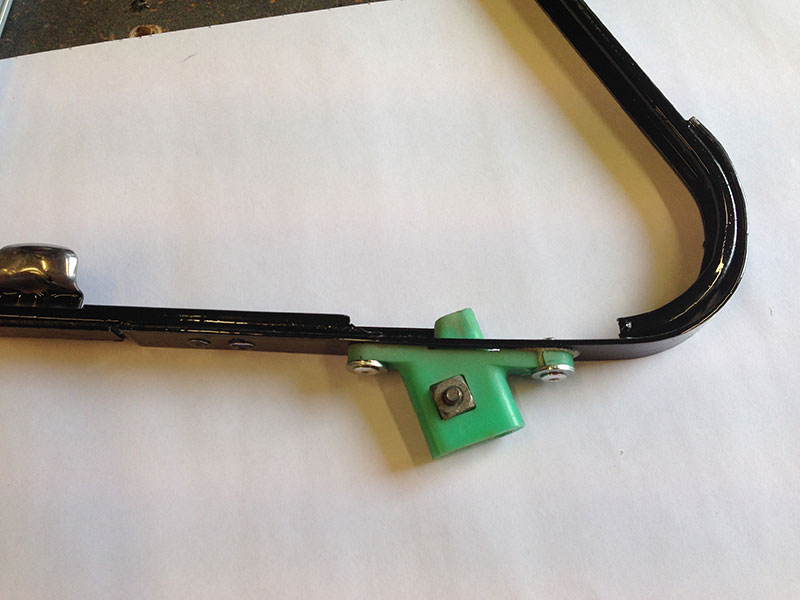
The old & new metal was cleaned up (sandblasted) and painted with POR15 prior to riveting together - so future rust shouldn't be a problem.

Qtr3.jpg


The bottom bracket was quite brittle so I used a couple of washers to even out the pressure from the new pop-rivets (and a dab of Gorilla glue to stick the broken bit back).

The rubber seals are proving quite fiddly to fit - I'll add photo's later once fitted and back in the van.

In the meantime I'm experimenting with how to bond the metal hinges to the glass quarter lights. These have been glued several times in the past but haven't lasted - luckily I managed to catch the glass as it fell out.

Gorilla glue seems pretty good, albeit somewhat messy if you use to much. However, I've come across some waterproof double-sided tape that looks very promising. If it works it should make fitting the glass much easier as it provides instant bonding.

I've taken a template of the quarter light glass - just in case. If they do fall out again I think I'll go for 5mm perspex, as this is easy to drill and can be screwed to the hinges (assuming these don't get lost).
 
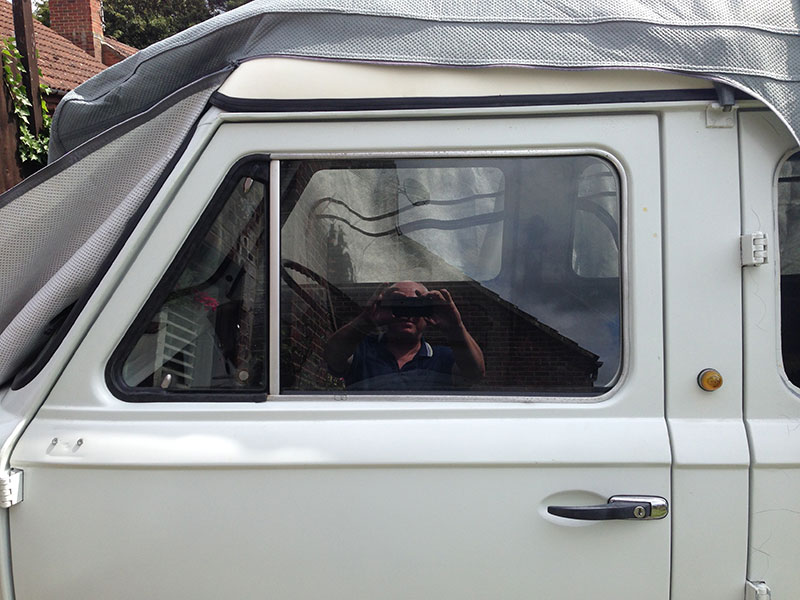
After much trial and error the passenger door windows are back in.

NSWindowsBackIn.jpg


You have to put the 'winder' window in before fitting the quarter light assembly and then you have about 2mm clearance to squeeze the assembly in. I tried the fitting before gluing the quarter light glass in place and opted to fit the glass last - makes it much easier to fit the rubber seals etc.

I've used double sided water proof tape to secure the quarter light glass, which made it easy to fit as no clamping required. However, the tape seems a little flexible at the moment so I'm not sure how long it will last (Hopefully it will harden once fully cured).

Although I've used new quarter light rubber seals the fit isn't great as there are still quite a few gaps - some black mastic will be needed to stop water getting in.
 
I've turned my attention to upgrading the front drum brakes to discs.
Some time (a few years) ago I bought a set of disc assemblies (including stub axles) of Ebay. The seller claimed they came from a 850 Spider but I have no way of verifying this or know how old they are.

Most parts seem to be easy to obtain e.g. the discs are standard 227mm diameter versions.

However, the callipers are a little more problematic, part numbers are 4169090 and 4169091 (n/s and o/s). Assuming that I can free the pistons one of the piston and seal service kits may suffice.

They are seized solid so I don't hold out much hope. In this case does anyone know where I can find replacements or an alternative? (the usual suspects, Ebay, etc.) haven't thrown anything up.

Thanks in advance.
 
Hi Peter
Thanks for the additional part numbers but like you they didn't throw up anything in a search. I have found an O/S calliper on Ebay but it isn't cheap and of little use without the matching one to make the pair.

Also before shelling out the money I need to check that the brake pads are easy to obtain - pads for standard 850/900 callipers are around the £20 mark and are in reasonable supply. I don't want to go to the time and expense of replacing/restoring the callipers only to find that the brake pads are silly money or not available - reconditioned aluminium shoes for the 900T are pushing the £150 mark :( (the later steel self-adjusting versions are sub £20 for a set).

Once I've resolved the front brakes I want to convert the rear ones to self-adjusting versions for ease of maintenance and cost of shoes. Has anyone done this before and if so what parts are needed - I doubt that it's a simple case of swapping the aluminium shoes for the steel versions.
 
:bang: :bang: :bang: :bang: :bang:

850 stub axles/steering knuckles are incompatible with 850T/900T/E

:bang: :bang: :bang: :bang: :bang:

The stub axles from the donor are totally seized so rather than spend time trying to free them I thought I'd see if I could just swap the back plates over to Connie.

I expected to do a bit of fettling to make them fit but they are totally miss-matched and not a chance of them fitting. :cry:

Back to searching Ebay in the hope that a set of discs from a 900E turn up. There have been a few in the last couple of years but I passed these over as I thought I had a set to swap over :mad:
 
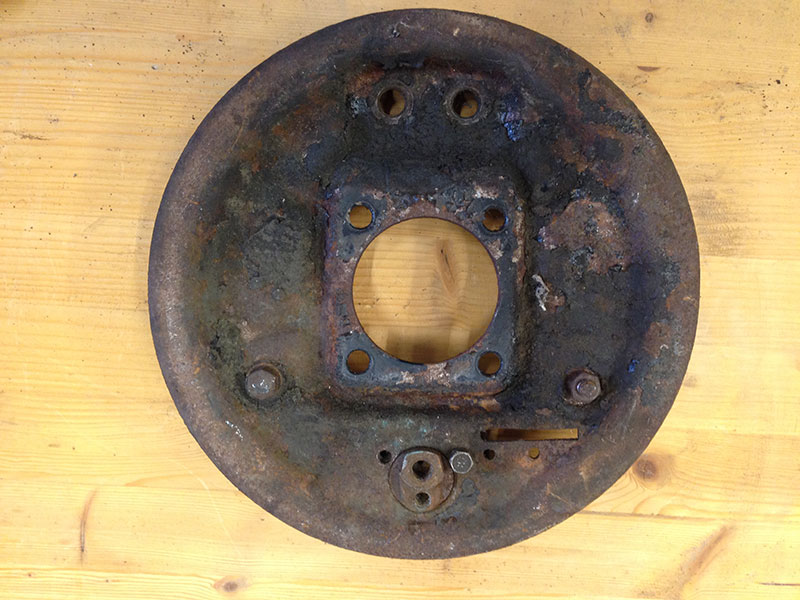
This is an old drum backplate (kept for possible spares), this is a rear one but the front is pretty similar.

Rear-Drum-Backplate.jpg


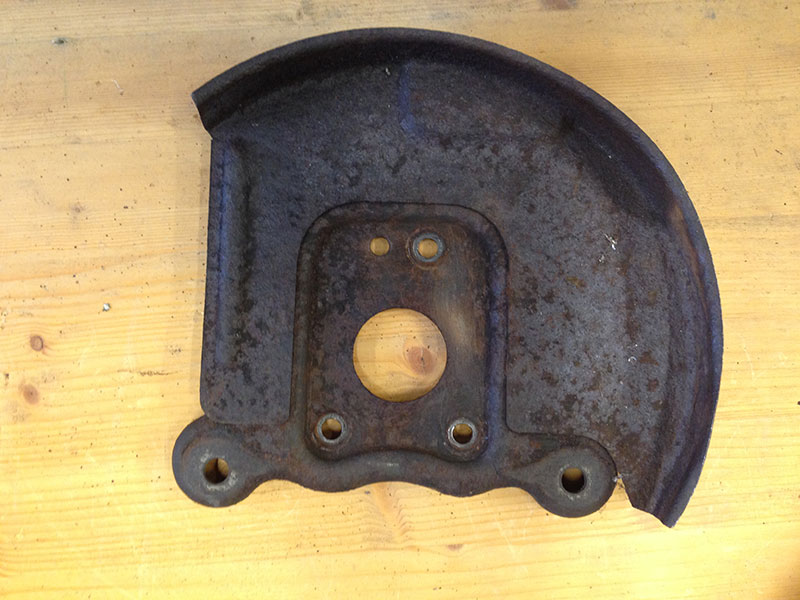
The backplate for the front discs is:

Front-Disc-Backplate.jpg


In addition to the mounting hole positions being different the centre hole of the disc backplate is significantly smaller.

The hub bits (not sure of the proper name) are different sizes, with the disc version being smaller to allow the disc to fit over it. (the wheel bolt patterns are the same.)

As the wheel bearings for the 850 and 850T/900T are different I'm assuming that the spindle size will be different and therefore not interchangeable.

The different stub axles/steering knuckles are shown on the Ricambio website.

850: https://www.ricambio.co.uk/set-of-stub-axles-steering-knuckles-fiat-850

850T/900T: https://www.ricambio.co.uk/stub-axles-steering-knuckles-fiat-850t-900t-e-multipla

And you can see, it doesn't look like any of the parts are interchangeable.

Looks like if I want to carry out a disc brake upgrade I'll have to look out for 900E parts - hopefully I can get the self-adjusting rear drums as well.

If anyone knows of where I could find any of these I would be very interested.
 
Excellent, thanks.

Looking at your top picture of the backplate with the 4 equally spaced holes looks very like a Cinq/Sei backplate.

There are caliper plates available for putting discs on the rear of a Cinq/sei. They accept a number of Fiat Calipers and use Cinq/Sei front discs, which will fit under 13 inch wheels.

Might be a line of enquiry.

Bear in mind that putting calipers on will require a different master cylinder.

Cheers

D
 
Back
Top