Aug27_front_L.jpg

900 900t Restoration (Connie)

Introduction

Hi

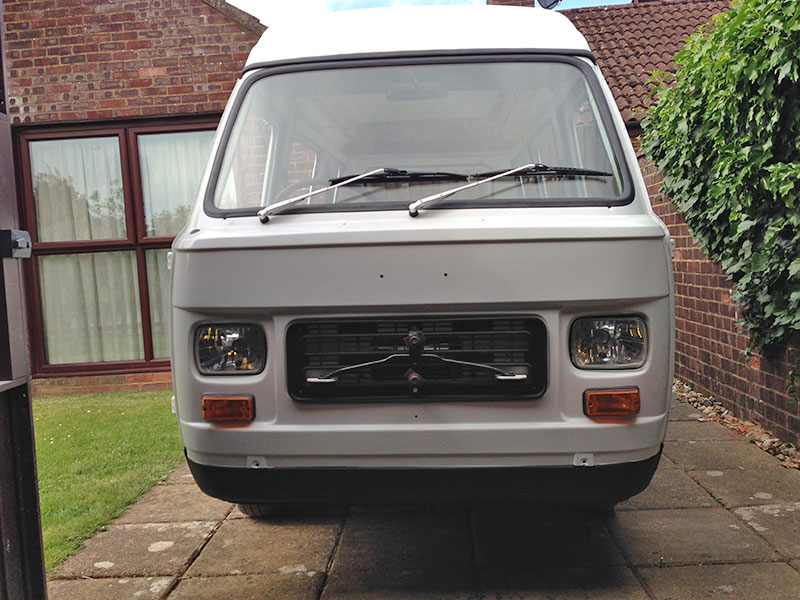
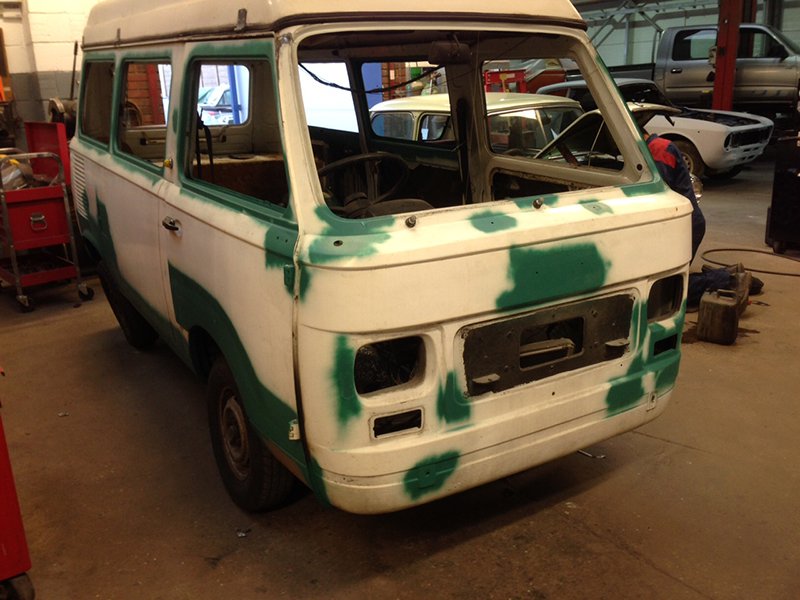
After having our 900T Amigo camper (Connie) for the last 14 years (off road for the last 10) we now have the time to work on the restoration.

Luckily for a 1978 Fiat she is surprisingly good condition, thanks largely to the Ziebart rustproofing.

Current status:

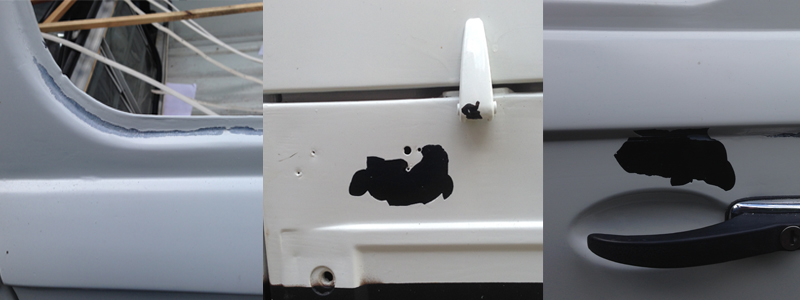
- Interior stripped, salvaged sink & cooker but rest was rotten.
- near side sill removed (practically fell off due to previous botched repair - pop-riveted on).
- Engine and gearbox out, largely out of necessity as rear wishbones had turned to paper. Local engineering firm laser cut the spring seats and rebuilt the damper mountings - now back on 4 wheels.
- Various panels sources many thanks to Ricambio.

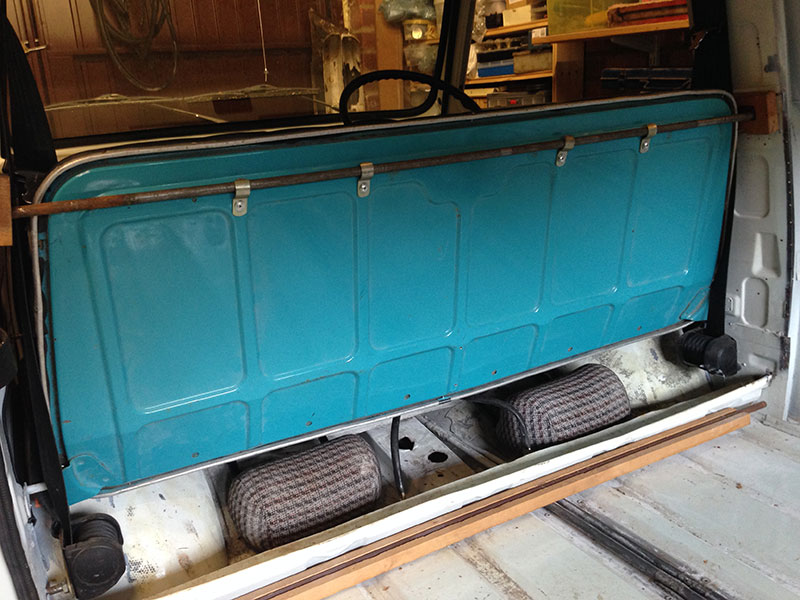
Will be off to the welders in a couple of weeks to have all the welding done and generally made structurally sound (not much welding really).

Once back she will be stripped back to bare metal, rust-proofed and resprayed. Not sure what colour yet, probably stick to the original white.

I'll add some pic's to chart the progress soon.

I've posted a separate thread about how to upgrade the suicide brakes and would appreciate any suggestions.

Cheers
....even more jealous:)
I will be getting a move on tomorrow.:D

It all looks very straight and lined-up in a way that my van never will. I even notice details like the little slots each side of the front windsreen where I have had to weld in new metal and will never have them again; presumably meant to let water drain out of the seal.
You've been a very busy boy.(y)
 
I forgot to mention...

I've put so much paint on that the holes are much smaller now and I've had a few cracks & splinters putting bits back :-( Fortunately not through to the rust proofing and the bits cover the cracked paint.

I've now taken to lightly using a file to remove the excess paint and make the holes the right size.
 
Long time no post... taking a leaf out of Peter's (Bluebell restoration) book with an end of year update.

Since my last post in June the only significant progress is to put the roof back on and fit new door weather seals etc. The new roof gutter seal is a slightly different profile to the original and leaves a slight gap between the seal and the gutter channel. My hope is that this will allow the gutters to dry properly rather than lock the moisture in (to cause the rust).

I've refitted a few odd bits - mainly as I find them in my garage (I really should have made a list of where I put everything when I stripped the van).

My next planned activity is to make Connie watertight - refit the remaining windows (with new seals). I've also obtained new seals for the quarter lights - I just need to find the metal hinges, as I put them somewhere safe when the fell off the glass.

Once watertight I can leave Connie outside (under a cover) to free up garage space while I work on the engine & gearbox etc.

Mechanically the only part that I know I need to get is a new clutch - these appear to be readily available. Hopefully, it will then be a case of a clean down and reassemble. I've decided not to rebuild the engine at this point as it was running fine before I took it out and freely turns over by hand. If it isn't broke don't fix it - sod's law means that you will end up finding something that you could have happily lived without knowing about.

Altogether I estimate about 6 weeks of work to get Connie ready for the road and MOT - spread out over several weekends and a week or two holiday. Once MOT'ed I can get on with the internal refit... that's what I'm really looking forward to.

I hope to introduce Connie to a few of her siblings in person in 2017.

Bye for now.
 
Great progress Gary.
Your forward plans sound good.
It's very sensible to get to the MOT ASAP, without worrying about internals or major engine and gearbox stripdowns. I hope to do the same as the propulsion department on Bluebell seems good, however I will be a year or two behind you.:bang:
I'm going to get cracking next week.
 
Hi All

I'm finally getting around to restarting Connie's restoration... almost a year since I've done anything substantial. Combination of project fatigue, work and life in general.

I'm now faced with boxes of bits where the labels have fell off/faded - a bit like piecing together a jigsaw without the picture to go on. I'm now working on the principle of working from the garage and shed and putting things back on Connie as I find them (clearing a section at a time) - rather than trying to find specific bits to put back on. A bit higgledy-piggledy but at least I can move the project forward again.

One extra job I wasn't expecting/planning on was to repair some of the paintwork.
As you can see from the image, some of the paint blistered around the window frames - I'm guessing there must have been some residual moisture. The black patches are where the primer and top coat lifted off the POR15 due to not keying it enough before applying the undercoat. From what I can tell there are just a couple of patches but I'll need to do a full check to make sure no where else is affected.

Luckily I hadn't put the windows back in and I stuck to the original paint colour - so matching in shouldn't be too difficult.

paint-damage.jpg


By for now.
 
.. almost a year since I've done anything substantial

Ditto..my reasons are similar together with having put quite a lot into my Fiat 500, including a bigger, rebuilt engine and gearbox together with a lot of tweaking to make it even more reliable and usable.
I'm currently respraying some dodgy parts of the 500 paintwork, so as the next job I'm thinking of tidying-up and painting the approximately 50% of the bodywork of the camper which is finished; welding etc. can be done in Winter.
I'm sorry to hear of that adhesion problem with the paint; I wasn't keen on that idea of using the POR 15 on the bodywork. It looks like you flatted it up quite well before the topcoat primer, but I had similar small problem areas after using epoxy primer, which has similar properties. It seems that the paint needs to be really well scuffed as near as possible to the time of over-coating with a 320 to 400 grit paper. The POR 15 must be quite challenging to get the abrasive to "dig" into.
Good luck and keep us posted; I'm sure there are plenty of other people keen to see what you do.:)
 
On the plus side the POR15 appears as if its fused to the tin underneath and looks as smooth as if it had been sprayed. If the areas coated with POR15 aren't exposed to sunlight you don't need to paint over it - just a shame they don't have something that could resit discolouring if exposed to sunshine. (Exposure to sun doesn't affect the rustproofing qualities though.)
 
I now have a front seat again
front-seat.jpg

It came from a 'roadworthy' 900t that was made into an ice-cream kiosk drag the image around to see the van - just to the right.

When I get on to the interior refit the back of the front seat will flip round to form the back of the interior front seat/headboard for the bed. This will allow the rear seat to move forward and line up with the side pillars. These will be strengthened to take 3-point rear seat belts.

Moving the rear seat forward should also provide space behind the rear seats to stand up at the cooker and sink.

You may also notice a couple of headrests underneath the seat. These came from an old Ford Fiesta and will fit nicely inline with the brackets holding the bar securing the seat.
 
Last edited:
The ice-cream van was stripped of all the mechanical bits and now sits inside the pizza restaurant. If you follow the link you can drag the image to find it... just to the right in the picture. (a new Google service, a bit like Google maps).

Just taken a screen shot
icecreamvan.png
 
Last edited:
Yep the bracket is for the spare wheel, here it is in place
Just-bought.jpg


Its all bolted back in place but I can take some photo's of it in situ if that helps?

Note: the top and bottom bracket bolts are located inside the heater box on Connie. However, the heater box is totally rotten and I need to make a new one so will try to allow access to the bracket bolts - if its not too much extra work.
 
that would be a big help, thanks Gary. Mine is a 1984 Pandora, and my front panel looks different to yours (no brackets where your wheel frame is bolted, and two large ducts for heater) but its a step closer for me, just worrying bout front taking the weight.
 
This photo shows the front stripped down, I've circled the mounting points.
Spare-wheel-fixings.jpg


I've zoomed in on the mounting bracket, hopefully this is clear enough? (let me know if you need more detail?)
Spare-wheel-bracket.jpg


With regard to the weight, apart from large washers at the back there are no additional supports or reinforcements. There is no structural load so the 4-point fixing takes the weight quite happily.

It's not easy to tell by the photo - the bracket roughly lines up with the front edge of the bumper. When putting the wheel back on I tend to rest it on the bumper first and then slide it onto the blots. The back of the wheel sits slightly proud of the body enabling you to fit the wheel cover.

Hope this helps.
 
Hi Gary, any further progress with Connie? You might have seen that I'm finally catching up with where you were a year ago.
I'm bothering you because I remember you were going to replace the canvas of the pop-top. As I'm now planning the same, I'm wondering if you ever found a source for the replacement that you could share. :)
 
Back
Top