17717052334_1044bd2216_b.jpg

900 Bluebell the 900e Amigo

Introduction

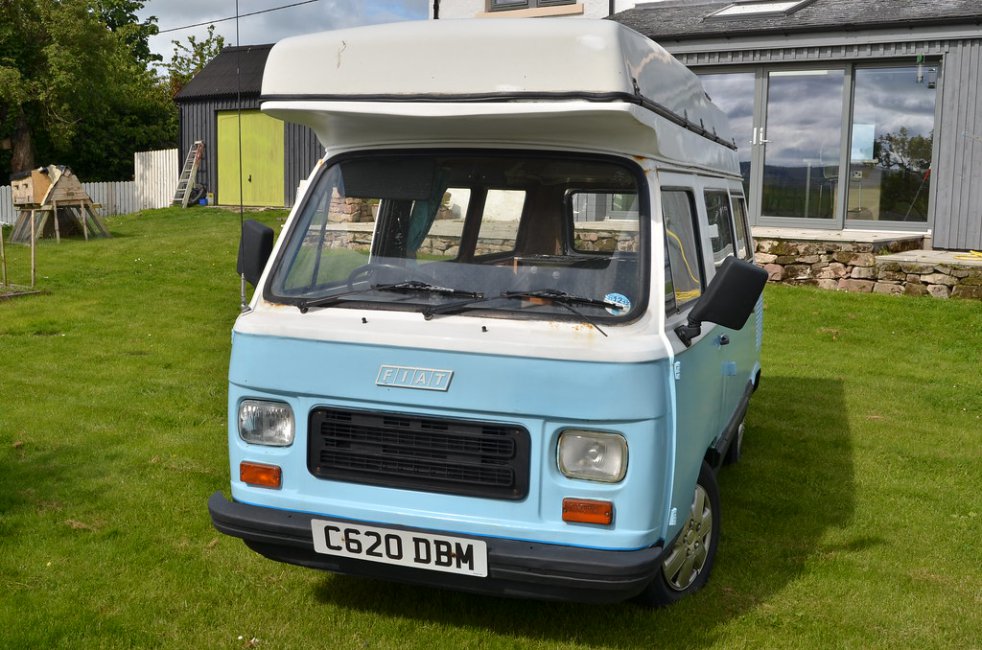
We have just taken on the ownership of this camper from Kelly and Karl and hope to have it on the road within the next six months.
17717052334_1044bd2216_b.jpgDSC_6177 by Peter Thompson, on Flickr
Not only is it a really lovely vehicle, it was also a pleasure to buy it from such a genuine and really nice couple. There was a huge amount of interest in the sale and I am really appreciative that I was favoured to be the buyer ; so many thanks Karl.:)
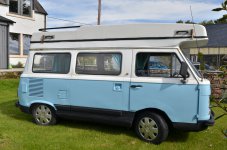
18335728502_1005bcd374_b.jpgDSC_6176 by Peter Thompson, on Flickr
There is a certain amount of essential welding to do underneath, which will add to the welding that has been done in the past. It is currently pretty solid underneath but not as pretty as it could be. I hope to tidy as I go and then work around the bodywork. This has signs of a lot of filler and there is rust poking through in places, but it looks like we will be able to get using it soon.
There are a number of mechanical issue but nothing too onerous and it starts and runs really well.
So a rolling restoration to usable standards.
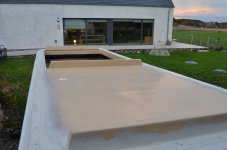
I just need to get the roof open now!
Watch this space as I document my progress.
Hi
Please can you provide a link to SGS?
I haven't heard of them before and a Google search on SGS doesn't help narrow them down.
Cheers

This is the link:

https://www.sgs-engineering.com/gas-struts

The ones I selected are:

GSC2425

These are dimensionally correct for my van but remember, it is the later "Sleeping Giant" version and uses three struts.
The company will give you really good service by email or phone and they even told me that if I have chosen slightly under-powered struts they will recharge them for me.
My contact was Adam Morris and I can't speak too highly of him.:worship:
 
Last edited:
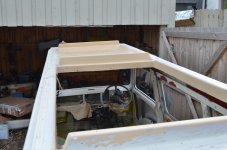
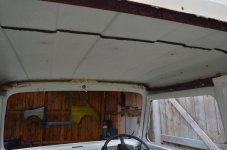
I hadn't intended to be quite as thorough as this but in removing the old "carpet" inside the roof I was left with a horrible expanse of old adhesive. By using a scraper, cellulose thinners and some stainless-steel wool I've got it all off so that I have a clean surface to start the re-trim.
Now I can see the fibreglass roof in all its glory I realise that it's an exceptionally clever and well made construction.
Having exposed the inner roof of the cab I'm wondering did these utilitarian vehicles leave the factory without a lining? The material was fitted in a very basic way like the rest of the campervan trim.
 

Attachments

  • FER_7759.JPG
    FER_7759.JPG
    4 MB · Views: 102
  • FER_7760.JPG
    FER_7760.JPG
    3.4 MB · Views: 154
  • FER_7766.JPG
    FER_7766.JPG
    3.8 MB · Views: 88
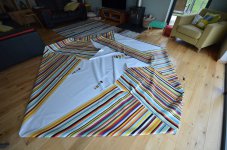
It's been cold and goes dark very early at this time of year. I've been a bit of a softy and I've just been tinkering around things; so not much progress. But others have been labouring on my behalf and today the new roof canvas arrived. I've unrolled it for inspection/admiration and I think it will look right:eek::eek::eek: with the very restrained colour scheme we have chosen for the van.:D:D:D
 

Attachments

  • FER_8626.JPG
    FER_8626.JPG
    4.9 MB · Views: 76
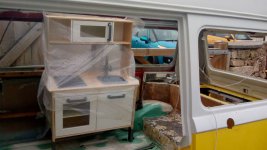
I've fitted the kitchen unit. IKEA do a standard one for children; it's still a bit big for an Amigo, but has all the functions needed including a halogen-hob which lights up. Actually the van is the safest place for Santa to hide a present for a two year old grand-daughter and her nosey big sister. The van sits in wait for slightly warmer and drier days when I can get on with the interior now that I have all the materials for it. :)
 

Attachments

  • IMG_20181218_141155518.jpeg
    IMG_20181218_141155518.jpeg
    48.8 KB · Views: 75
Did I say that? [emoji3] One month in and I'm still cutting down trees rather than restoring a campervan. I would prefer the world to warm up and dry out a bit before I move on with the interior but I haven't abandoned the project. ?
There is no such thing as an abandoned project... only a rest from one while life gets in the way.

Looking at our posts I'm guessing that we have a similar amount of work left to do to finish our campers.

How about a challenge?
The first one to turn up driving their van (under its own power from start to finish) gets a blow-out meal paid for by the other?

I've just checked your location (Nairn, Scotland), I live in Fordingbridge, Hampshire - we couldn't get further apart in the UK if we tried.

According to Google maps it's a 600+ mile journey and around 11 hours travel (probably nearer 20+ in a 900t) - will need a stop-over halfway (but that's what campers are for, aren't they).

What do you say, are you up for the challenge?
 
Did I say that? [emoji3] One month in and I'm still cutting down trees rather than restoring a campervan. I would prefer the world to warm up and dry out a bit before I move on with the interior but I haven't abandoned the project. ?

Some of us have none of the skill, space, patience, funding etc to do this sort of restoration, but would absolutely love to do something similar.

I love the updates, plus having worked on these wee vans when they were new and still being involved in the caravan industry, this one piques my interest even more.

Keep up the excellent work

Cheers

D
 
There is no such thing as an abandoned project... only a rest from one while life gets in the way.

Looking at our posts I'm guessing that we have a similar amount of work left to do to finish our campers.

How about a challenge?
The first one to turn up driving their van (under its own power from start to finish) gets a blow-out meal paid for by the other?

I've just checked your location (Nairn, Scotland), I live in Fordingbridge, Hampshire - we couldn't get further apart in the UK if we tried.

According to Google maps it's a 600+ mile journey and around 11 hours travel (probably nearer 20+ in a 900t) - will need a stop-over halfway (but that's what campers are for, aren't they).

What do you say, are you up for the challenge?
Definitely up for that challenge. I guess I was reasonably close to you in my 500 last summer when I visited my brother near Chichester and then drove to St. Austell. I have a big birthday soon and then a few weeks busy with work, but by the beginning of March I'll be back in the game.[emoji3] I'm a long way behind in chasing mechanical consumables such as rubber bushes and steering components.
 
Last edited:
Some of us have none of the skill, space, patience, funding etc to do this sort of restoration, but would absolutely love to do something similar.

I love the updates, plus having worked on these wee vans when they were new and still being involved in the caravan industry, this one piques my interest even more.

Keep up the excellent work

Cheers

D
I really appreciate the encouraging words and that's a major hope when you make such a public statement in recording your work... I will do this van justice in the end.[emoji3]
 
I've not abandoned the restoration but I have had a very busy winter with a lot of projects unrelated to vehicles. Today I reached the end of a very long list of these jobs and decided to get the van project underway again.

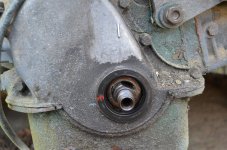
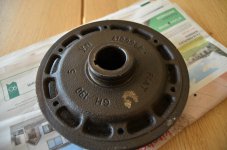
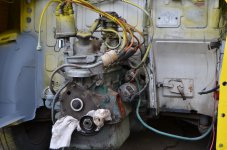
It's much easier to do everything when it's trundled out of the garage but since the engine has been immobilised it has become a very heavy lump to manhandle all the time. Getting the engine running again is a priority so I started cleaning and adjusting all of the distributor components. Then I looked at the ignition timing which is very straightforward for me because apart from the counterclockwise engine rotation the procedure it's just the same as on my Fiat 500. But in the course of this I think I have discovered that the crankshaft pulley is loose...possibly a worn keyway. It can be rotated a few degrees without any apparent movement of the crankshaft.

So the next job is to remove the pulley and get a look at it. New ones are available but it's an irritating problem I could do without.:bang:
 
Yay!!! an update.

BOO, a problem.

Years ago we used to have a box of selected woodruff keys for just this situtation.

D

Edit:, you can still get them... https://www.ebay.co.uk/itm/222255150799?ul_noapp=true

Hi Peter

Regarding your pulley spinning when perhaps it shouldn't, its common on the 850 pulleys see the earlier posting with Gary getting his 900t going.
Its more likely to be the cast iron pulley has worn than the hardened woodruff key, normally 85% of the woodruff key is in the timing chain gear and 15% is located in the end pulley but sometimes the key can be located more into the gear, so you could find its a case of either repair/replace the end pulley or find a longer woodruff key and machine it to locate more into the pulley.
unfortunately the fiat 500 pulleys are different.

i hope this helps more than it comfuses

Tim
 
This post contains affiliate links which may earn a commission at no additional cost to you.
Thanks Tim...that's what I meant regarding the keyway; I've already noted that the pulley is fairly widely available on eBay so as you say, a known weakness. It would be handy if I could get away with a longer key and obviously I'll get it apart over the weekend and report back.
 
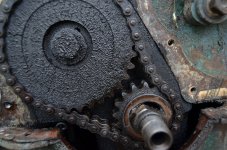
After dismantling I am relieved to be able to say that it's not a faulty pulley; it's a very worn timing-chain which is actually scraping on the inside of the cover.

It may as well be fixed properly now I have it all apart. So now starts the task of scouring the Internet for the spares I will need. Basically everything I touched that is a wearable part...timing-chain and sprockets, belts, contact-breakers, condenser gaskets and front seal.

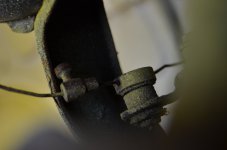
Getting up close to the engine I noticed that the throttle cable has a lot of slack at its connection to the carburettor; the engine would have been falling short of full revs....not good for such an underpowered vehicle!
 

Attachments

  • FER_7552.JPG
    FER_7552.JPG
    3.3 MB · Views: 42
  • FER_7554.JPG
    FER_7554.JPG
    5.2 MB · Views: 52
  • FER_7545.JPG
    FER_7545.JPG
    5.7 MB · Views: 47
  • FER_7544.JPG
    FER_7544.JPG
    4 MB · Views: 46
Last edited:
Hi Peter
Out of interest what mileage is Bluebell/Buttercup?
I.e. is the problem due to high mileage or just unlucky.

While you are checking out the accelerator cable it's also worth checking the choke as well. These are much easier to replace if the engine is out... as I found out after the event (the choke cable snapped/rusted off at the lever end, by the gearshift the first time I tried to use it again on Connie).

I've also bought a new throttle cable, as the existing one seems a little stiff - probably due to lack of use. However, the cable I've bought doesn't appear to match what's underneath the van :confused:
Has anyone fitted a replacement accelerator cable? and if yes any tips/photos?
 
Hi Peter
Out of interest what mileage is Bluebell/Buttercup?
I.e. is the problem due to high mileage or just unlucky.

Hi Gary, the mileage is around 83,000 and that didn't seem to change much over the final three or four MOTs. But I think that's academic as the engine has been changed not long before I bought it. So I assumed it would have been replaced with a good 'un and it certainly shows a fair amount of gasket-goo and other signs that someone has been "at it".

I guess it's had a hard life although after a careful check, the sprocket teeth don't seem worn despite the state of the chain.

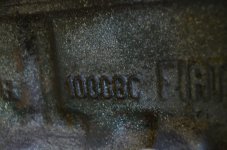
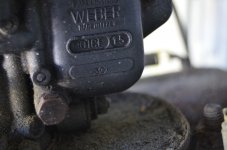
But one interesting point is that the cylinder-head is aluminium whereas I thought they were cast-iron; I have a spare cast-iron one which came with the car. It also came with an extra carburettor which I will need to check out because I suspect these items were included because they will be the originals before the engine was changed. The engine block reads "100GBC and I think it should possibly be "100GF". The carburettor is also different from expected being "30ICF15" rather than 30ICF20/250.

I don't know if this change is for better or worse than standard but it appears that it may be at least a part of an earlier engine of a Sports model which has an increased horsepower in comparison with the 100GF.
 

Attachments

  • FER_7558.JPG
    FER_7558.JPG
    4.1 MB · Views: 49
  • FER_7561.JPG
    FER_7561.JPG
    3.6 MB · Views: 51
Last edited:
Connie's engine is also a GBC with alloy head - 900T's should have had the GF.

I had always thought that it was the original one when it came out of the factory (cars made in the 70's often had different parts depending on parts shortages) but I've just checked the engine number against the V5 and they are different - assuming the engine number is the one stamped under #1 spark plug? There was no mention of an engine swap when we bought her in 2001, so I'm assuming that the previous owner didn't bother to tell the DVLA.

According to the Haynes manual the 900T came with the Weber 30 ICF 20/250 whereas the 850T had the 30 ICF 15 (the one fitted to Connie as well).
 
Connie's engine is also a GBC with alloy head - 900T's should have had the GF.

Yes, my van has "GF" on the bulkhead-plate. I now see that alloy heads are standard throughout the range so nothing strange there. Seeing as we both seem to have the same combination of numbers maybe this is a configuration that was found to be a good one back in the day?

I got carried away today and decided to look at the cooling system and ended up removing the radiator and water-pump. Dare I say it?..they seem to be in good condition.:D Once you get cracking it's a remarkably easy engine to get at and for the moment I'm happier to take it on piecemeal like this rather than remove it completely.
 

Attachments

  • FER_7627.JPG
    FER_7627.JPG
    4.5 MB · Views: 61
Back
Top