17717052334_1044bd2216_b.jpg

900 Bluebell the 900e Amigo

Introduction

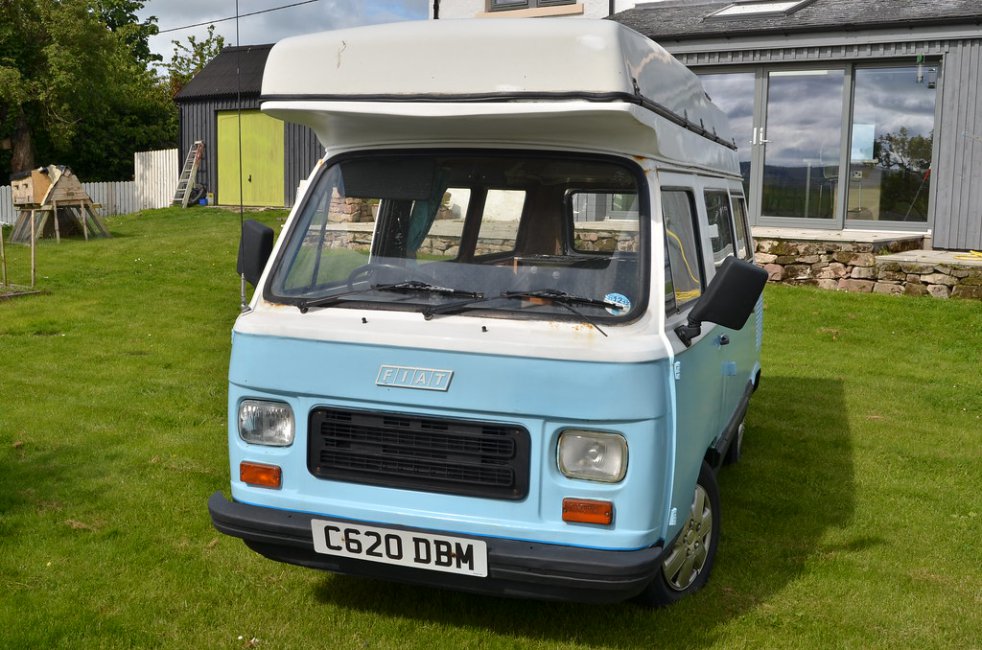
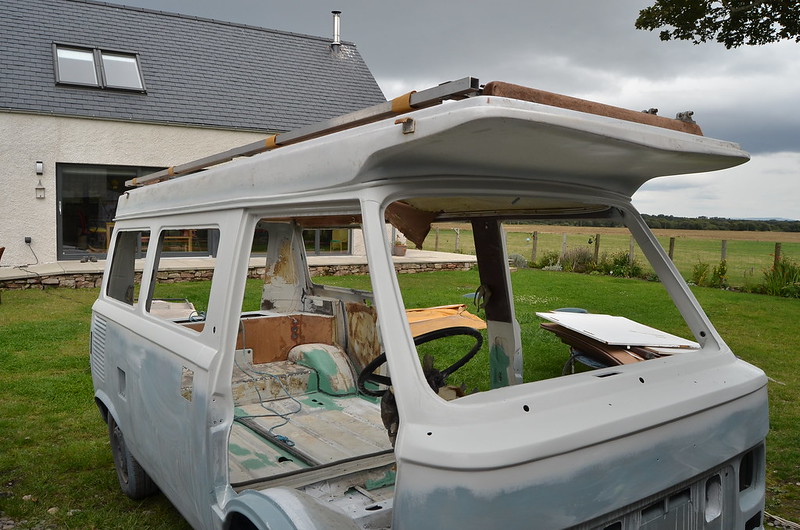
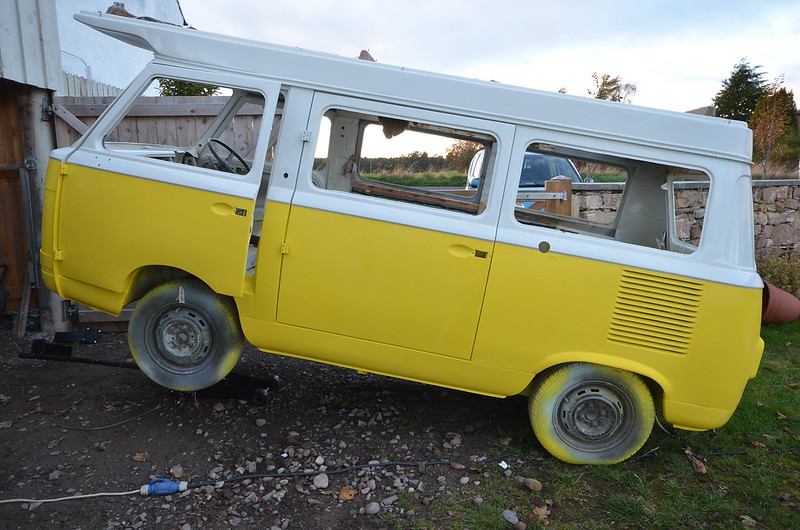
We have just taken on the ownership of this camper from Kelly and Karl and hope to have it on the road within the next six months.
17717052334_1044bd2216_b.jpgDSC_6177 by Peter Thompson, on Flickr
Not only is it a really lovely vehicle, it was also a pleasure to buy it from such a genuine and really nice couple. There was a huge amount of interest in the sale and I am really appreciative that I was favoured to be the buyer ; so many thanks Karl.:)
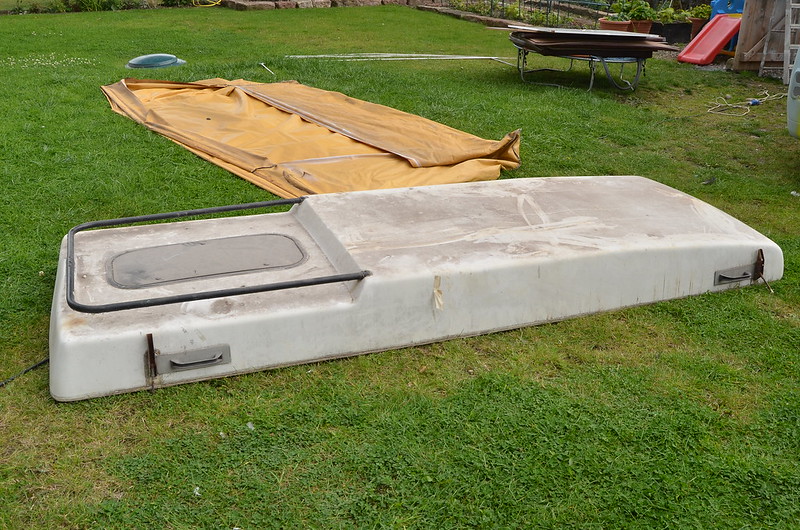
18335728502_1005bcd374_b.jpgDSC_6176 by Peter Thompson, on Flickr
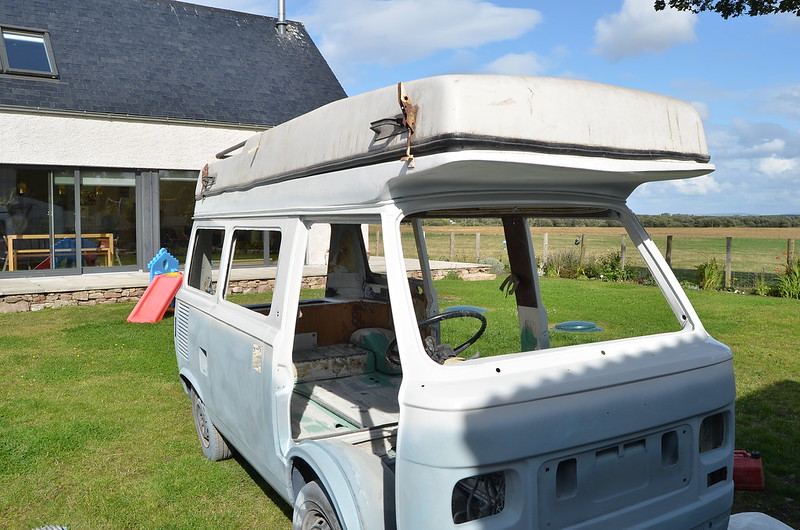
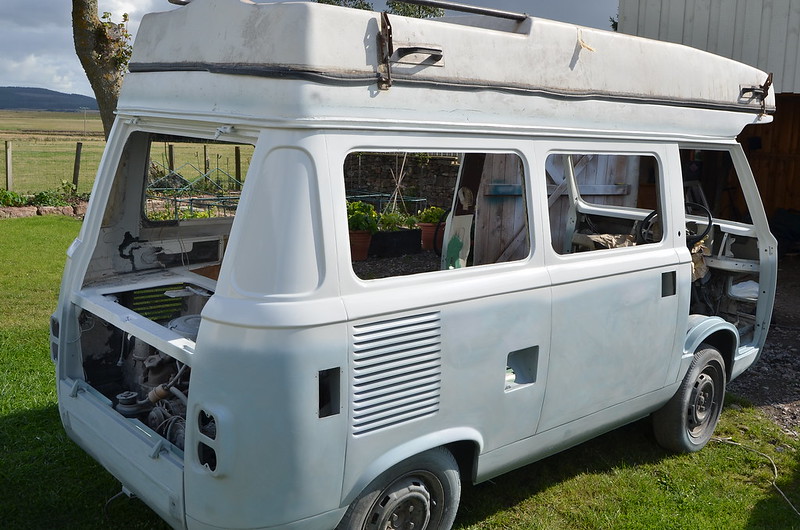
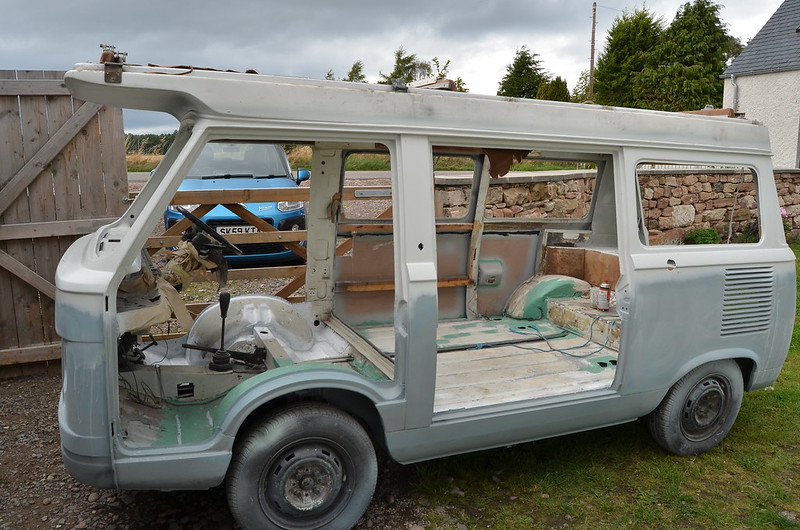
There is a certain amount of essential welding to do underneath, which will add to the welding that has been done in the past. It is currently pretty solid underneath but not as pretty as it could be. I hope to tidy as I go and then work around the bodywork. This has signs of a lot of filler and there is rust poking through in places, but it looks like we will be able to get using it soon.
There are a number of mechanical issue but nothing too onerous and it starts and runs really well.
So a rolling restoration to usable standards.
I just need to get the roof open now!
Watch this space as I document my progress.
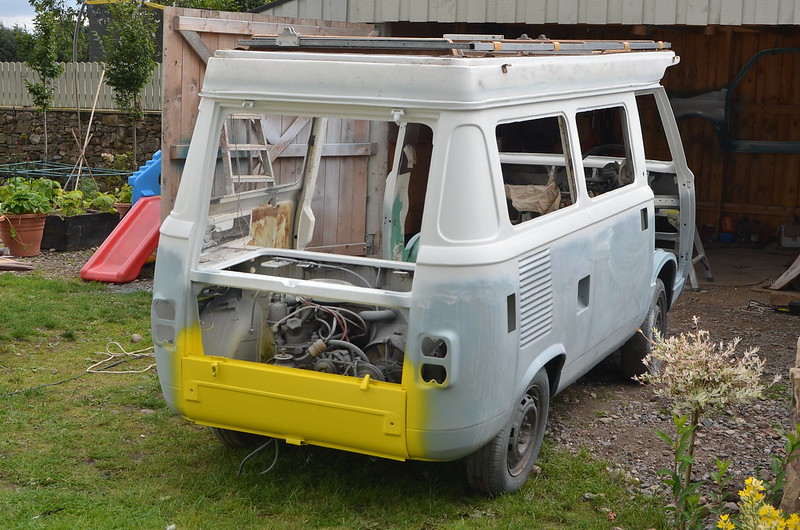
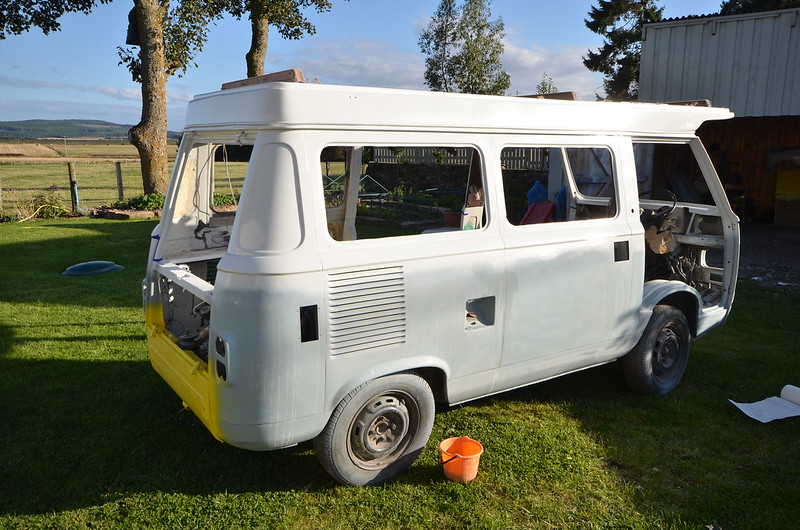
I surprised myself today by progressing to the white topcoat. It's Fiat Corfu white, which was the original colour, but only to the waistline as the yellow will be below that. The fibreglass roof will be a job for later.

FER_3967 by Peter Thompson, on Flickr
FER_3966 by Peter Thompson, on Flickr

This is after three full coats and when it has had a day to harden I'll be sanding it to remove the high spots and then applying three more thinner coats to finish.

FER_3970 by Peter Thompson, on Flickr

It went on very well and has an even and shiny finish. Full marks to the paint supplier. Autopaints of St Helens; https://auto-paint.co.uk/ and to the LVLP paint-gun. It seems a shame as I could get away with the paintwork as it is ; the white seems very forgiving in comparison with stronger colours that I have sprayed before.

And have you seen the state of the art of my spraybooth?:D Who needs to have a temperature controlled environment with filtered air?

FER_3969 by Peter Thompson, on Flickr

It's a good feeling to see old Bluebell metamorphosing to Buttercup.:)
 
Looking good as always! I assume the white bit above the roof gutter is part of the roof and fibreglass as well?

So this altered ego move to Buttercup makes me assume that some sort of yellow is involved? What particular shade have you gone for from the colour colour palette?
 
Looking good as always! I assume the white bit above the roof gutter is part of the roof and fibreglass as well?

So this altered ego move to Buttercup makes me assume that some sort of yellow is involved? What particular shade have you gone for from the colour colour palette?

To answer the last question, I think that the yellow is as yellow as it's possible to be. We chose it from the RAL colours, 1018 to be precise:

https://goo.gl/images/XAuXcY

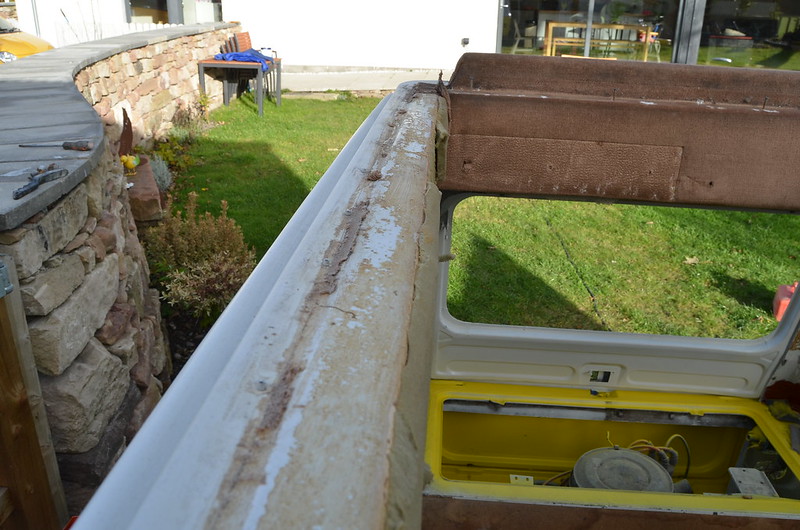
That is a two-part roof and I think that the lower half is what has protected the guttering which was in much better shape than I have seen on images of vans with the earlier type of roof. I think I will get away with lightly sanding the surface and I intend to roller-paint it with Rustoleum. Being a custom-made item it has ripples and an imperfect shape to it and it's also huge and quite high; I don't fancy trying to spray it from a ladder.:eek:

Today I did a bit of wet-sanding on the white paint and I found it very quick and easy as the paint has settled very flat; so if the weather will please warm up again I can move to the final coats and then get started on the yellow.
 
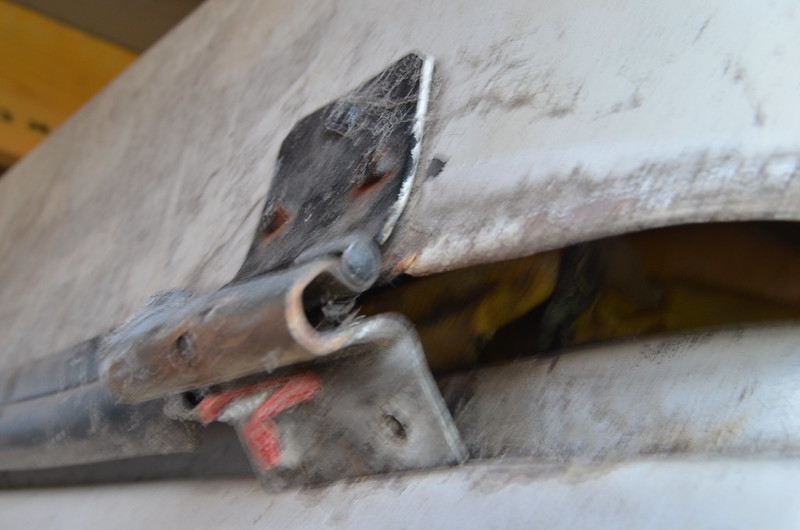
Tony Vitesse got me thinking in more detail about that roof and as I need to repair some or all of the five hinges and their fixings I did a bit of poke about to see how they are attached....bad image of the worst of them (now available in heavy brass).

FER_3981 by Peter Thompson, on Flickr

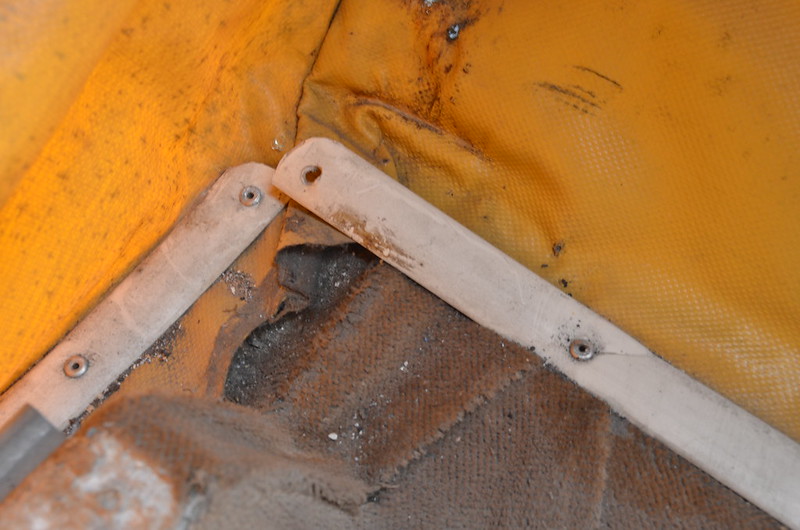
I needed to remove a flimsy, riveted strip which secures the vinyl of the roof so that I can get at the rivets which hold down the hinges.

FER_3974 by Peter Thompson, on Flickr

This was much easier than I expected and led me to realise that it wouldn't take much more effort to completely remove the roof.

It will be better to renovate the fibreglass whilst detached from the vehicle and it would also have been essential to partially dismantle in any case in order to for the planned replacement of the interior trim.
Further thoughts are that I may be able to obtain a new "canvas" either locally-made or by one of several companies who already make them for the strikingly similar "Super-Viking" VW van modified by the same company that adapted my van.
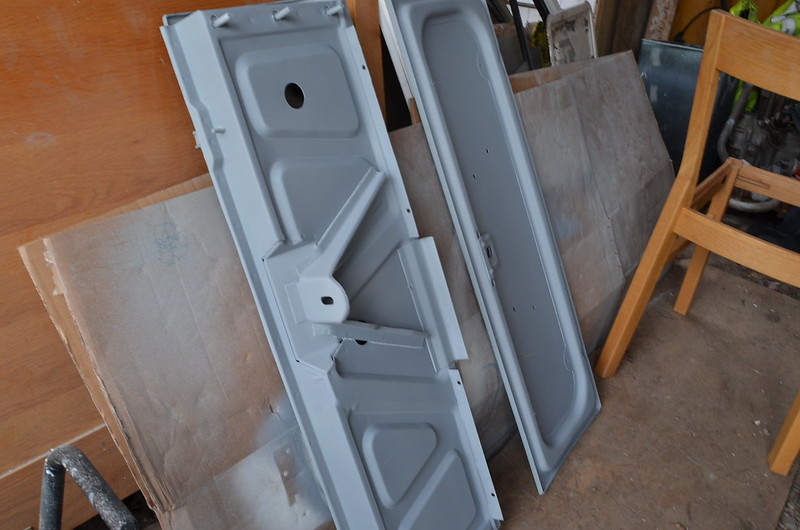
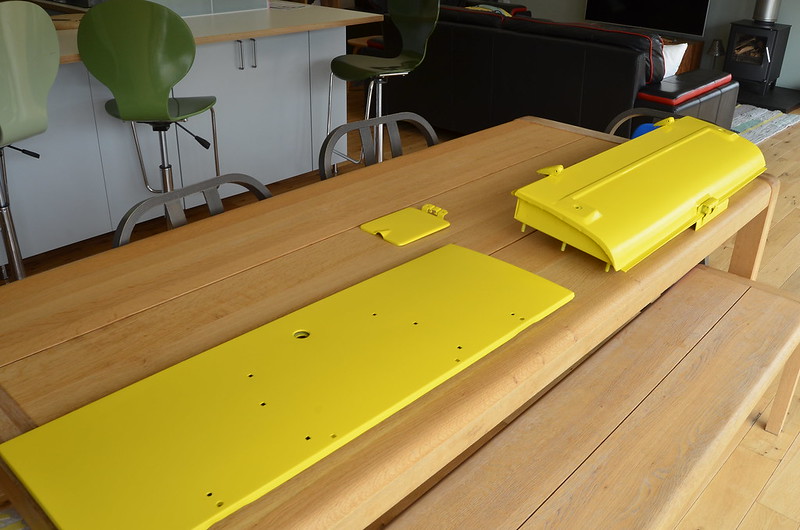
I also primed the inner sides of the rear engine support and the engine lid; being detachable items I can play about with the yellow paint tomorrow. :)

FER_3983 by Peter Thompson, on Flickr
 
I put my thinking-cap on today (should have been my hard-hat!) and removed the roof.

FER_3999 by Peter Thompson, on Flickr

It's easy to put in one sentence and was much quicker and easier than would ever have expected, but even so, it was quite challenging and very heavy. The fact that the vehicle is hand-made is helpful because you can easily understand the construction methods when un-picking them.
I never intended to get into this detail but it will enable me to give the van the fresh, modern look that has been requested by Sheila.
So I will have to divert attention to preparing and painting the fixed part of the fibreglass roof which is now exposed fully. The upper half can wait but will be much easier to sort out whilst it is off the vehicle.

FER_4003 by Peter Thompson, on Flickr

FER_4000 by Peter Thompson, on Flickr

The test painting of this electric yellow went well; the paint goes on even more smoothly but less shiny than the white.

FER_4008 by Peter Thompson, on Flickr

FER_4004 by Peter Thompson, on Flickr

But as you can see, it's a real statement colour which is much brighter than one of us who will be using it expected it to be.:D:D:D
 
But as you can see, it's a real statement colour which is much brighter than one of us who will be using it expected it to be.:D:D:D

Well look on the ‘BRIGHT SIDE’ no one is likely to miss you:)

Probably needs some spot lights but I can’t see much room for them? Have you considered a chequered roof?
 
Well look on the ‘BRIGHT SIDE’ no one is likely to miss you:)

Probably needs some spot lights but I can’t see much room for them? Have you considered a chequered roof?

At the speed this things is going to achieve, spotlights won't really be necessary.:D
There is a chance that we could get a yellow and white stripey-patterned roof-canvas. I hadn't thought of the checkered pattern....genius. :):):)
This was at Goodwood 2014; I guess it's a vinyl wrap.

KNO_2026 by Peter Thompson, on Flickr
 
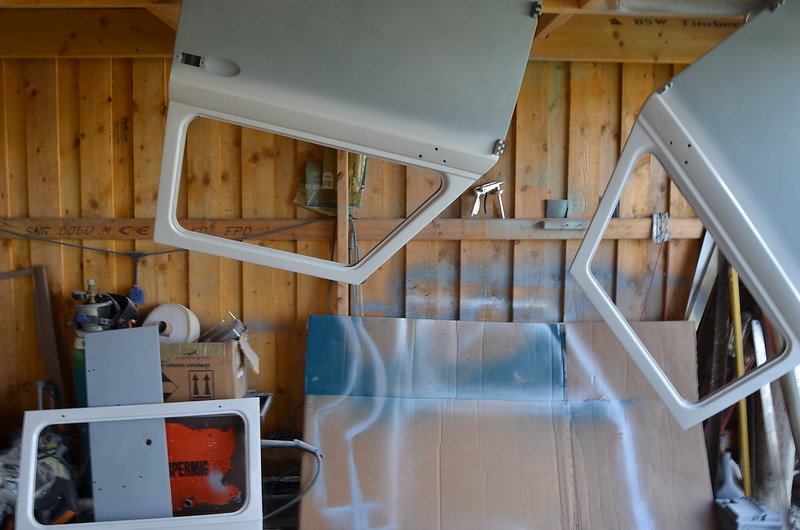
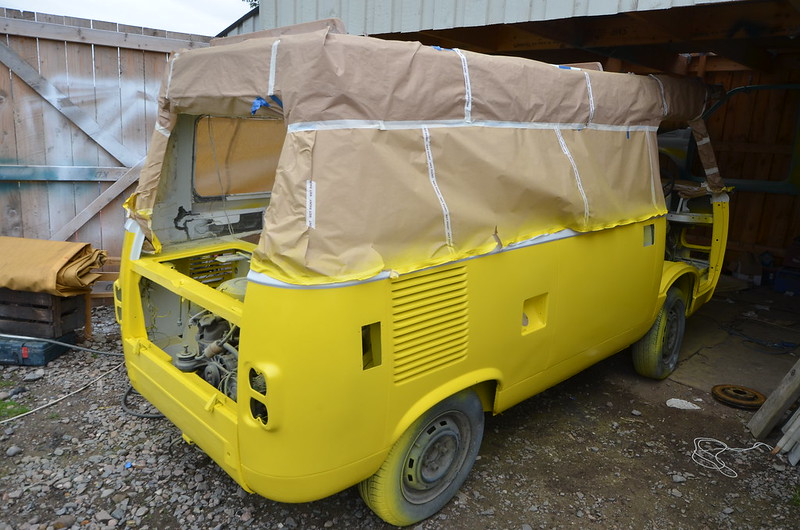
The painting drags on; it really slows things down having two colours. there's extra mixing and cleaning of the gun but the worst thing is the masking. It took an hour and a half just to do the doors and tailgate. I'm using "fine-line" tape where the two colours meet but I decided to take it off quite promptly after the first three coats of paint to avoid any cracking. I'll have to replace it all after wet-sanding and before the last three coats.:bang:

FER_4488 by Peter Thompson, on Flickr

At least the white is finished now and even after a day's drying it's super smooth and shiny.:)

FER_4486 by Peter Thompson, on Flickr
 
Hard work but it’s going to look the mutts ? when completed. I was talking to the guy who sprayed my 500 the other day and he was saying about how 90% of the time he can get a really good finish straight out of the gun that doesn’t need hardly any polishing. Then some days he sprays a panel and thinks “what went wrong there”? As the finish is iffy and he’s been doing it every day for years.
 
Hard work but it’s going to look the mutts ? when completed. I was talking to the guy who sprayed my 500 the other day and he was saying about how 90% of the time he can get a really good finish straight out of the gun that doesn’t need hardly any polishing. Then some days he sprays a panel and thinks “what went wrong there”? As the finish is iffy and he’s been doing it every day for years.
In my case the improvement in finish has definitely been due to the gun. It's not expensive but is designed to work at lower pressures and air volumes, which suits my amateur setup. :)
I've just finished masking the top of the van so I'm looking for a warm, dry day tomorrow....
 
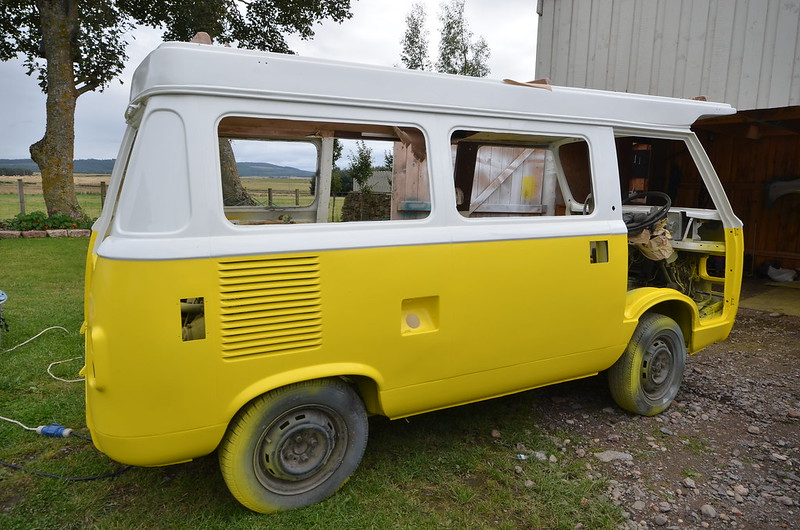
The big day has come and the bottom half of the van has been sprayed. It's now going to get a couple of weeks to shrink and cure and I hope that by late September it will still be suitable to find half a day for the final coats. I removed all the masking because I get stressed thinking the tape will get too stuck on and bring off the paint.

FER_4489 by Peter Thompson, on Flickr

FER_4496 by Peter Thompson, on Flickr

I want to finish by doing the whole van in one go so now I've started fitting the doors etc. It was worthwhile adjusting everything before the primer stage as so far, with the tailgate, passenger and side-door fitted it's all gone smoothly. It will be easier to wet-and-dry and to paint everything fully assembled. It also avoids the possibility of me dropping a panel or chipping it as I fit it with its final coat of paint.

FER_4497 by Peter Thompson, on Flickr

Now I have a bit of a shine on it I'm seeing the waviness that I anticipated in some of the panels where I should have spent another eon of my life filling and flatting,:bang: but at least there are no horrible sunken patches or signs of the filler.

I like the finished look and judging by how quickly I've progressed assembling things, the van could start to move on very quickly from here on.

Sheila wanted an Italian name so we looked up "Sunshine". So now we'll have to say that Bluebell/Buttercup was reborn today as an adaptation of that word; "Luce" (presumably pronounced "Loo-chay")...so I think that this second name change might also count as a gender change as Luce sounds more like a boy. :D
 
Last edited:
Oh WOW!!!!!:eek: I was reading that post with my eyes ? wide open in anticipation as I scrolled down.:D ☀️ looks awesome. I like the little detail with masking on the B post and I assume that’s a C post!!!!!

I bet you are really pleased? It’s one of those cup of tea moments where you keep returning and sitting down to admire your handiwork.:D

Now you just have to be patient and give it time to cure but I guess the return trip down south to collect Murphio will help with that.
 
Oh WOW!!!!!:eek: I was reading that post with my eyes [emoji102] wide open in anticipation as I scrolled down.:D [emoji295]️ looks awesome. I like the little detail with masking on the B post and I assume that’s a C post!!!!!

I bet you are really pleased? It’s one of those cup of tea moments where you keep returning and sitting down to admire your handiwork.:D

Now you just have to be patient and give it time to cure but I guess the return trip down south to collect Murphio will help with that.
I am quite pleased how it's turned out...a bit radical but it's appropriate for such a fun and quirky vehicle. I didn't want a flat line around the van so following natural moulding lines made sense. Inside the doors is all white. It looks even better now I have the doors fixed on.
There is an A,B,C and even a D post on this thing. All of them, at both sides, have had to be rebuilt and connected to the sills.
Sheila can finally see "it" and next thing is to order a load of trimming materials so I can make an interior.
 
After a big gap whilst I've been up and down the UK in my 500, been abroad on holiday, prepared both the modern cars for the MOT, built a temporary carport for the little car and a variety of other jobs, today I finally got my hands back on the van.

I've now got some light-grey roof-lining carpet to replace the cheap and worn brown fabric which is sagging and tatty. It's basically stuck to the inside of the fibreglass so not difficult to replace or remove, but first I tool loads of images. I don't think there can be many people who have got this deep into the restoration of an Amigo roof so there won't be much information about if I get confused. Ahhhh

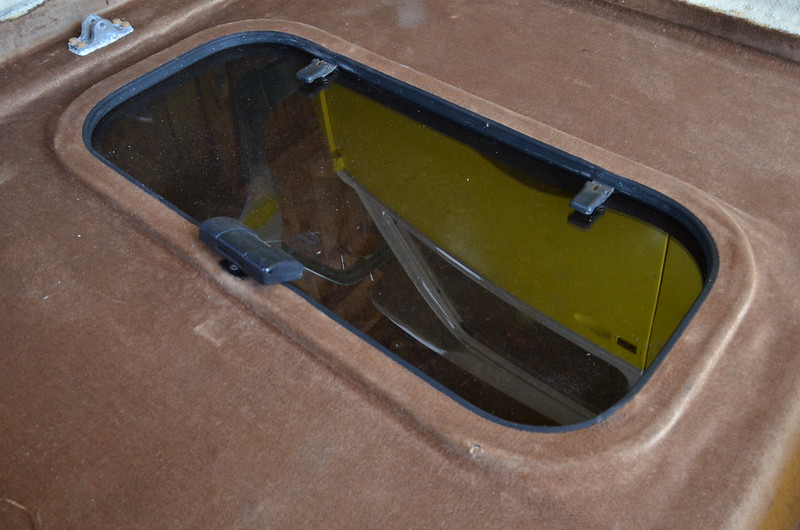
There is an openable window and it took a while to work out how to remove it as I want to replace the sealant. But short screws secure it and there were no breakages, unlike just about every other screw fixing which has rusted into the timber insets in the fibreglass.

FER_7211 by Peter Thompson, on Flickr

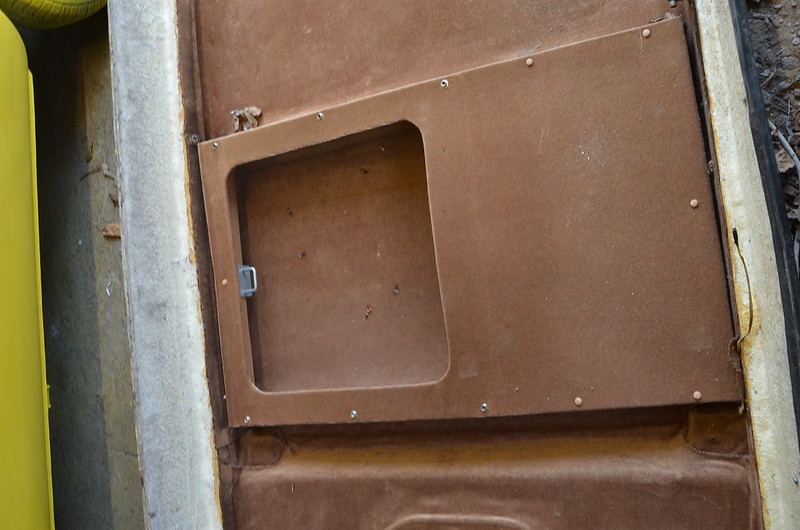
The "wardrobe" is a simple thing to remove and it's just made from hardboard and cheap scraps of timber....this is a very home-made van!

FER_7206 by Peter Thompson, on Flickr
 
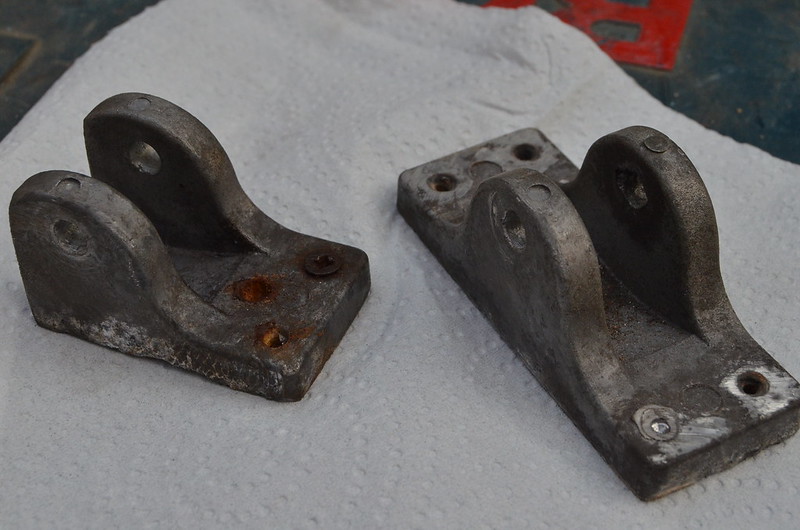
After a lot of grief caused by steel screws seizing into the aluminium, strut pivot-blocks.

FER_7230 by Peter Thompson, on Flickr

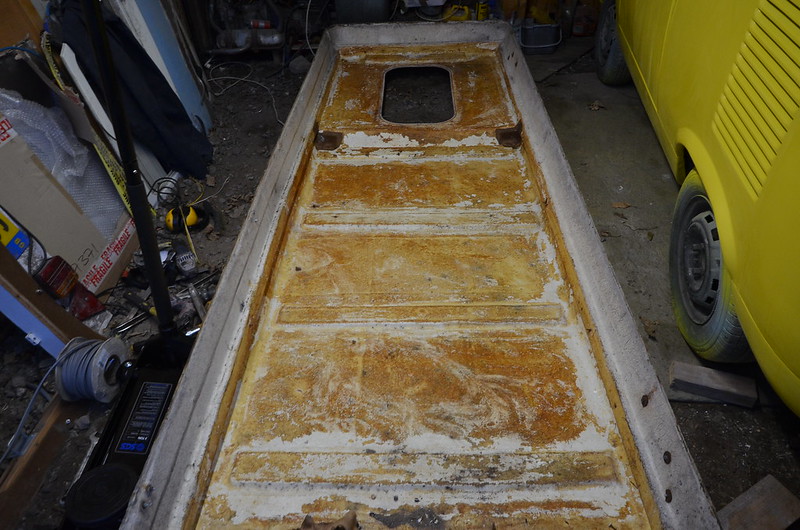
I finally got all the hardware off the roof and was able to strip the lining material.

FER_7300 by Peter Thompson, on Flickr

The fibreglass construction is very well made with a lot of embedded reinforcement timbers and a thin strip of steel encircling the very thin outer edge where the five hinges attach. New hinges which look the same are available for the VW Viking roof and I am waiting for a new batch to be made.
The next stage is to clean up the inside of the roof and re-line it with the thicker new fabric.

I was playing with a new, heavy-duty trolley-jack and cross-beam bought to replace my trusty little Halfords job which has served me for twenty years; it's going to be very helpful in giving access to let me do the final preparation and sealing under the van.:)

FER_7295 by Peter Thompson, on Flickr

FER_7297 by Peter Thompson, on Flickr
 
Yes; I highly recommend them both for the quality of their products and the standard of their service. They were really helpful with regards to the struts and the price was a significant saving over every other source where I would also have been buying "blind",
 
I haven't been on this thread for some time.
I am always impressed with your skill, determination and patience Peter.
Tell me did you honestly think there would be this much work when you started? I think you have nearly rebuilt the bottom half of the car.


Its great too see it finally come to life.


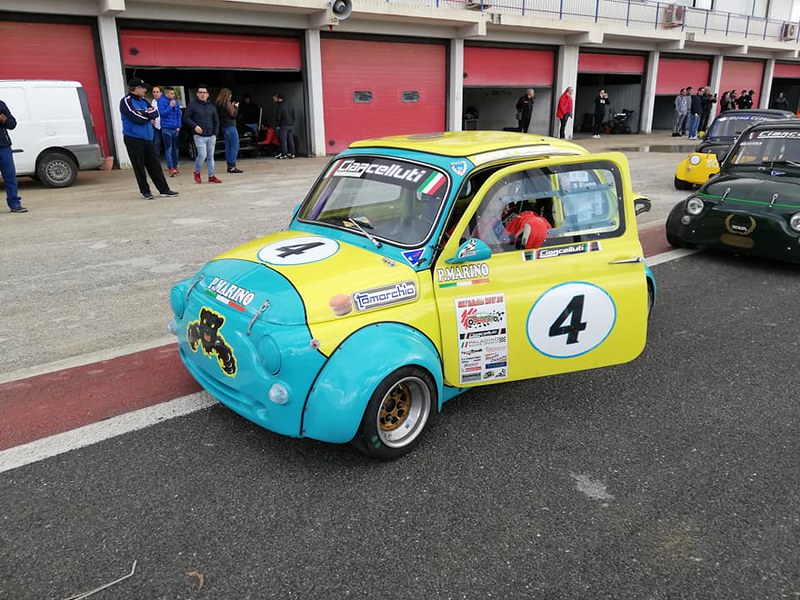
You could have gone for a mix of the teal and yellow!
 

Attachments

  • Scooby Doo.JPG
    Scooby Doo.JPG
    33.2 KB · Views: 1,240
Tell me did you honestly think there would be this much work when you started? I think you have nearly rebuilt the bottom half of the car.

You could have gone for a mix of the teal and yellow!

I actually thought I would be driving around in it, tatty but mechanically sound, within six months.

I have rebuilt the entire bottom 400mm or so....and the rest!

Now I'm at the re-upholstering stage I can't believe that I thought that it would do for me in the original state...the fabric is just falling apart.

FER_7711 by Peter Thompson, on Flickr

Today I've taken tons of photos so that I can emulate the original folds and tucks of the fabric. Then, having stripped away the fabric, foam-padding and water-damaged chipboard paneling I have revealed the inner roof which is surprisingly well preserved. I'm currently scraping the fibreglass clean of the remnants of adhesive and foam so that I can start sticking on the foil insulation.

FER_7706 by Peter Thompson, on Flickr

Pity I never thought of teal and yellow..maybe on the next vehicle?:D
PS. This just came up on Facebook; :eek::eek::eek:
teal and yellow by Peter Thompson, on Flickr
 
Last edited:
Back
Top