Technical Berlina Thermostat

Currently reading:
Technical Berlina Thermostat

FR85

Member
Joined
Jan 15, 2020
Messages
250
Points
110
Location
Kildare
Hi Guys,

First time poster!

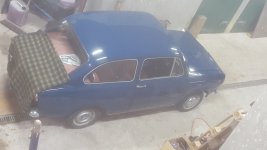
I have an 850 Berlina and it was running a little hot, I took out the thermostat and it's now staying well below the middle mark/barely registering. Car is in Ireland, weather isn't the warmest so this too may be aiding in the cooling.


Is it ok to run it this way without the thermostat and just let it run cool?

I have taken out the radiator, flushed it and back flushed it with a hose, soaked it with warm water and vinegar, blew out the vanes with compressed air and a light power wash, flushed the engine and also cleaned the fan blades as they were caked with gunk. the airflow through the rad felt from underneath is dramatically different now, it's seriously moving air! The engine bay has the all important bottom trays also.


All is back together, car is running sweet but I was just wondering about running it with out the thermostat.


On a side note there is an element of white goo on the oil filler cap, not loads but it is present, the engine was rebuilt about five years ago but it has done little driving since, maybe about 150kms if even, so I would put the gunk down to condensation in the rocker cover.

Thanks!

Gavin
 
Hi Gavin

yes it seems you have done all the sensible things, i would run it for a few trips to make sure its all staying stable then probably look at putting the stat back in, a small detail though, check the stat you have has a small 5/6mm bypass hole in it that will allow flow all the time,

Tim
 
Hi Tim,

Thanks for the back up. It's own has a small hole with for want of a word a bypass flap.

I did put it in a pot and slowly brought it to the boil and it did start to open at about 87-89.

Cheap enough so I might order one and just have a new one in stock.

If I did elect to leave it out is there any long term harm that could be done? My theory by leaving it out is that there is one less thing to go wrong! ;)


Thanks,

Gav
 
You sir are a gent! Thanking you!

Will no doubt be back with more questions!

Gav
 
Hi Gavin,

'Mayonnaise' (white goo) under the oil filler cap - usually a sign of cold running but can also be an early warning sign of impending head gasket failure. As you mention that the engine was rebuilt some years ago and then not used much, I'm wondering if the cylinder head was ever re-torqued? It usually needed to be done (engine cold) after 600 - 1000 miles. I'd suggest re-torqueing the cyl. head as a precaution in case it was never done, then reset the valve clearances (cold). While you're doing this you can remove the valve cover and check just how much 'mayonnaise' build-up is present.

There are some by-pass hoses etc. on the top of the cylinder head beside the rocker/valve cover. From memory there is a small hose (8mm bore?) running from a stub on the thermostat housing to a fixing on the cyl. head (possibly a temperature sender unit) and another hose that iirc connects to a stub on the water pump as a bypass. There are also feed and return hoses that go to the heater unit in the front of the cabin.The purpose of these bypass hoses etc. is to assist in bleeding air from the cylinder head, prevents steam pockets occurring around the valves and assist the heater operation before the thermostat opens. These pipes need to be removed and checked/cleared out as necessary, be aware that the pipe stubs tend to disintegrate from corrosion and the hoses can become blocked. You might have to find/make replacements, possibly you might find similar used on the Fiat 127 etc. - the 850 engine evolved into the 903 ohv engine that was used in later models. Without cleaning out this pipework, you might have difficulty in bleeding all air from the cooling system and getting the heater to work properly.

I'd prefer to refit the thermostat, having cleaned the cooling system as you've done, plus the bypass hoses described above and then have a well-working heater/demister to cope with the vagaries of the Irish weather. If the head gasket is about to fail, I'd prefer to know sooner rather than later, deal with it now rather than maybe when away from home/on a trip etc.

Hth,

Al.
 
Last edited:
Hi Gav

Yes i would definitely agree with the retorquing and valve gap resetting. you could take the opportunity whilst retorquing to refit the stat.

it will take a few good runs to dry the mayonnaise even if the head gasket is ok.

enjoy the runs though

Tim
 
Al and Tim,

Thanks for the replies.

The gent who rebuilt the engine had said about retorquing the head but I'd never done the milage. He had suggested in and around 1000kms. Judging by the looks of the pipe clamps I think the bypass hoses below the thermostat were looked at. Stewart who was a Fiat guru here in Ireland wasnt one for leaving stones unturned!

However, new problem! Waterpump, on the top between the bypass hose and the pully there is a little hole that is weeping coolant. I've been told on a facebook site this is a sign of bearing wear and I'm up against a replacement pump so this will need addressing before moving on.....it never rains but it pours!!!

Loving getting back into working on this car, zero laptops and diagnostic software required, eyes, ears and tools!!!

Will keep you updated, thanks and be safe!

Gav
 
Also Al, you are correct, there from memory is a bypass hose that leaves the thermostat, goes to a stub on the pully end of the engine and branches off down towarsd the pump. With the thermostat out I would imagine there is coolant flowing all along these lines. I did numerous engine flushes along with fitting everything back up, filling with water, running it and then draining. So everything in theory gotna good flushing via several methods.
While the rad was off there was also a mains garden hose connected to the heater matrix hose that comes off the rad, water under pressure was put through this and again flushed. I don't have a set of feeler gauges and I don't think I'd be confident in my ability to do valve gapping and timing.

Thanks for all the advice!

Gavin
 
Hi Gav

Ref the water pump leak. often these pumps are good at holding water until they get used when the seal bushes start to seep. is it leaking out of the little hole under the fan end of the casing, they can be rebuilt but the risk is damaging the rear removable section of the casing as its fragile. if it gets a rebuilt it will be best to go for the two bearings and two water seals all at the same time.

If you have a 3 bolt pump 1965 to 1968 then replacement full pumps are the easiest way to go, after 1968 then some have the 4 bolt pumps which are difficult to get new pumps but rebuild is possible, you can get them professionally rebuilt as well for reasonable money on an exchange basis.

due to the light wear of the valve tops and rocker arms i dont use feeler gauges. i work out the valve gap required as a percentage of a turn of the rocker arm screw according to the pitch of the screw and use that to set them instead. dont forget to allow for rocker arm ratio as both sides are not the same length.

A good workshop manual or haynes will guide you through the valve regapping and re torquing.

Tim
 
Evening Tim,

It's a 3 hole so. Research on this has been done. I have another pump there off a doner engine but I don't know the history if it as I got the engine in cardboard boxes.
New pump won't break the bank.

The Haynes manual has the torque settings in as about 29 ft/lbs I think, doesnt seem like a lot to me?

Thanks again for the help Tim, very very kind of you!!

Gav
 
Also Al, you are correct, there from memory is a bypass hose that leaves the thermostat, goes to a stub on the pully end of the engine and branches off down towarsd the pump. With the thermostat out I would imagine there is coolant flowing all along these lines. I did numerous engine flushes along with fitting everything back up, filling with water, running it and then draining. So everything in theory gotna good flushing via several methods.
While the rad was off there was also a mains garden hose connected to the heater matrix hose that comes off the rad, water under pressure was put through this and again flushed. I don't have a set of feeler gauges and I don't think I'd be confident in my ability to do valve gapping and timing.

Thanks for all the advice!

Gavin

I've described these bypass hoses etc. and where they connect to from memory so you'll hopefully forgive me if I'm a little wrong in my description, but I think I've described the general gist of what they're like, enough to convey their importance in the overall correct functioning of the cooling system.

You seem to have done a fairly thorough flush of the cooling system, but I 'd have to re-iterate the importance of removing these hoses and checking each pipe and stub involved. My experience is that these pipes/stubs can become completely blocked and don't therefore respond to flushing, needing instead a lot of manual poking to clear things out.

Any workshop manual should include a full description of each part of the cooling system and it's function. The cooling system on the 850 was quite advanced back in the day as it included the above bypass system and also was a sealed system including a coolant expansion bottle/tank. (I upgraded the system on my old Fiat 600 to this arrangement to good effect!).

Al.
 
Al,

The system will be drained again and I will pay more attention to these also. Have some aquarium pipe cleaning brushes that I will use when changing the water pump.

Thanks again for taking the time to reply!

Gav
 
Re :- water pump

Back in the day, we used to just fit a new water pump to cars in the dealership where I worked.

But I did rebuild many pumps for my own use or on friends/relative's cars.
As Tim says, the pump can be rebuilt but that rear bearing housing plate is extremely prone to breaking. You could try removing all the bolts and then leaving the pump to soak for a few days in diesel fuel to hopefully help loosen the corrosion bond between surfaces. other fluids e.g. white vinegar might be more effective? A little gentle heat can help, I've also have seen a junior (i.e. 6") hacksaw blade used to remove the gasket, if fitted on the rear housing plate to allow penetrating fluid to be sprayed into where it's needed.Try to use a gear/bearing pull to remove the rear cover rather than prying at the joint surface. Also, iirc, with the bolts removed it should be possible to try to twist/rotate the rear cover plate in order to break the corrosion seal rather than try to pry it apart.

As Tim has said there are 2 bearings and 2 seals. Iirc, these seals comprise a carbon sealing ring held in a spring-loaded brass housing. If rebuilding one of these pumps, you also need to check the sealing face for these seals on the impeller (pump) shaft - often these to be cleaned up (on a lathe if you have access to one). When re-assembling the pump, clean all bearing/seal recesses to allow easy fitting of bearing/seals, press everything together, don't be tempted to hammer anything or you risk fracturing one of the carbon ring seals.

Some Mechanics used to advise running a rebuilt pump dry,(i.e. before installing any coolant) for a couple of minutes to help the new seal 'bed-into' the old metal surface. Given that your engine was out of action for some time, (you don't mention if anti-freeze was used) it's always possible that some corrosion has occurred on the metal surface that abuts the carbon ring seal. Of course, the bearings may be worn or damaged if coolant has gotten into them but if worn there should be some rocking movement at the drive pulley.

It might be worth trying to run the engine without coolant for 2-3 minutes and see if this slight water weep stops. You could also try one of the leak sealers designed to seal small leaks such as 'Bar's Leaks', Radweld etc. if you want -I know some people don't like to use these quick-fix products. Be aware that anti-freeze mixture is notorious for finding any weak point in a cooling system unlike plain water - so just because the system is leak free when tested with water, doesn't mean it will still be leak free when antifreeze is installed. I used to do a system pressure check on any cooling system I had worked on.

Al.
 
Last edited:
Hi Gavin,

I'm surprised (shocked actually :eek: ) that you don't have a set of feeler gauges!
Back in the day, even people who didn't work on their cars seemed to have a set. But things have moved on, I suppose.

Feeler gauge sets can usually be found inexpensively at most motor factors/car accessory outlets and of course online.

You'll also need feeler gauges to check contact breaker points gap (before adjusting ignition timing) and spark plug gaps.

As Tim has said any workshop manual will guide you through the procedure of re-torqueing the cylinder head and re-setting the valve clearances - it's not difficult. I note you mention the Haynes manual. Most manuals also describe the 'rule-of nine' which can used if you want to minimize turning of the engine when setting the valve clearances (aka 'setting the tappets'). Just remember that the 850 engine turns anti-clockwise, looking at the crank pulley which is regarded at the front of the engine, even though it's at the rear :).

To re-torque the cyl. head, you'll need a torque wrench. The figure you give of 29 lb/ft sounds correct, iirc the head bolts are only 8 or 9mm in diameter.
Also iirc, there is a head bolt hidden in the inlet port, so the carb will need to be removed for access. There is also a bolt with iirc a smaller head, possibly 14mm just under the thermostat housing, it's a bit awkward to access unless you have a suitable 'crow's-foot' adaptor, (I had one I welded up) but you can remove the entire thermostat housing for access. I used to have a 17mm 3/8" square drive socket on which I had ground a heavy chamfer to allow me to access the cyl. head bolts without removing the rocker shaft, this copied the official Fiat special tools for re-torqueing head bolts.

I assume you know that rear body panel above the bumper level can be easily removed on the 850 Saloon (2 nuts each side + possible a couple of wire for the rear lights/no.plate light?). This greatly improves access for jobs such as cylinder head removal, water pump removal etc.

Al.
 
Last edited:
Hi All,

Spoke to the guy who rebuilt the engine, hes going to retorque the head and he has a Fiat water pump kit and is going to rebuild it.

While all this is being done I will have a look at the other hoses.

Image attached.....I hope!

Gav
 

Attachments

  • 20200113_220148.jpg
    20200113_220148.jpg
    2.6 MB · Views: 25
Hi Gavin,

If you care to check out www.fdricambi.com/en/fiat-850/heating-cooling

you'll see the various parts still available from this supplier for the 850 cooling system incl. water pumps, thermostat housing and cover, one of the bearings (I thought there were 2 of the same size/type?) Also shown are the water pump seals which I tried to describe.

Al.
 
Update:

Have had contact with my guy here in Ireland and hes found the pump kit! I have the pump out and my jesus on high was that a job, the rear bolt was moulded in there, I thought I was going to be getting the bottles and adding heat but it's out anyway and sure enough its "bearing'y" sounding and feeling. I have another with a broken fan and they are like chalk and cheese from a feel point of view.

I have also blown some air through the bypass hoses and all seems clean and the air I blew through was lung powered! Very confident they are clear.

My guy here has also told me he has a collection of 850 parts I can have due to his pending retirement! Age and the internet has I'm afraid killed his business and he said even though I'm 35 and drove him demented I always returned to him rather then go online for parts so as a thank you hes giving me what he can find. I have to be honest I have never been a fan of online shopping. That said i did manage to scoop a very very good set of doors for my 600D through Facebook recently in Italy. One bought, second will be bought on payday this week and then I'll get them shipped.

Just a small update, thanks again for your help and advice!

Gav
 
Back
Top