Technical 500 1.2 pop coolant

Currently reading:
Technical 500 1.2 pop coolant

bondquest

New member
Joined
May 5, 2013
Messages
35
Points
11
Location
Grimsby
The Fiat 500 passed its MOT today, with no MOT advisories.

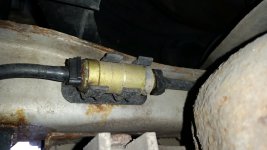
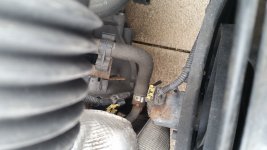
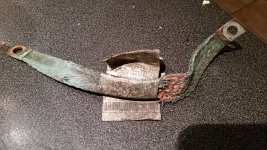
However the radiator has a small leak, and experience tells me leaks tend to get worse over time.

In view of this I've ordered a new rad, which I intend to fit myself. I know it means front bumper off, and removing the bar behind, but I reckon I can manage it (famous last words).

Fiat recommend Paraflu Up coolant, but can I just use any OAT type coolant?
 
This might help whilst changing it check the condition of the metal water pipe running behind the exhaust manifold , the quick connect bottom hose can be hard to move, once drained gently place back brim system with water then pull off hose again, do this several times you'll be amazed how much crap comes out. When bleeding the system be VERY careful with the bleed screw left of the battery
 

Attachments

  • 1600283509240782812277194334633.jpg
    1600283509240782812277194334633.jpg
    3.7 MB · Views: 82
Last edited:
Thanks for the reply. Is that a Haynes?

It's sounding a bit more complicated now. My son and I easily changed a radiator on his MX-5 NB.

I assumed that after I removed the crossmember, it'd just be a question of disconnecting the inlet and outlet hoses, undoing any mounting bolts, and disconnecting the fan electrics, and lifting the rad and fan out together.

After that I (again) assumed I'd swap the fan onto the new rad and reverse the procedure. Fill up with coolant and run it until the thermostat opened, and then top up as necessary.

Would you bother using coolant flush, or just use clean water a few times?

Do I need to use the bleed screw, can't I just drain the system after undoing a hose/pipe?

Are the inlet and outlet hoses both metal?

Have I gone in too deep? Should I just take the rad to a mechanic and ask them to do it?
 
Yes Haynes, hose connections are plastic, use normal water brim then pull off bottom hose, only loosely placed back leaking as filling, the gushing out effect pulls out lots of rust, you need to bleed the air out using the bleed screw or the heater might not work upon 're filling. The bottom hose has a stainless retaining wire clip remove it altogether(keep it) then pull off the hose/plastic coupling, this is quite hard the first time! Normal pink coolant whilst underneath look at the metal water pipe, also look at the sump pan, and clutch slave servo quick disconnect and the main engine earth strap
 

Attachments

  • 20170312_133456.jpg
    20170312_133456.jpg
    4.7 MB · Views: 41
Thanks for the reply. Is that a Haynes?


I assumed that after I removed the crossmember, it'd just be a question of disconnecting the inlet and outlet hoses, undoing any mounting bolts, and disconnecting the fan electrics, and lifting the rad and fan out together.

The fan is held to the back of the radiator by two self tapping screws, and two tabs which fit into slots in the radiator frame. You can remove the screws and then pull the tabs out of the tabs (disconnecting it from the radiator) without removing the fan from the car's electrics. It's simple to re-attach the fan when the new radiator is in place.


Have a look at the metal pipe and try to gauge how bad it is. I've rust-treated the Younger Mrs S' one.. but if yours looks like its very shonky, it may be worth fitting a new one while you have it apart. If it was me, I'd give the new one a couple coats of smooth Hammerite before I fitted it, just to help it last a bit longer.


Ralf S.
 
Last edited:
Thanks for the assistance so far, it's been very helpful, and morale boosting to know there is support out there.

The rad came 16 hours after ordering. Unfortunately due to other commitments, I only started half an hour ago, so I think I'll stop and continue first thing in the morning.

The 7 star bolts on the top and bottom of the bumper came off fairly easy, however the Philips screws holding the wheel arch trim on won't budge, so I've given them a liberal spraying of penetrating fluid, and hope that the overnight soak will help.

The rad removal looks fairly easy, especially with the guidance received so far. Just two main rubber hoses, and a couple of screws. The new rad came with new O rings for the connections. There's a another little bag with a small jubilee clip & rubber thingy, does anyone know what that's for?

Update - After two hours of being soaked in penetrating fluid, and strong arm tactics with a ratchet, the screws are out.
 

Attachments

  • IMG_20200917_144125.jpg
    IMG_20200917_144125.jpg
    6.8 MB · Views: 56
Last edited:
Thanks for the info.

I forgot the wing alignment bolts are still in place. I might nip outside now while it's still light and give them a squirt.

I've got a set of nylon pry tools, and was going to use them to unclip the bumper from the wings. I'll take your advice and go easy.

Cheers (y)
 
It’s an easy job. Disconnect top and bottom pipes and drain.

Remove the A/C condenser if your car has AC, 4 bolts and move the condenser out of the way. Remove the two supporting brackets at the bottom of the rad then pull down on the rad so it comes out of the support pegs.

Pull the rubber parts of the brackets off the old rad and push onto the new one. Push back up into the plastic retainer tabs and do up the bottom brackets bolts. Refit the pipes and refit the condenser.

The bottom plastic pipe is a pig to get off. Take off the metal clip and then brute force with a bit of rocking motion eventually will come off. I always cut the plastic of the radiator with it still on and then put it in a vice to remove. Persevere it will come off eventually.
 
Last edited:
The pipe is not expensive or hard to replace if a little fiddly just clean off all loose rust protecting the oil filter connection once you've removed the oil filter(You can do it without removing it but it makes it far easier as it's just above)
Note DO NOT REMOVE THE AC CONDENSOR unless you really have to and have the system professionally de gassed before hand, pop owners are fine as we don't have a.c. (unfortunately)
 
The pipe is not expensive or hard to replace if a little fiddly just clean off all loose rust protecting the oil filter connection once you've removed the oil filter(You can do it without removing it but it makes it far easier as it's just above)

Note DO NOT REMOVE THE AC CONDENSOR unless you really have to and have the system professionally de gassed before hand, pop owners are fine as we don't have a.c. (unfortunately)


The pipe was actually in good shape apart from the front part that is fixed to the rubber hose so luckily I all I had to remove was the air box to get to it!
Anyway sorted it and it’s protected for now!
 
There are so many design faults with these cars like the door handles and the boot wiring. Not sure if they've redesigned either.

Tell me about it, like rear suspension bolts that hit the brake pipes when you try to remove them, oh and then hit the fuel tank before they're fully out preventing the arm releasing.
 
Back
Top