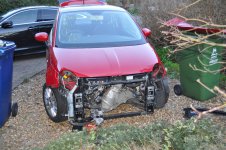
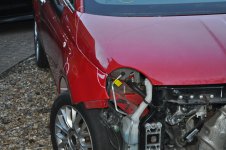
Just hung the lights on (unbroken from scrap yard) as they still have the small hook clip - aside from drivers wing it looks really good, bumper to although it was too far back as I'd pushed it as far in as I could to hang without falling off. Slam panel position is about 5mm too low all round as it was just a rough fit and the combination of that and the drivers wing stops the bonnet completely closing.
Plan:
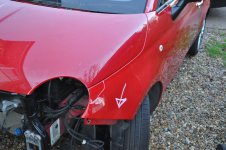
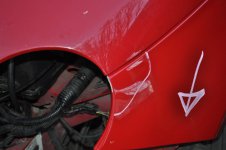
sort wings out
readjust bonnet hinges, wings & bonnet bolts to line up - tighten down
clean fan & radiator pack, fit intercooler then radiator slam panel, reattach hoses as each is fitted, attach wiring for fan & horn
fill coolant & check for drips.
put jack under slam panel to keep in position
attach crash bars to slam panel, fingertight all bolts.
fingertight bolt fit lights, attach wiring
jack up the slam panel a bit so the bonnet latches correctly & adjust rubber bonnet stops
check bonnet horizontal gap vs slam panel top edge is consistent across bumper width and that lights line up well vs bonnet/wings
test fit bumper to check L/R position of slam panel using bumper/bonnet edge as a guide
mess around probably for hours until completely happy with alignment
remove bumper
tighten upper slam bolts
loosen subframe arm bolts
tighten lower crash bar bolts
tighten subframe arm bolts
rivet on wing clip strips
tighten lamp bolts for best fit with bonnet closed, readjust rubber bonnet stops
fit condenser
fit bumper
attach driving lamp wiring
fit wheel liners & undertray
refit scuttle & wipers.
refit air cleaner assembly
check engine oil level
run engine for a few minutes, re-check coolant & oil levels.
take car for wheel alignment check, headlight alignment check, aircon regas
I highly recommend the scuttle removal & fingertight hinge bolts thing - they currently look like theyre in crazy positions vs where they were once fitted on another car and where mine were (pen lines), but the end results are great - only test & tighten the bolts when holding the bonnet open from the middle - as soon as you put it on the stay it can pull the hinges out of place again.
Also I've ended up with a single horn and a dual horn. Can't make my mind up which one suits the car more, I'm sure my neighbours are not appreciating the tests. I was going to regas the aircon myself but the local F1 autocentre are charging less than the regas kit costs and no messing around with a canister deposit.