Technical Abarth 500 - Boom after overcharged with offshelf gauged stopleak refrigerant can.

Currently reading:
Technical Abarth 500 - Boom after overcharged with offshelf gauged stopleak refrigerant can.

ormani

New member
Joined
Jun 13, 2020
Messages
13
Points
5
Location
South Florida
So it all started when I did a radiator flush. According to the instructions on radiator flush, I was to cleanout, refill and run this stuff with the heater on high. For a deeper clean it was suggested to run for a couple of days before refilling with fresh new coolant. So that's what I did ran it for about an hour with heater full blast, next day same thing. The third day when it was cold from not running it. Drained, flushed well with water to make sure all flushing fluid was gone, and filled up with Fiat antifreeze.
All was going well but I noticed the A/C was not cooling so well. Being in Miami Florida heaters rarely ever used, especially in high like I was running for radiator flush.
So who knows, maybe a leak or something developed. I started thinking, maybe the radiator flush had some acids that might have ate away something : O - ring? aluminum?
I stopped by the local autozone store and picked up some refrigerant charge, with stop leak and compressor conditioner. The can even had a pressure gauge, braided line and a quick release nozzle for the low pressure.
I drive back home, pop the hood, put A/C full blast, connect the can and it measures yellow for low. No problem , shake the can and start pushing through in like intervals. Gauge is moving up from yellow slowly towards the green. All of a sudden , it by passes green all together and goes right on the beginning of red line. I immediately disengaged and figured some will probably leak out a little. I will be good.
Go in the house, hour later get in the car. A/C is blowing nice and cold. Then I start hearing like this jet noise, and then a BOOM. I even felt it in the cabin, but can't remember if it was the startle of the noise or a something exploded around the center firewall. What ever it was it was not good.

Looked around every where and no signs of oil residue. Compressor stopped working.

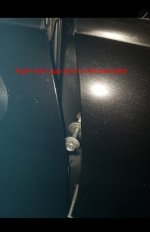
Bought some more refrigerant with stopleak. tried a little this time. Compressor would kick on as was filling system then shortly after stopped. Looked like leak somewhere in engine compartment area. Low pressure hose look like a culprit. Changed it.
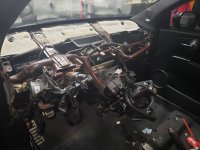
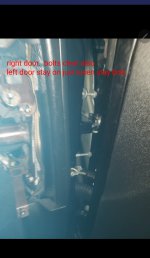
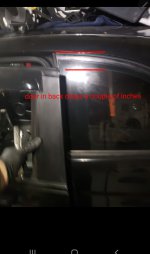
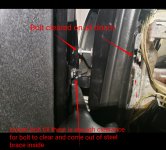
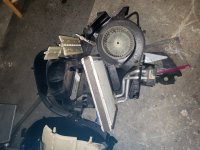
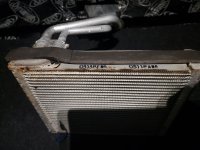
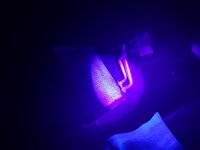
Compressor then wasn't working and left it alone when all the Covid stuff started. I been fidling with it, ended up getting really gauges, a vacuum pump. and still will not hold vacuum and compressor will not engage. tried pushing florescent dye through system with compressor not working engaged but no signs anywhere. I even went a little courageously crazy and took the whole dash iut and looking in through evap / heater box for fluorescent traces and haven't really seen anything. Anyone have any clues, ideas, suggestions?
 
Hi and welcome to the forum.

Sorry to hear about your problem.

Take it to a professional, this is a perfect example of why you should never try to fill an a.c. system yourself, no disrespect.

:yeahthat:

Bought some more refrigerant with stopleak

These types of products are generally little more than snake oil and often do much more harm than good.

If any kind of HVAC system is leaking, you need to find out why and fix the root cause of the problem; not try and seal it with an additive.

But what's done is done; the best thing you can do now is to take it to a specialist A/C shop and see what they advise.
 
Last edited:
You probably overcharged the system or the stopleak stuff blocked something up causing the pressure to build up until it blew something apart
Possibly the evaporator in the cabin airbox


Definitely take it to a AC specialist allthrough the bill may not be cheep now
 
Im past that point now since I have already taken apart the dash and am going after the evaporator.

Since I heard the jet noise , stuff coming out of vent like a cloudy air before I heard the BOOM.

I should be at the evaporator today or tomorrow, just need to figure out how to remove the raw steel tube brace that holds dash up and eveporator housing in place. Looks like the bolts are coming from outside car and doors are going to need to be removed.
 

Attachments

  • 20201125_064818.jpg
    20201125_064818.jpg
    3.3 MB · Views: 68
  • 20201126_151049.jpg
    20201126_151049.jpg
    5 MB · Views: 58
  • 20201126_151101.jpg
    20201126_151101.jpg
    3.5 MB · Views: 57
Looks like the bolts are coming from outside car and doors are going to need to be removed.

Yes, to properly access the heater box both doors have to be removed to get that steel brace out. The heater box is just about the first thing to go into the bodyshell when the car is built.

There's a workshop manual for the European cars which you can download for free from the downloads section of this forum. How much of it is compatible with the North American market models I don't know, but you may find something useful in there. The procedure for accessing the evaporator matrix is described in some detail.

As you've already found out, it's a lot of work. Good luck, and do keep posting how you're getting on.
 
Last edited:
Went to take out doors to get bolts from frame out but was able to get bolts to clear enough to free steal cross frame. On the left door I unbolted door stay and freed rubber tube that wires pass in through door. Learned from right door none of this is necessary.

The door stay allen bolt can just be loosened out like 1/4 of an inch, and the 15mm bolts on door like about 3/4 of an inch for top, bottom 15mm door bolt maybe just half inch out. Door will just sag enough to clear.

I also grabbed a magic marker and marked were the hinge was sitting just incase of alignment later. do this first before loosing anything obviously. I worked the door bolts a little, then the cage frame bolts then back forth. Did this so I could losen the door bolts just enough to make the clearance.

would have sucked if the door bolt came off. would have sucked trying to put back in with heavy door, not to mention a wire pulled.

It turned out to be less invasive, just slowly wrenching the 13mm bolts little by little with the wrench did take some time and patience. It's quarter turns for a while till can do rest by hand. didn't want to try and use socket from outside through door gap.

That's all I need is a crease in the door cause it moved. It's like this is all a lesson for mindless shortcuts. If I just would have put an ounce less of refigerant stopleak maybe this wouldn't have turned into such a nightmare.
 

Attachments

  • Screenshot_20201126_211700.jpg
    Screenshot_20201126_211700.jpg
    288 KB · Views: 74
  • Screenshot_20201126_211533.jpg
    Screenshot_20201126_211533.jpg
    260 KB · Views: 69
  • Screenshot_20201126_210802.jpg
    Screenshot_20201126_210802.jpg
    329.9 KB · Views: 51
  • Screenshot_20201126_210642.jpg
    Screenshot_20201126_210642.jpg
    188 KB · Views: 46
Wanted to attach this photo. Didn't know how to go back and add by editing.
 

Attachments

  • Screenshot_20201126_210346.jpg
    Screenshot_20201126_210346.jpg
    258 KB · Views: 218
That's all I need is a crease in the door cause it moved.

This is one of the reasons why the workshop procedure recommended by Fiat is to remove the doors completely.

If anyone tried doing what you have done in a busy workshop, the car would likely be a wreck by the time the job was finished.
 
Last edited:
Well finally got the evaporator / heater core. It's is 100% confirmed that you do not have to take the doors out, if you want to patiently use an open end wrench to loosen the bolts the whole way. Trying to squeeze a rachet between door and fender to save time is not advised.

what is aso a plus of not removing the whole way is if you are doing by yourself if you had to hold the door and alighn the holes might be challenging. I saw a post were a person replacing their complete door was using a car jack. I have also been able to open all the way to get in and out if necessary with no problem.


I had used usome UV dye a couple of months ago wondering if these are traces under the black light.

marching forward. next will get new evaporator core, new expansion valve, new seals just to make sure.

hope that's it and start putting it back together, patiently, slowly, and cautiously.

good thing is the clips go on a lot easier than it is to take them off, and that seems like tge whole car.

It was designed for the assembly line.
 

Attachments

  • 20201201_225220.jpg
    20201201_225220.jpg
    4.3 MB · Views: 48
  • 20201201_225745.jpg
    20201201_225745.jpg
    3.3 MB · Views: 46
  • 20201201_225612.jpg
    20201201_225612.jpg
    2.4 MB · Views: 45
Well.. we've all been there... it's called a "learning experience"... :D

I think "doors off" is just the easiest/quickest way if you have assistance available but it's useful to know that it can also be done with the doors still on if you're on your own (as we usually are). (y)

Just test that the a/c works before you put the dashboard back together... and also test it again between the dashboard being re-installed and the doors going on. It'll be a bummer if you get to the end and some plug or something inaccessible isn't connected..

If you have Climate Controlled a/c rather than a manual dial, check that the flap actuators are working, before you put it all back. It could be that the radiator flush gave the heater a workout and it's now flowing more hot coolant than before, which may have led to the a/c feeling warmer if the flaps are jammed (quite a regular problem).

Otherwise, the cooling system is not directly connected to the a/c so don't blame yourself for flushing the coolant. Any damage in one system doesn't affect the other (apart from they work together, obviously).

You did clumsy-break the a/c though.... :D but, you're fixing it despite it being a bit of a mission... so you shouldn't beat yourself up about that.


Ralf S.
 
I'd make sure you get the system does professional this time rather then using the top up kits
As it's been open to the elements it really needs to the air and moisture vaccuming out of the system to ensure a good life span

Good repair job however
 
Yes.. takes a few minutes, doesn't cost soooooo much more than the aerosol cannisters, if you hunt around for a promotion especially... and if they blow it up, you'll at least be able to re-assure them that all the nuts and bolts will come off easily, since they were done not long ago.. :D


Ralf S.
 
The big issue has been that I have not been able to get the compressor to turn on anymore. I also bought a vacuum pump and professional gauges this time around, but when even after hours of running vacuum pump it would not hold a vacuum.

just for kicks I blocked off one end off the evaporator, put underwater and put compressed air in it to see if it would atleast show some evidence of leak and it's not looking like it is the issue. if it had a hole it would have to be big but no signs of anything that large yet.

I know refrigerant is thinner than regular air but no signs of uv dye or air leaks yet. atleast that big. I am going to buy an evaporator, and expansion Valve since I've gotten this far and just chuckle at the fact that I might have taken this whole thing apart and the evaporator was not it. Thanks for the advice on the blend doors I will check those out as well.

the hunt continues. will keep everyone posted. I have been taking hundreds of pictures and videos of how every is layed iut incase someone needs any reference in the future.
 

Attachments

  • 20201202_195442.jpg
    20201202_195442.jpg
    3.4 MB · Views: 42
Back
Top