Ok it was threatening to rain at some time during the day and it was cold so I set to with everything I needed...
Did I need to disconnect the battery because I was going to disturb the electrics for the mirrors? .... I took a chance and decided not to (A good call, as it turned out).
Doing it slowly, so I could photograph everything, and including a break (well, it look liked we weren't going to get rain after all) to have soup with a sandwich lunch and watching the BBC news, it was all done and back together again in less than 2 hours.
Proceed as follows:
Firstly, remove the small plastic trim covering 2 allen bolts near the door pull

No need to remove the bolts yet though

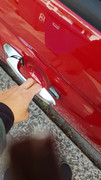
Next I prised off the chrome (plastic, so be gentle) bezel around the inner door handle by easing a small screwdriver in at the front (door hinge) end...

There are 4 plastic lugs holding it on ...

and there's no need to remove the hidden 3rd allen bolt just yet

Now start to ease out the plastic plugs which hold the door card to the inner door frame by starting in the bottom corner furthest from the door hinges .... this can take time if you don't want to the plastic plugs or rip them out of their holders on the door card, although a proper tool would make the job easier...


The next photograph shows where all the red plugs are positioned and once they are all "popper out", the 3 allen bolts can be removed, and the door card unhooked from the top where it lips over the door window ledge, but it still can't be removed more than about 6 inches from the door as it is sill attached to the wiring loom and to the door handle cable.

So now to remove the wiring loom link by EITHER pulling out the plug by pressing a release tab on its rearward side (neat to the green wire in the photo)

OR (as I did) by removing the mirror switches panel, lifting it up and out by pressing the release lug (indicated by the screwdriver) and then removing the (then) more accessible wiring plug ....

Now remove the door handle cable by swinging round the white plastic clip and pulling up the right angle bend in the cable, also releasing the black plastic outer cable retainer from the door card...


And now start to lift up the polystyrene door skin very carefully using the blunt flat bladed screwdriver... this is what takes the time if you want it to go back intact and using the same glue... it worked for me, and simply pressed down and held tight when I was putting it all back together.


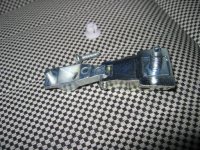
You can just see inside the door the 10mm but at the back of the handle's broken hinge. Remove the nut and discard the broken hinge, but keep the nut, you don't get another.

The pozidrive screw retaining the other part of the broken hinge in the door handle can be undone through the hole in the door!
Now the fiddly part and I realised a quarter inch combination spanner and Poizedrive bit ....

would fit between the outer door skin and flopping handle sufficiently for me to fit the new hinge to the handle and screw it up tight. It takes time but saved me disturbing the door lock and handle linkages.

Swing the hinge round to its closed position and its threaded bold can then be slotted through the hole and the 10mm night tightened on it

Reassembly is a straightforward reversal of what's been undone, though I struggled to hook the door card over the windows ledge until I removed the window wipe-channel from the door card and put that in place next to the glass first.

Good luck if you need it.
- flat bladed blunt screwdriver and piece of card (for levering/teasing off the door card)
- a small yellow handled flat bladed screwdriver for pointing with (for the camera) and prising off the inner door handle chrome bezel
- an allen key to remove the 3 bolts holding on the door card
- a small ratchet and 10mm socket and extension bar for the but at the inner-door-skin side of the broken hinge
- remove the door card
- replace the hinge and re-affix the handle
- replace the door card
Did I need to disconnect the battery because I was going to disturb the electrics for the mirrors? .... I took a chance and decided not to (A good call, as it turned out).
Doing it slowly, so I could photograph everything, and including a break (well, it look liked we weren't going to get rain after all) to have soup with a sandwich lunch and watching the BBC news, it was all done and back together again in less than 2 hours.
Proceed as follows:
Firstly, remove the small plastic trim covering 2 allen bolts near the door pull
No need to remove the bolts yet though
Next I prised off the chrome (plastic, so be gentle) bezel around the inner door handle by easing a small screwdriver in at the front (door hinge) end...
There are 4 plastic lugs holding it on ...
and there's no need to remove the hidden 3rd allen bolt just yet
Now start to ease out the plastic plugs which hold the door card to the inner door frame by starting in the bottom corner furthest from the door hinges .... this can take time if you don't want to the plastic plugs or rip them out of their holders on the door card, although a proper tool would make the job easier...
The next photograph shows where all the red plugs are positioned and once they are all "popper out", the 3 allen bolts can be removed, and the door card unhooked from the top where it lips over the door window ledge, but it still can't be removed more than about 6 inches from the door as it is sill attached to the wiring loom and to the door handle cable.
So now to remove the wiring loom link by EITHER pulling out the plug by pressing a release tab on its rearward side (neat to the green wire in the photo)
OR (as I did) by removing the mirror switches panel, lifting it up and out by pressing the release lug (indicated by the screwdriver) and then removing the (then) more accessible wiring plug ....
Now remove the door handle cable by swinging round the white plastic clip and pulling up the right angle bend in the cable, also releasing the black plastic outer cable retainer from the door card...
And now start to lift up the polystyrene door skin very carefully using the blunt flat bladed screwdriver... this is what takes the time if you want it to go back intact and using the same glue... it worked for me, and simply pressed down and held tight when I was putting it all back together.
You can just see inside the door the 10mm but at the back of the handle's broken hinge. Remove the nut and discard the broken hinge, but keep the nut, you don't get another.
The pozidrive screw retaining the other part of the broken hinge in the door handle can be undone through the hole in the door!
Now the fiddly part and I realised a quarter inch combination spanner and Poizedrive bit ....
would fit between the outer door skin and flopping handle sufficiently for me to fit the new hinge to the handle and screw it up tight. It takes time but saved me disturbing the door lock and handle linkages.
Swing the hinge round to its closed position and its threaded bold can then be slotted through the hole and the 10mm night tightened on it
Reassembly is a straightforward reversal of what's been undone, though I struggled to hook the door card over the windows ledge until I removed the window wipe-channel from the door card and put that in place next to the glass first.
Good luck if you need it.