IMG-0348.jpg

500 (Classic) "Sophia's" Restoration

Introduction

I have finally begun the process to start the restoration on my wife's cinquecento "Sophia"

Original Introduction Thread

She is a 1966 F with a 650 motor that has a synchro gearbox, electronic ignition and a dynamo.

When I purchased the car from Bring A Trailer it looked to be in much better condition than when she showed up at our home in December. I knew that I was going to have to do some work to get her to where we wanted to be with the car, but I didn't expect to need to "fix" so much. I'm not necessarily mad about this, as I will be able to learn more about the car as I go through it.
The car was originally blue, but was repainted to green at some point. We plan to bring her back to blue, but not for a few years. I'm certainly in over my head on this, but that's part of the fun!

When I started to look her over, I noticed that the exhaust was severely cracked, the seller stated it was "new"

IMG-1884.jpg


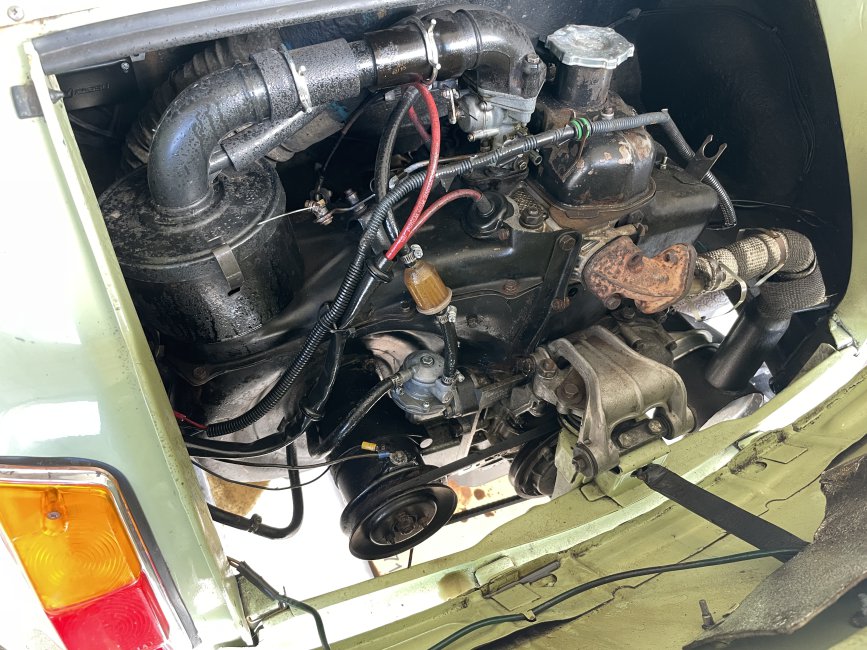
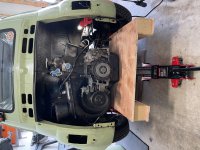
Here's how the engine looked after the first test drive. You'll note that the engine is covered in oil, as it turns out, the car has a major oil leak that sprayed over the whole engine from the belt and pullies. I thought we had a fire with all the smoke!

IMG-0348.jpg


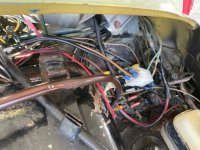
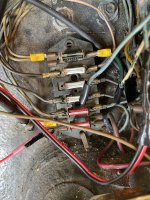
The wiring is also quite a mess, with lots of splices and things not working as they should. I ordered a new loom and will be rewiring the whole car.

IMG-1886.jpg


IMG-1885.jpg


IMG-1894.jpg


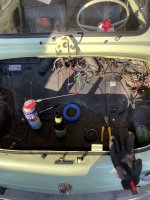
Gas tank out to begin the wiring removal process. I think I'll repaint it with the colors of the Italian flag

64220810349-43-E1094-E-D6-CB-43-D1-883-A-A850-B1-A7-BE8-B.jpg


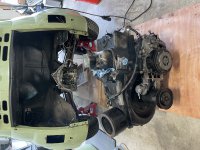
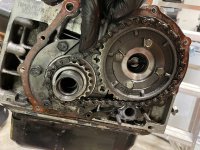
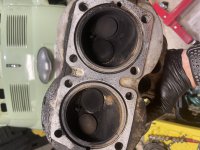
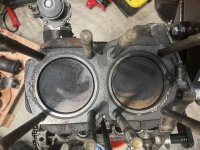
And now the process of removing the bits from the engine in preparation to pull it out to fix the oil leak, paint shrouds, swap oil pan and rebuild carburetor. I'll be replacing the bonnet, starter and accelerator cables as well.

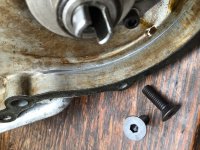
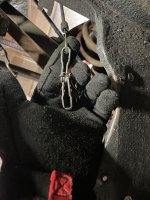
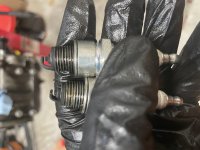
Interesting "fix" for a shorter starter cable...

IMG-2258.jpg


The accelerator cable just runs without a housing for the full length of the car

IMG-2253.jpg


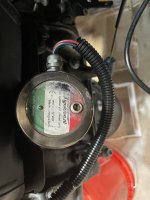
Electronic Ignition. If anyone can give pointers on how this needs to be wired into the loom, it would be greatly appreciated.

IMG-2257.jpg


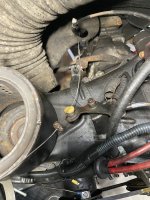
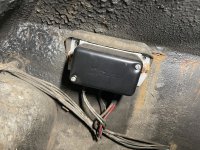
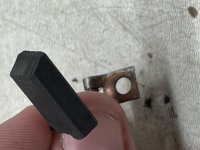
Can anyone tell me what this is? Voltage Regulator?

IMG-2256.jpg


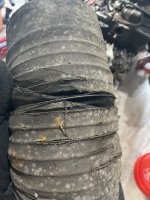
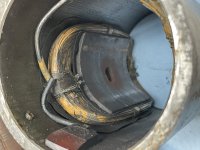
Air intake hose needs to be replaced...having a hard time finding this part, any leads?

IMG-2254.jpg


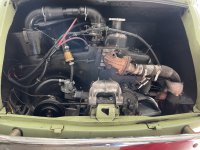
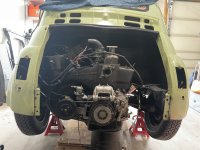
And here's how she sits for now

IMG-2252.jpg


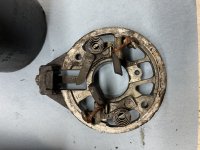
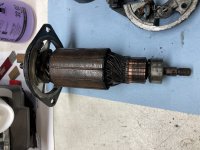
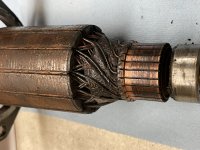
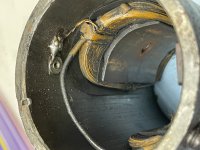
The dynamo does not appear to be working, so I will need to rebuild it. I have a spare so I may send it off for refurbishment.
I have gone through my 'collection'and I have some screws ready to despatch to you. The top-cover screws are 5mm, so I have given you a selection of cap-head (allen bolts) which you will have to trim to length. I, sadly, do not have any repair inserts for 5mm. The choke body screws are 4mm so I have sorted you out some 'length-adjustable' screws---again you will have to trim them. I have also put a couple of "self-tapping inserts" in with the screws in case the choke screw threads are knackered.
Just confirm your address on an e-mail and I will put them into the post Monday or Tuesday ([email protected])

Thank you Thomas. I appreciate the officer, but I have a large assortment of metric screws in varying lengths that I should be able to use if I cannot source original bits. If my screws won’t work, I will let you know.

As always, you are so generous!
 
Last edited:
The cost of sending the screws to you will be so minimal, I might as well let you have them. 5mm screws aren't a very common size. Just found your address Ryan, so will post them Monday or Tuesday. Have you given Luca a set of spanners yet?
 
Finally, motor is out!!
 

Attachments

  • F810A96B-E124-4403-9D61-7D65D7B862D4.jpeg
    F810A96B-E124-4403-9D61-7D65D7B862D4.jpeg
    4.5 MB · Views: 51
  • 01AFC8A3-A0EA-49F9-A31A-8F6692ADC20A.jpeg
    01AFC8A3-A0EA-49F9-A31A-8F6692ADC20A.jpeg
    4.3 MB · Views: 52
Looks like I need new pushrod tubes…
Anything here look particularly bad? There’a oil leaking from somewhere on the right side of the photo…thoughts?
 

Attachments

  • A29705BE-3B1B-4104-A104-D1BF6852A2AE.jpeg
    A29705BE-3B1B-4104-A104-D1BF6852A2AE.jpeg
    2.9 MB · Views: 53
Looks like I need new pushrod tubes…
Anything here look particularly bad? There’a oil leaking from somewhere on the right side of the photo…thoughts?

The tubes aren't all that expensive or difficult to replace and someone may come along recommending an alternative. I think the rust will be surface only as the tubes are unpainted when new. In fact, the corrosion shows that your leaky engine may be better than many.

The oil will be coming from around the rubber rings which seal the tops and bottoms of the tubes; this is a common problem, especially after a number of years have passed, often with long periods of inactivity.

Obviously, the job is a bit of a PITA as the head needs to come off. there are threads on this forum which give guidance. The main things are to fit the correct type of seals, to back this up with a small amount of sealant and to take extreme care when replacing the tubes and head to ensure the tube ends and seals enter their locating holes squarely.
 
Looks like I need new pushrod tubes…
Anything here look particularly bad? There’a oil leaking from somewhere on the right side of the photo…thoughts?
As Peter has said those push rod tubes should be ok. I would give them a wire brushing and a blow over with heat resistant paint. Removing the cylinder head will give you a chance for a decoke. When refitting the head I lower the head making sure the tubes are aligned and seals are located then before I start tightening the head down I spin the tubes to check everything is located nicely.
 
Pulled apart the dynamo. How does it look to you guys?

I’ve got a spare that I can also pull apart to try to salvage anything that looks spent.

That glob of solder doesn’t look right
 

Attachments

  • FF2B819F-4347-4CF0-BA52-E27A2C43A3AD.jpeg
    FF2B819F-4347-4CF0-BA52-E27A2C43A3AD.jpeg
    4.2 MB · Views: 43
  • 11A317E4-775F-40F3-9596-780A4E7A4ADC.jpeg
    11A317E4-775F-40F3-9596-780A4E7A4ADC.jpeg
    4 MB · Views: 42
  • C61B2B5F-3EF2-459E-B33B-1B03F85C289D.jpeg
    C61B2B5F-3EF2-459E-B33B-1B03F85C289D.jpeg
    2.1 MB · Views: 44
  • 72731C3A-1EC4-4801-BB9A-3B557395D1E0.jpeg
    72731C3A-1EC4-4801-BB9A-3B557395D1E0.jpeg
    2.3 MB · Views: 52
  • 55608A8A-4737-4F7D-B720-66A83BA3A27D.jpeg
    55608A8A-4737-4F7D-B720-66A83BA3A27D.jpeg
    2.1 MB · Views: 41
  • A0888569-7F30-413E-9DFC-8DBFD266521D.jpeg
    A0888569-7F30-413E-9DFC-8DBFD266521D.jpeg
    1.2 MB · Views: 42
Last edited:
Has anyone here had trouble removing the pulley from the crank shaft? I removed the oil “filter” cover, large nut (only was hand tight!) and the folded washer. The pulley doesn’t seem to slide off easily. Is there a step not in the Haynes manual I’m missing to remove the pulley? I don’t want to grab the pry bar unless I’m certain it needs it!
 
To the best of my knowledge Ryan, once the big nut is off (which SHOULD have been tight!) the pulley should just pull off---on all models. I wonder if, being that the nut was only hand-tight, whether it has been 'chattering' on the crank and worn a lip on it or the woodfruff key (between the pulley and the crank) which is preventing the pulley from sliding off. The torque forthe big nut is:--108.5ft lb!
 
To the best of my knowledge Ryan, once the big nut is off (which SHOULD have been tight!) the pulley should just pull off---on all models. I wonder if, being that the nut was only hand-tight, whether it has been 'chattering' on the crank and worn a lip on it or the woodfruff key (between the pulley and the crank) which is preventing the pulley from sliding off. The torque forthe big nut is:--108.5ft lb!

I suspect that this is also the culprit of the spinning and spraying oil leak she had.
 
Pulled the timing chain cover and the head tonight. Anything look out of sorts or a cause for concern? Think the timing change is due for a replacement? Not sure how much slack there should be.

Looks like the head gasket got blown out a bit, the head was not on there very tight. Took almost no effort to crack the nuts.
 

Attachments

  • 7D000F74-4551-4AC8-8DFA-BE2FF07F57A4.jpeg
    7D000F74-4551-4AC8-8DFA-BE2FF07F57A4.jpeg
    2.8 MB · Views: 61
  • 5C8EA42E-C36D-4172-99E4-FFC11BCB2972.jpeg
    5C8EA42E-C36D-4172-99E4-FFC11BCB2972.jpeg
    2.2 MB · Views: 53
  • E55E55EA-DE03-4BBC-8C95-BFAB107D1DCB.jpeg
    E55E55EA-DE03-4BBC-8C95-BFAB107D1DCB.jpeg
    4.2 MB · Views: 56
  • 4432DC4C-207E-4C50-8181-495A7DCF179E.jpeg
    4432DC4C-207E-4C50-8181-495A7DCF179E.jpeg
    5.2 MB · Views: 55
  • 256E4CED-A6D9-42C7-ADD3-4BFDF2789924.jpeg
    256E4CED-A6D9-42C7-ADD3-4BFDF2789924.jpeg
    2.7 MB · Views: 49
Last edited:
Pulled the timing chain cover and the head tonight. Anything look out of sorts or a cause for concern? Think the timing change is due for a replacement? Not sure how much slack there should be.

Looks like the head gasket got blown out a bit, the head was not on there very tight. Took almost no effort to crack the nuts.

The timing chain has zero slack when fitted new with new sprockets.
In my experience, it's quite common for the head to seem not very tightly secured when removing. That doesn't necessarily mean it will blow, but in your case there has obviously been blow-by on both cylinders.

The engine has obviously been taken apart previously as there is slight damage to screw heads and at least one of the screws is non-original. I don't think the engine has done a great mileage since then and the head and pistons look like they will clean up well.

I'm sure it will run brilliantly after a bit of tidying up. :)
 
Last edited:
Totally agree with Peter---that timing chain and the sprockets require renewal. When new, there is practically no slack at all in the chain. If you look carefully, some of the camshaft teeth are beggining to show more wear on one side of the teeth than the other. As the head torque isn't very high, it is not uncommon for the nuts to come undone very easily---but possibly yours were a bit TOO loose as you can see signs of head gasket blow-by.
 
You may well find that the self tensioning weights on the timing chain have thrown out far enough to start eating through the timing chain cover as in my picture. Not a problem as long as it has not broken through. Also you may want to replace those two countersunk screws on the main bearing with Allen head ones like those I have shown. Much easier to work with.
 

Attachments

  • BF2D55C6-DC30-41EC-8BA8-D73B24434890.jpeg
    BF2D55C6-DC30-41EC-8BA8-D73B24434890.jpeg
    2.1 MB · Views: 35
Completely agree David----almost impossible to get a torque setting with the 'Phillips' headed screws, whereas you can with the Allen-key (cap-head) alternative; now available from most of the European suppliers.
 
Back
Top