Technical H4 (halogen) headlight conversion

Currently reading:
Technical H4 (halogen) headlight conversion

nathanrobo

Member
Joined
Sep 6, 2008
Messages
99
Points
77
Location
Kettering
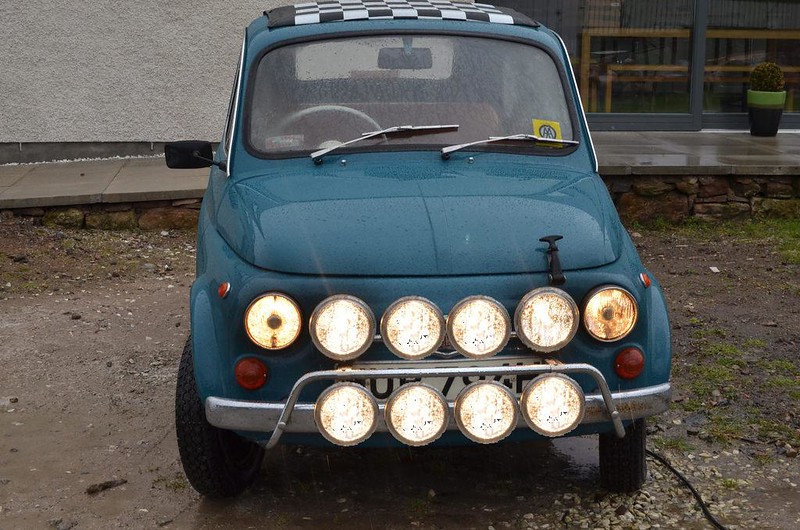
Thought it might be interesting to do a thread on upgrading the headlights for a 500. I'd appreciate any expert critique ;-)

Screen Shot 2018-10-28 at 13.10.41.png

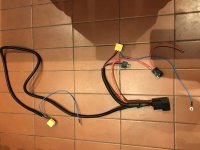
The loom that comes with the Kit (as sold by Axel in Germany & Frank in Holland) doesn't appear to make a great deal of sense, it's certainly not plug and play. You'll need some 6.3mm terminal connections, spade & female with shroud's. I used bare terminals with push on shrouds as they look more original than the insulated terminals. But it does mean using a different crimping tool - I'll post pics of the crimp tools etc tomorrow:

But wiring the system is fairly simple.

There's one relay for each side High Beam, with dipped beams (possibly) connecting directly to the switches (I need to check) Note: 500's are wired with Left Hand Headlamp to rear right light etc).

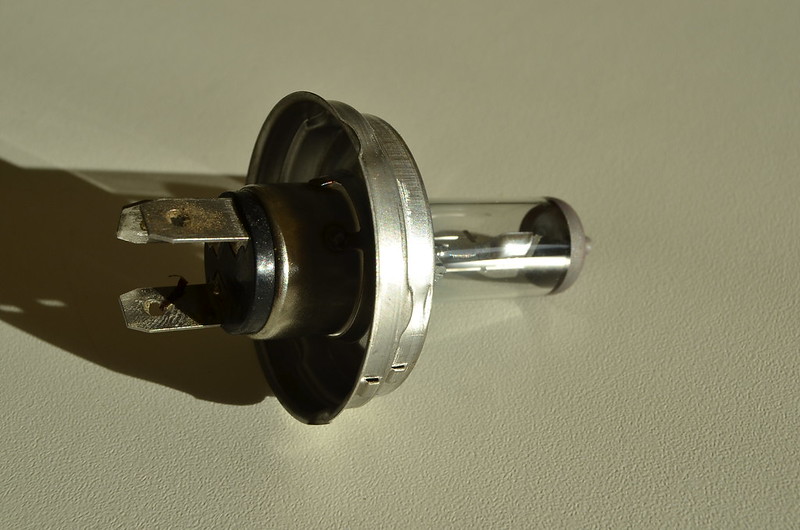
I bought ceramic H4 headlight plugs.

Left Highbeam

1. You need to take the wire Black / Green from the switch on the stalk. Connect it pin 86 on the 4pin relay & connect a grounded earth to pin 85 - these are the two sides of the coil windings on the relay. When they are energised they close the "normally open" switch in the relay. In practice you will be taking the 3pin plug from the back of the light and using the Black / Green wire.

2. Connect Pin 30 via a fuse to the battery and pin 87 to the wire high beam wire on the light itself. So when the coil is energised by the Black / Green coming from the high beam switch, Pin 30 (live from the battery) and Pin 87 to the bulb are connected together.

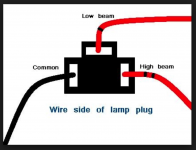
Picture below shows the wiring diagram for a H4 bulb / plug (this is a different arrangement vs. the original bulb / light)

3. Test that the left high beam works.


12V relay.png

Right Highbeam
Repeat point 1, 2 & 3 for the Right hand light (solid green high beam).


As mentioned above I think the low beams can be connected directly to the switches (I haven't done the low beams yet), but it might be preferable to get a pair of fused relays and connect the low beams (left and right separately).

Low Beam Left hand side on Relays:

Black / Grey from switch would connect to 86 on the relay, 85 would be to ground, 30 from the positive on the battery and 87 out to the bulb via the back of the H4 connector plug.

Low Beam Right hand side on Relays:

Grey from switch would connect to 86 on the relay, 85 would be to ground, 30 from the positive on the battery and 87 out to the bulb via the back of the H4 connector plug.
 

Attachments

  • Screen Shot 2018-10-28 at 19.06.01.png
    Screen Shot 2018-10-28 at 19.06.01.png
    355.3 KB · Views: 47
Last edited:
I suspect this subject may have been done to death, but just in case of any recent changes... Does anyone know of a H4 headlamp available for RHD.

I remember a few years ago, somebody mentioning a headlight for a TR6 or something similar??
 
I suspect this subject may have been done to death, but just in case of any recent changes... Does anyone know of a H4 headlamp available for RHD.

I remember a few years ago, somebody mentioning a headlight for a TR6 or something similar??

due to the small size of the headlight, 130mm - 5" most classics of that period were 140mm 5 1/2", I searched for suitable replacements....
all I could find other than tractor lights were those from Lambretta/Vespa Scooters.. Fitting larger lights would necessitate modifications to the front panel. One of my cars actually had larger lights fitted but these were simply glued in the original bucket with silicon so non adjustable...

Problem with Scooter headlights that is other than the fitting to a 500 they don't have an angled beam...

Things I have done to retain the original Carello RHD lenses has been to carefully cut out the lens and fit it to a new reflector with silkaflex...

F/L/R cars have mountings on the headlight that match the front panel, which means that using different reflectors is a "no go" without lots of work....
but if a later car was fitted with a later N or D panel then you could use the N/D headlight mounting system that allows simple headlights to be used... or modify the buckets as N/D mountings are a simple affair...

then you could use a scooter/motorcycle reflector with RHD lenses...
This would provide the fixings for more modern lights from Motorcycles...

a lot of faf.... but if you are restoring a car to keep and drive a lot, then something to think about.....

But I guess there must be alternative headlight bulbs (lamps is the correct term) that fit 500 headlights..

I don't have time to take and post pics, but you can easily search on Google/Ebay and 500 spares sites to look at images to see what I am talking about...
Ohh Batteries.... Have a look at the latest Motorcycle batteries... yes expensive, but small and could be used in pairs (or more).. I have considered using them mounted at the rear or sunk slightly under the rear seat as it would free up under bonnet space...
 
Last edited:
Last edited:
So are these the same current as the originals or do they need relays in place?
The current is the same, the wattage is higher on both filaments. Ideally you would want to play safe and operate them via relays.
If fact relay operation may even improve the intensity of standard fit bulbs as well as the protection it gives to your original Fiat switches and wiring circuits.
 
Relays are only a couple of quid each. And so easy to wire in. When I've completed my project, I'll do more pics with the layout etc.
 
The current is the same, the wattage is higher on both filaments. Ideally you would want to play safe and operate them via relays.
If fact relay operation may even improve the intensity of standard fit bulbs as well as the protection it gives to your original Fiat switches and wiring circuits.

Peter,

You can't have higher wattage without the voltage or current increasing. Amps = Watts / Volts. As the voltage is basically fixed, fitting higher wattage bulbs means higher current. Fitting relays is essential if upgrading to halogen bulbs. Apart from the higher running current the inital inrush current as the filaent heats u is much higher and will damage the switch contacts. The other advantag of relays is the wire can he heavier and shorter reducing voltage drop and giving a brighter light.

Robert G8RPI.

:bang: Thanks for that .......current isn't volts right :D:bang: I was mis-thinking that one or is it Trumpian "mis-speaking"? :D

But that's exactly what I've done so I'm safe, phew. Nathan has already fitted relays so he's OK too.:)
 
:bang: Thanks for that .......current isn't volts right :D:bang: I was mis-thinking that one or is it Trumpian "mis-speaking"? :D

But that's exactly what I've done so I'm safe, phew. Nathan has already fitted relays so he's OK too.:)

Watts = Power (work per unit of time) Amps = current or flow of electrons & Voltage = pressure, when the lights are one pd (potential difference).

Amps are really what we need to be concerned with.
 
Last edited:
Amps are really what we need to be concerned with.

When I fitted the same system in my car I had no concern for amps, watts or volts, DC or AC.:) But I did understand the principle of what I was doing. The key things for me were to have reasonably heavy-gauge wiring, safe cable-routing, appropriate fuse arrangements and secure terminations. This was all made easier by a clever little mini-loom that cost peanuts off eBay.

MAL_1115 by Peter Thompson, on Flickr

The mathematics of the lights/relay setup are good to know (when you understand them:D) to confirm that it's all going to work safely. But the maths have already been done as evidenced by the vast numbers of cars safely running with halogens.
A month or so ago I drove a continuous 120 miles in the dark using the halogens and my additional spotlights when possible; that was nearly three and a half hours of a lot of amps and the car lived for me to tell the tale.:D

PS. One of the photos may be faked in some respects. :)

thefinalsolution by Peter Thompson, on Flickr
 
Last edited:
Ooh I recognise that £7.95 of eBay if I recall. Plug n play into the existing loom, no need to chop any existing connectors off. Connect up your power from the battery, connect up your earths, plug in your Halogen Bulbs, sorry Lamps. Job done!!!!!
 

Attachments

  • 4A28D0EE-E1C3-4794-B0F7-AC7B2426D333.jpeg
    4A28D0EE-E1C3-4794-B0F7-AC7B2426D333.jpeg
    2.4 MB · Views: 28
Silly question but - what’s the purpose of the bulb upgrade?
Is it just a brighter + theoretically safer beam?

Or is there some engine demand reduction whereby the halogen actually gives you a 1hp (10%) increase in power?
 
Silly question but - what’s the purpose of the bulb upgrade?
Is it just a brighter + theoretically safer beam?

Or is there some engine demand reduction whereby the halogen actually gives you a 1hp (10%) increase in power?
One of the main purposes of the bulb upgrade is the discussion provoked by doing so, [emoji16]
Scottish roads at night in winter are at least 10% darker than standard [emoji6] so the bulb/lamp is needed to compensate for that.
Obviously a higher wattage of lamp/bulb will actually make the car look like it's going faster [emoji4] but seriously, being able to see properly in the dark does actually let you go faster should you wish to and you have a modified engine. [emoji6]
The bulbs/lamps are not the H4 with the base with three tangs but appear to be called HB12 and have the P45t base without tangs. There is some indication that they may not be approved for road use and maybe this relates to the geometry of the headlight reflector?
 
Hi:
I am looking to upgrade to halogen on my 1970 500F but I am unable to find the wiring loom you show on any ebay site. I may be searching incorrectly though, but if you have a link or a vendor's website, I would appreciate it!

Thanks,
Dax
 
This post contains affiliate links which may earn a commission at no additional cost to you.
Back
Top