DSC09035.JPG

500 (Classic) Dexter the 1962 Fiat 500D

Introduction

Welcome to my blog for my 1962 Fiat 500D.

I had already started a blog although I wasn't able to change the title and thought it would be best to start a new one with a more descriptive title for others to search and hopefully aid them in their own restoration.

I have split it into 2 sections. This part will be the main vehicle.
The other part will be the engine of which you can find here:
https://www.fiatforum.com/500-classic/444739-fiat-500d-engine-1962-a.html

I took ownership of this 500 in April 2014. This was just after I bought my first restoration project, a 1971 Fiat 500L.
https://www.fiatforum.com/500-classic/345169-franko-1971-500l.html
Sadly I was too far into the L to stop and so the D had to be tucked away until I had the time to start it.
I eventually decided to call him Dexter.

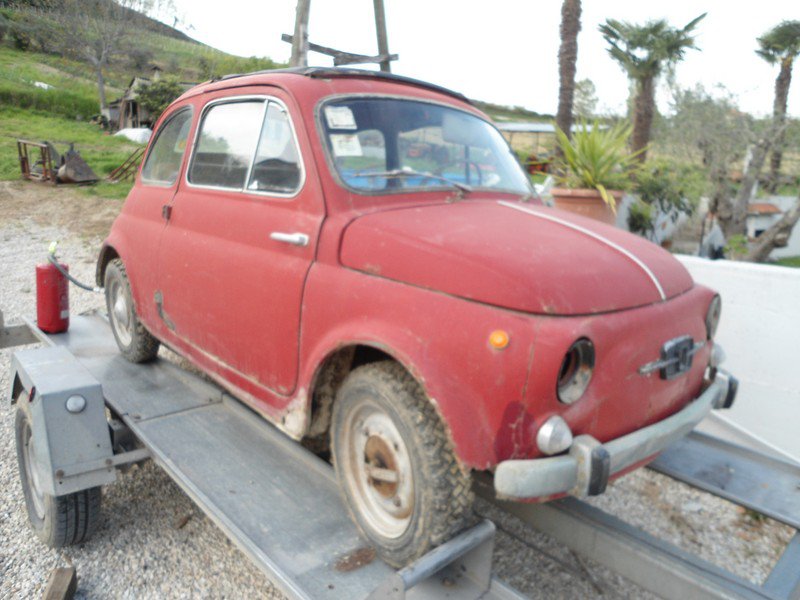
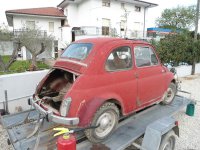
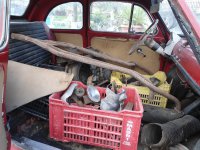
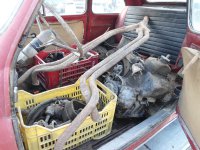
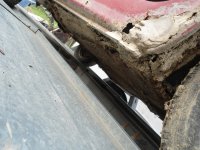
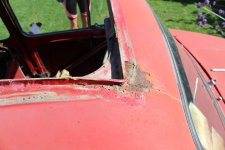
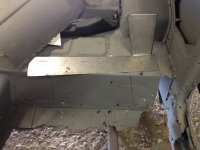
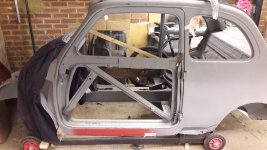
Here' some photos of the vehicle when it was first offered to me. It was at the time on the back of a trailer in southern Italy.
I confirmed I was interested in it, but really wanted to see it before being fully committed. Although I did have a certain forum member that was like the devil on my shoulder saying "Buy it"
devil.gif
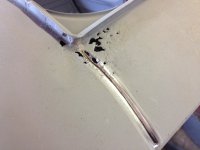
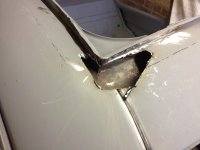
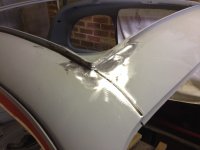
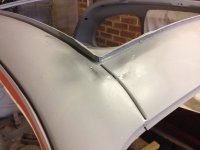
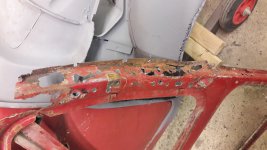
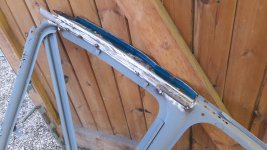
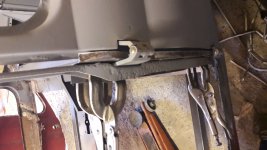
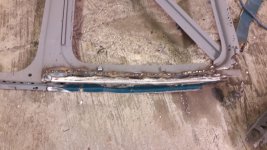
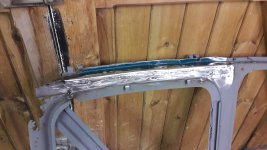
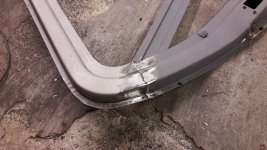
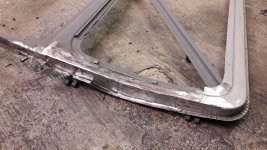
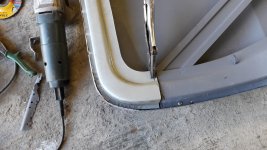
A couple of hours spare today so I got the grinder out.
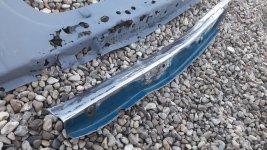
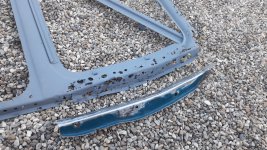
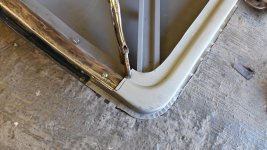
The main joint was okay but I had to remove the metal either side of the joint so it was easier to just take a section out.
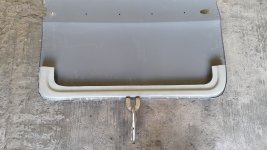
Made 2 new sections and welded them in.
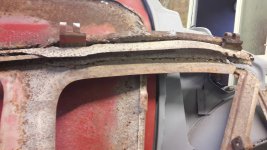
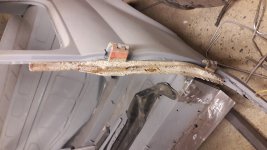
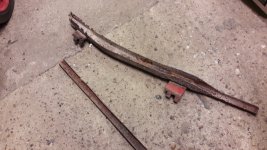
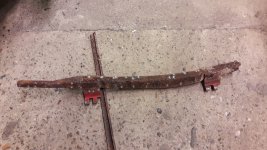
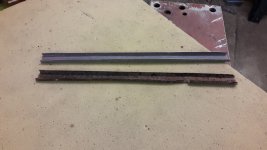
All I need to do is replace the small reinforcement strip that goes round the corner of the sunroof aperture.
I will wait until I next have the spot welder out.
There's a few more small jobs like this I can knock off whilst I get the main panels ordered.
 

Attachments

  • IMG_8431.JPG
    IMG_8431.JPG
    2 MB · Views: 72
  • IMG_8432.JPG
    IMG_8432.JPG
    2.1 MB · Views: 69
  • IMG_8434.JPG
    IMG_8434.JPG
    1.7 MB · Views: 77
  • IMG_8435.JPG
    IMG_8435.JPG
    2.2 MB · Views: 79
  • IMG_1315.JPG
    IMG_1315.JPG
    5.6 MB · Views: 73
Whilst I am waiting for some panels I thought I could work on some of those small areas that need repairing.
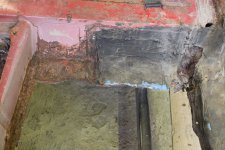
The rear seat floor was a good place to start.
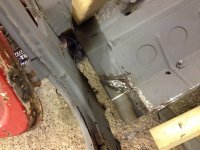
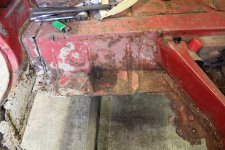
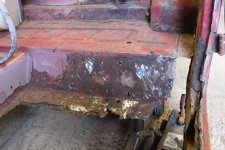
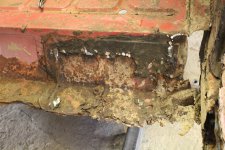
The right one wasn't too bad but had a certain amount of corrosion and was also distorted where it had been jacked up and collapsed.
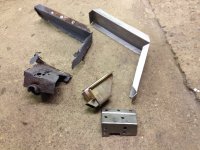
I made a previous template for the L shaped reinforcement panel which I made for the 500L so I made 2 of these. They are the same for both sides with the exception of the folds are handed.
I also bought 2 new jacking points for the L but I ended up using the old ones so I had these spare.
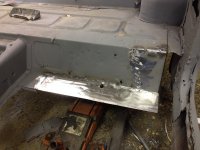
Once removed, I had to remove a small section of the double skinned panel that strengthens the floor. Then I could weld in a new section to build the floor panel to the correct dimensions.
The L panel fits in nicely. There is then a small extension panel that is welded to the jacking point. I made a template for this and made one for each side.
The panels now align nicely and are ready to be welded in but I am waiting until I have my sill panels to go in as I want to make sure everything lines up properly.
The Left hand side was a lot worse. There was nothing left of the jacking point and the corrosion had really taken place which meant completely removing the strengthening panel. The section of the rear floor was so bad that I just cut the whole corroded area out and welded in a new panel.
I just need to remove the L panel now, but again waiting until I have the sills.
Not sure what to do about the reinforcement panels? I can repair the right one but the left one either means make one or I did find one on a website but they wanted about £50 for it.
Only a couple of jobs left to do now before its major panel replacement time.
 

Attachments

  • IMG_1960.JPG
    IMG_1960.JPG
    2.4 MB · Views: 68
  • IMG_8466.JPG
    IMG_8466.JPG
    2 MB · Views: 72
  • IMG_8464.JPG
    IMG_8464.JPG
    2.5 MB · Views: 71
  • IMG_8465.JPG
    IMG_8465.JPG
    2 MB · Views: 65
  • IMG_1969.JPG
    IMG_1969.JPG
    2.6 MB · Views: 64
  • IMG_8469.JPG
    IMG_8469.JPG
    2.5 MB · Views: 67
  • IMG_8468.JPG
    IMG_8468.JPG
    1.9 MB · Views: 64
  • IMG_8467.JPG
    IMG_8467.JPG
    2.3 MB · Views: 68
  • IMG_2011.JPG
    IMG_2011.JPG
    2.1 MB · Views: 64
  • IMG_1995.JPG
    IMG_1995.JPG
    2.5 MB · Views: 64
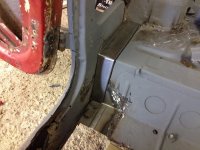
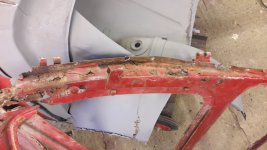
Some "lovely" welding by a previous, much less talented repairer!
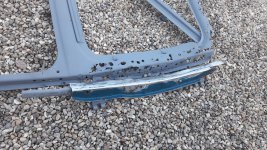
It shouldn't be too hard to make a reinforcement plate but given the thickness it would be a struggle to replicate that swage-line. I guess it's back to the place that made you a centre-tunnel?
 
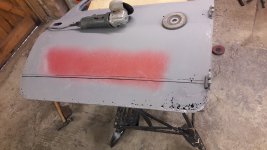
Following some information I received from Motobambino about the new D doors being a very poor fit, I decided to have a go at repairing my doors.
The right one is not as bad as the left. It would appear that at some time it has been replaced with another 2nd hand door.
The left one is much worse condition so I thought this should be my trial one as if it goes wrong I haven't much lost as I was planning on renewing this one.
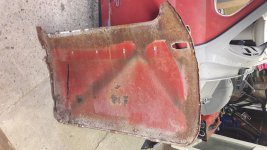
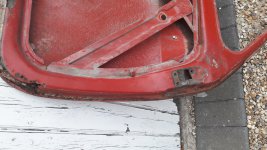
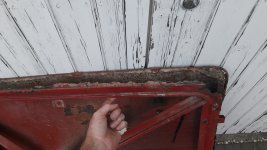
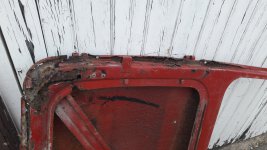
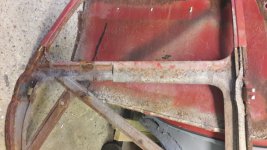
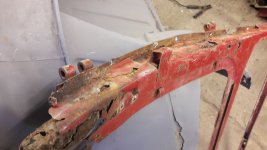
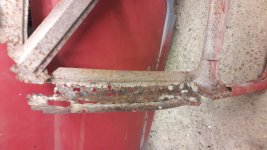
The lower door frame is extremely corroded to the point it has detached itself from the door skin.
The D doors have a strengthening panel running down the inside of the back edge of the door. These are thick metal but have a lot of corrosion and are impossible to clean up without removing or removing by chemical cleaning/acid.
Due to the amount of corrosion if I sent it off to be dipped I don't think there would be much coming back.
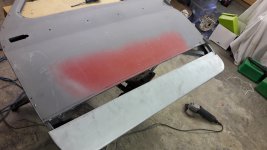
So I decided to remove the door skin to expose the door shell.
There are a few spot welds on the skin edge that need to be drilled then slowly bend the edge back up and then cut through where the skin meets the window frame. This is the easiest area to cut and weld back together again.
Once removed you can see why doors always corrode again once they have been repaired. Door skins were usually fitted in factory with bare metal to bare metal. Over time the metal corrodes and slowly the rust comes through. Nowadays they are usually coated and then put together with a sealer in between. This helps prevent corrosion at a later date along with a good squirt of anti corrosion wax.
The thick metal pillar is spot welded to the rear door frame.
It took quite a bit of drilling to remove all the spot welds and detach it from the door shell.
Next step is to get the door shell, post and skin sand blasted to see what is left. If the door skin is reusable I will replace the bottom 3 inches as a repair panel is available. Then I can repair the door shell back frame and then reweld the strengthener back in place. Then I can replace the bottom section of the door frame as there is also a section available for these.
Its shocking that new D doors are available but the fit of them seems to be so bad that unless you really have to, you wouldn't want to fit a new one.
If anyone has had to fit a new D door can you post some photos of the fit of your door please and advise where you got them from?
 

Attachments

  • 20181014_171031.jpg
    20181014_171031.jpg
    2.7 MB · Views: 61
  • 20181014_171102.jpg
    20181014_171102.jpg
    3.1 MB · Views: 61
  • 20181014_162730.jpg
    20181014_162730.jpg
    3.5 MB · Views: 65
  • 20181014_162722.jpg
    20181014_162722.jpg
    3.3 MB · Views: 63
  • 20181014_162709.jpg
    20181014_162709.jpg
    3.4 MB · Views: 64
  • 20181014_170955.jpg
    20181014_170955.jpg
    3.1 MB · Views: 58
  • 20181014_171008.jpg
    20181014_171008.jpg
    2.9 MB · Views: 57
  • 20181014_171037.jpg
    20181014_171037.jpg
    2.5 MB · Views: 63
  • 20181014_185714.jpg
    20181014_185714.jpg
    2.8 MB · Views: 60
  • 20181014_185729.jpg
    20181014_185729.jpg
    2.9 MB · Views: 54
  • 20181014_185943.jpg
    20181014_185943.jpg
    2.9 MB · Views: 65
  • 20181014_185758.jpg
    20181014_185758.jpg
    3.5 MB · Views: 56
  • 20181014_185807.jpg
    20181014_185807.jpg
    3.6 MB · Views: 59
Door is back from the blasters. Its not too bad.
Lucky enough I kept my old L doors and the rear profile is the same on the rear of the door. The frame is a lot deeper then the D so I cut the section out that I needed and I then clamped it to the upright post that hinges on the 1/4 panel to get the contour in the right place. Then folded the edge over to give me the shape I needed.
Then I welded about an inch section to it and ground the weld down flat.
With the post and the section fastened to the original door I could then draw the section to cut out of the door.
Clamp it all back together and try it on the car then tack it together.
Remove the rear post and then weld it all up.
The shell is now quite solid apart from the lower section.
I have ordered these from Germany so it will be interesting to see what they are like.
I might have to wait until I get my sill panels before I go much further as I want to get the gaps and alignment as good as possible.
 

Attachments

  • 20181020_175944.jpg
    20181020_175944.jpg
    3 MB · Views: 58
  • 20181020_164621.jpg
    20181020_164621.jpg
    2.9 MB · Views: 54
  • 20181020_164351.jpg
    20181020_164351.jpg
    5.2 MB · Views: 56
  • 20181020_164309.jpg
    20181020_164309.jpg
    4.3 MB · Views: 63
  • 20181020_164301.jpg
    20181020_164301.jpg
    4.6 MB · Views: 58
  • 20181020_181737.jpg
    20181020_181737.jpg
    2.8 MB · Views: 56
  • 20181020_183456.jpg
    20181020_183456.jpg
    2.8 MB · Views: 51
The D door repair panels turned up Thursday.
So I couldn't wait to see how well they fit.
The door frame section is a really good pressing. They are actually N lower door frames as they don't have the pressing that creates the channel for the door trim to fit into.
Not a problem as I personally think the N door panels look better than the D's as they fit nicer.
I placed the door frame back into the door skin and held it in place with self tapping screws. Then took it apart and cut off the bottom section.
Then screwed the skin back on and cut the new panel to fit. Tacked it in place then removed the door skin and finished welding it up. Obviously I tried the door on first to make sure it lines up.
Then I carried out a small repair to the inner rear hinge post and then welded that in place.
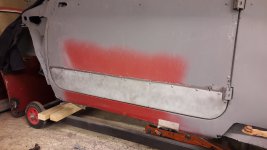
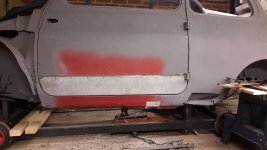
The Door now sits in its hole just right and the inner frame lines up nicely with the existing front wing & rear wing. So all I need to do now is make the drain holes and then fit the door skin back on.
 

Attachments

  • 20181027_183134.jpg
    20181027_183134.jpg
    3.4 MB · Views: 67
  • 20181027_183118.jpg
    20181027_183118.jpg
    4 MB · Views: 57
  • 20181027_151459.jpg
    20181027_151459.jpg
    3.6 MB · Views: 60
  • 20181027_151508.jpg
    20181027_151508.jpg
    3.3 MB · Views: 60
  • 20181027_143606.jpg
    20181027_143606.jpg
    3.9 MB · Views: 71
  • 20181027_183314.jpg
    20181027_183314.jpg
    3.2 MB · Views: 65
  • 20181027_183301.jpg
    20181027_183301.jpg
    3.3 MB · Views: 56
  • 20181027_183250.jpg
    20181027_183250.jpg
    2.7 MB · Views: 58
  • 20181027_183231.jpg
    20181027_183231.jpg
    2.7 MB · Views: 60
  • 20181027_183217.jpg
    20181027_183217.jpg
    2.4 MB · Views: 64
.......... I personally think the N door panels look better than the D's as they fit nicer.

ahhh yes the better qualities of the Protptypi......
I guess they used the D as an experiment trying to improve the N but that didn't quite work :devil::devil::devil:


told you you could repair those doors!!
 
Tony, it wasn't too bad in the garage.
I actually had the doors open yesterday whilst I was working.
It was a bit windy this afternoon so Franko was outside and I was inside with the doors most definitely shut.


I think the reason they changed the N door to the D door was due to water ingress. Without that lower channel any water that runs down the back of the door trim is likely to run down the inside of the door and into the car.
Not really a problem in my case as it probably wont see much rain.
The D is far superior to the N as it has a whole lot of modifications that dealt with all the problems with the N.
biggrin.gif


Todays job was the outer lower section.
It actually fitted quite well. The only thing was I had to trim the return lip as it was a lot wider than the original.
A quick measure to see where the panel would go up to, then make a line. Cut the door skin with the angle grinder to get a nice straight line.
Remove the paint from the first inch of door skin then use the swager tool to make a step on the door skin for the over lap.
A small cut out was required by the hinge and also at the front to deal with the joint. It was all screwed in place and then the door fitted back on to check alignment. Still a few tweaks to make but its generally ready to go.
I also found time to fold up a new window channel for the rear of the door as the old one was very corroded.
So next step is to weld in the window channel, then fit the door skin and lower section.
 

Attachments

  • 20181028_144637.jpg
    20181028_144637.jpg
    2.8 MB · Views: 63
  • 20181028_150237.jpg
    20181028_150237.jpg
    2.5 MB · Views: 58
  • 20181028_165234.jpg
    20181028_165234.jpg
    2.6 MB · Views: 60
  • 20181028_165259.jpg
    20181028_165259.jpg
    2.6 MB · Views: 62
  • 20181028_175030.jpg
    20181028_175030.jpg
    3.5 MB · Views: 56
  • 20181028_175047.jpg
    20181028_175047.jpg
    3.2 MB · Views: 61
.........The D is far superior to the N as it has a whole lot of modifications that dealt with all the problems with the N.

Have you not heard the phrase "you can't really improve on the original....."

Much better to repair your doors than deal with the replacements...
Probably mess work in the end....
 
Have you not heard the phrase "you can't really improve on the original....."

Much better to repair your doors than deal with the replacements...
Probably mess work in the end....


All things improve..
The principle may not have improved but the specification did.
Windscreen washers, ash tray, rear seat, wind up windows, better engine & gearbox, larger driveshafts.
 
All things improve..
The principle may not have improved but the specification did.
Windscreen washers, ash tray, rear seat, wind up windows, better engine & gearbox, larger driveshafts.

They didn't do much about the Rust proofing!!!

Who needs all those modern things to go wrong....
Ashtray???? is that to store coins in?

How many passengers have you taken out in Franko?

Wind up windows (they did experiment with those on later N's)... We have a full sun roof... (oh I believe D owners actually modify their cars to be like an N in that respect...)

small drive shafts adds to the thrill and excitement...

Now I still have 4-6 doors that may need doing....
will you be offering an exchange service?

:):):)
 
Neat and determined work Sean. Would those repair sections fit the F and L if you put aside the issue of the channel for the trim?
Sadly the lower door frames on the F model are completely different to the N/D models.
I don't understand why they can't supply them as another option to the poor fitting doors. They could just use a smaller section of steel in the press and also supply door skins.
 
Back
Top