General Fiat 500 1958 N

Currently reading:
General Fiat 500 1958 N

Most of my bits and pieces are ready for the build now .Will post some pictures soon of the shell throughout the stages of it being restored and painted .
 

Attachments

  • 320E223E-84A3-4313-B86E-AB5C04D442B8.jpeg
    320E223E-84A3-4313-B86E-AB5C04D442B8.jpeg
    1.7 MB · Views: 53
  • A18B476D-7FB7-4AB3-8601-2818AC8E910A.jpeg
    A18B476D-7FB7-4AB3-8601-2818AC8E910A.jpeg
    2.3 MB · Views: 55
A quick update
This is one very complex restoration not for the faint hearted I don’t think Gav will take on another 500 N
 

Attachments

  • 1EFF8037-D6E7-4A76-B52B-F80F47D5E98D.jpg
    1EFF8037-D6E7-4A76-B52B-F80F47D5E98D.jpg
    453 KB · Views: 60
  • 0D2A0D36-59AB-4658-8D75-A7060ED86CC8.jpg
    0D2A0D36-59AB-4658-8D75-A7060ED86CC8.jpg
    380.9 KB · Views: 63
  • BB5BCDCB-DA81-4B19-82AE-E6612F022CF4.jpg
    BB5BCDCB-DA81-4B19-82AE-E6612F022CF4.jpg
    305.7 KB · Views: 61
  • 2C691A84-F427-4F91-BAA5-64BF23660A3A.jpg
    2C691A84-F427-4F91-BAA5-64BF23660A3A.jpg
    219.6 KB · Views: 62
  • BE5594AF-EC24-464D-BE63-FE4EB8F4F27D.jpg
    BE5594AF-EC24-464D-BE63-FE4EB8F4F27D.jpg
    293.4 KB · Views: 58
  • 6F803B63-434D-44D1-91EF-FD77E18D7249.jpg
    6F803B63-434D-44D1-91EF-FD77E18D7249.jpg
    336.7 KB · Views: 61
  • AB2A6D04-AFAA-4C22-B9D2-E6F7E2548705.jpg
    AB2A6D04-AFAA-4C22-B9D2-E6F7E2548705.jpg
    490.1 KB · Views: 58
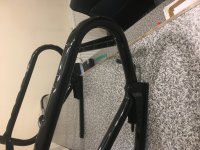
Having completed some extensive repairs myself on a suicide door model, I can honestly say that I don't envy your body builder.
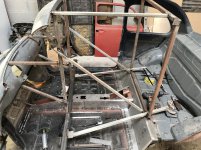
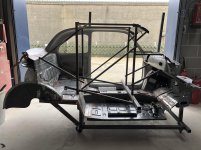
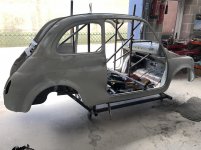
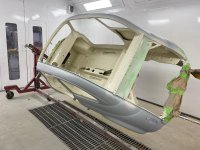
Mine was a nightmare as all the panels needed some form of modification to get them to line up.
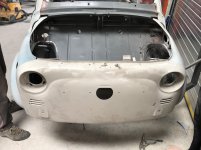
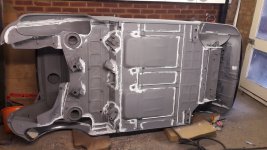
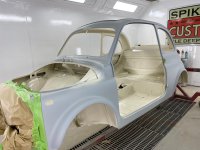
Although you are lucky in having found 2 genuine sides, this in itself is a massive and complicated job to get the vehicle back together all square.
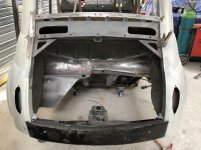
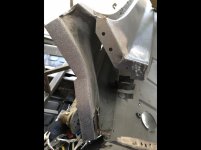
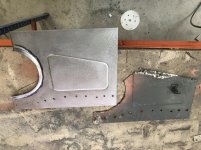
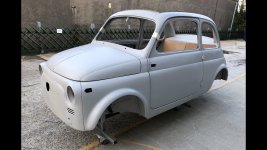
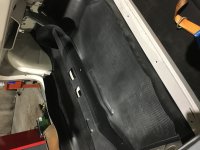
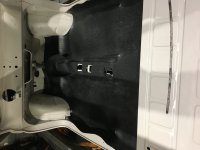
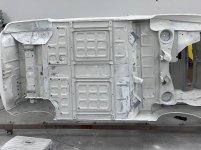
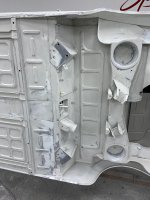
I saw your vehicle first hand before it went away and your floors, rear floors and front foot well were all either badly corroded, damaged or had already been poorly repaired. This makes it even more complicated as you wont know what is correct. On top of this he has remade many panels as they are not available.
So as much as I am sure you are growing impatient, it looks like he is doing a great job.
I can only imagine how many hours he has spent measuring and scratching his head whilst drinking gallons of tea.
Anyone who thinks this is easy, think again!
Cant wait to see this one finished for different reasons to you.
Keep the photos coming Andy. Us resto nut jobs love this kind of work.:)
 
Having seen the shell in person before it was blasted, I am well impressed with the transformation this shell has gone through.
Just some minor cosmetics to be completed then off to the paint shop!
thumb.gif
 
So the shell is in its final stages prepping for primer........
I’m sure somebody will tell me if I’ve missed anything. How complex is the underneath of these little cars
 

Attachments

  • A7A46987-E910-4301-A65A-AB66F2B9C22A.jpg
    A7A46987-E910-4301-A65A-AB66F2B9C22A.jpg
    303.7 KB · Views: 37
  • 3B4FA117-8DA5-4388-A779-5B3A88FC701E.jpeg
    3B4FA117-8DA5-4388-A779-5B3A88FC701E.jpeg
    195.9 KB · Views: 30
Hi Andy
Being a N yours may be different to a D.
You don't appear to have any jacking points at the front or rear of the floor pans.
Your original floor was so badly modified there was no way of telling if they were originally on the car.
Maybe Peter can enlighten us
thumb.gif
 

Attachments

  • 20190727_170150.jpg
    20190727_170150.jpg
    2.9 MB · Views: 32
Hi Andy
Being a N yours may be different to a D.
You don't appear to have any jacking points at the front or rear of the floor pans.
.........

ohhhh it would have been much more fun to point it out once Andy had finished the resto.....


(but I actually missed the post lol)
 
...not enough whisky actually....I thought I saw Sean's car on a trailer...how could it be on it's side? ;)

It's just after they drove off they forgot to tie it down and it rolled off onto it's side
:D:D:D
but if you look Andy's Prototypi also has a flat floor... different rear spring plates......
 
Last edited:
Back
Top