General Introduction and my new 1969 500L

Currently reading:
General Introduction and my new 1969 500L

.."geo"....geometry(y):D...maths was never my best subject. :D

I see what you mean about the handbrake; if you were bleeding using the foot pedal, the springs on the shoes wouldn't keep spoiling your work by pushing the pistons of the rear wheel cylinders back in. It doesn't make any difference in my method because I'm sucking (not literally:eek:) the fluid out rather than pushing it.

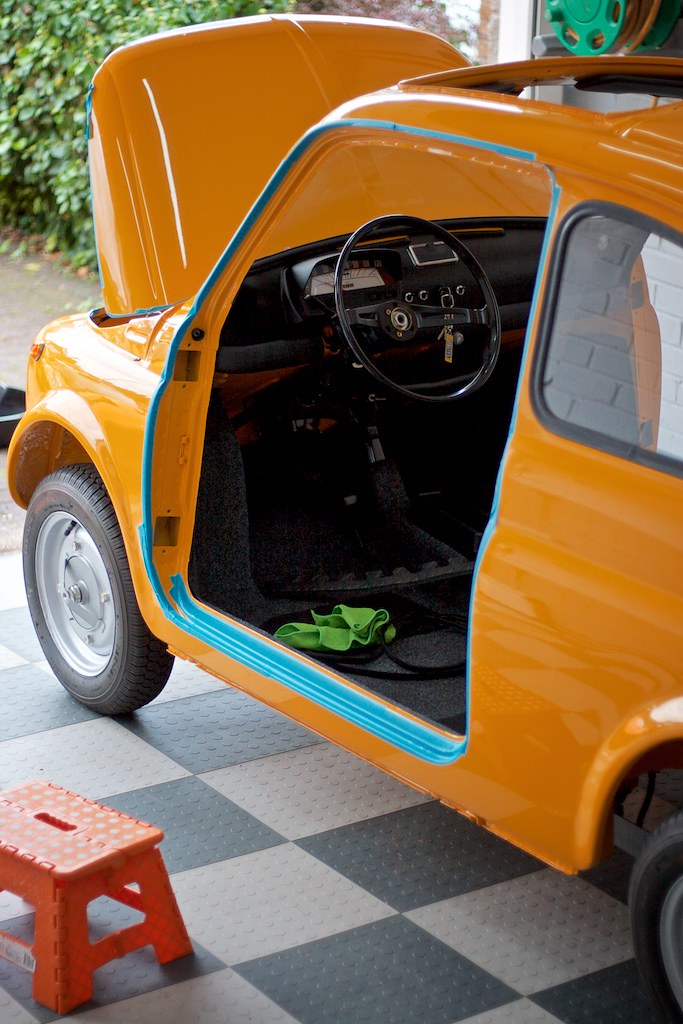
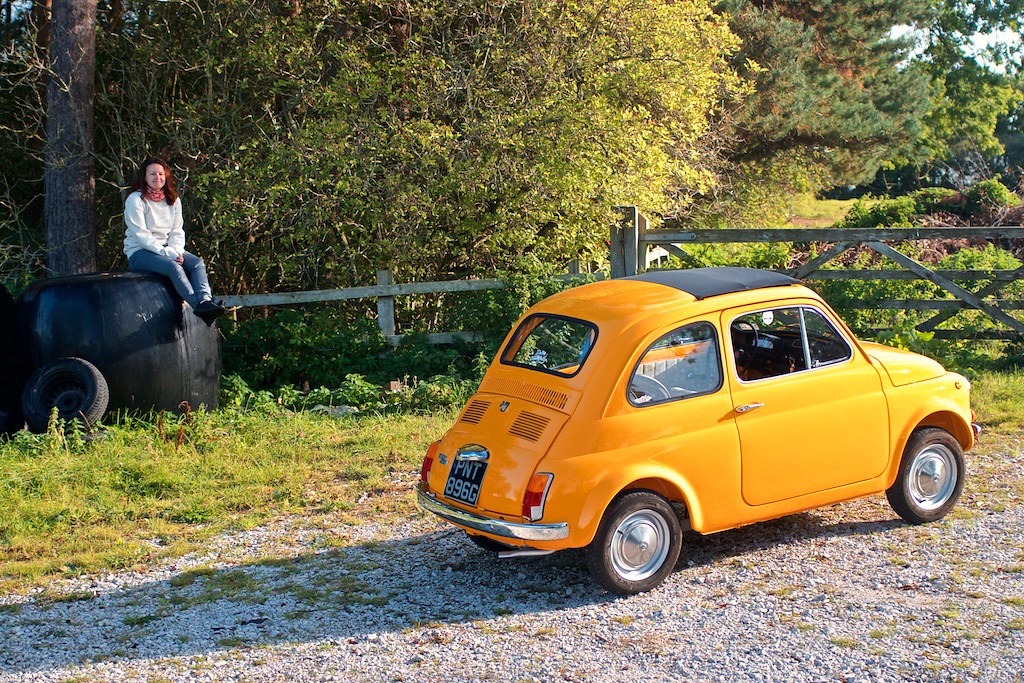
I agree that if you have a contact who can set up the steering and suspension accurately you will find it's a superb car to drive....it is anyway, but the little details being right make a big difference. :)
 
Whilst I appreciate that your "wheel aligner" will have all the proper tools and be a professional, one piece of advice from Tony Castle-Miller (he of Middle Barton Garage fame) is that it is imperative that the track-rods are the same length. If they aren't, the "Ackerman effect" is adversely affected and you will probably get tyre squeal when cornering. The morning I spent getting it right on my car was well worth it and definately made a difference.
 
Hi,

Back for another update.

We decided to fit a larger finned sump to help with cooling. My husband painted the letting on the sump for a little extra pop. :)

50356328891_ee17b83167_b.jpg


We also needed to modify the exhaust heat shield to fit the position of the starter/heat tube for the 650cc engine, and painted in matt black VHT paint.

50356328966_63a1694551_b.jpg


We also made a stainless steel bracket to hold the washer bag, painted satin black with SS fittings.

50356328956_34ed3e3441_b.jpg


Then it was time for some other finishing touches, such as the OEM stickers I bought ages ago.

50356329111_b73896838e_b.jpg


50355626243_8e5ef67c24_b.jpg


50417730696_41489eab10_b.jpg


50417037498_52370b57e9_b.jpg


It feels very satisfying to finally be putting the finishing touches to something we’ve worked on for so long! :D

50355626353_90be249f1e_b.jpg


And the original key and keyring.

50356329136_12952751a5_b.jpg


One final vacuum of the shell then the interior went in.

50417896212_d601290d0a_b.jpg


Fitting the doors was less than straightforward so we had to modify the striker and remove some excess paint on the back face on one of the hinges to get one of the door fit.

50417730496_026d8b08d7_b.jpg


I had the interior re-trimmed by Kens Customs in Derbyshire. As with this whole build, I wanted something “OEM+”, as if Fiat built this car in the 60’s, but with an added bit of luxury. I vent for taupe vinyl side and rear with a hard wearing linen front/door cards. I would definitely recommend his services if you're looking for a re-trim.

50355626103_8f3a5088a7_b.jpg


50355626048_4f4051fde2_b.jpg


50417730451_a9183b18f5_b.jpg


We ran into an issue when trying to fit the new aftermarket door release surrounds...the plastic was very weak and broke immediately.

50417896182_aa40240809_b.jpg


So we dug out the original but very tatty ones and resprayed them satin black.

50417037413_cec8db96b8_b.jpg


So, after 4 years and 2 days, here he is, finally finished. We’ve been making the most of the late summer/early autumn weather and using it as much as possible, loving every minute of it! :slayer:(y)

50356329171_f8d6dbafa7_b.jpg


50356490317_edcd413574_b.jpg


50356329001_d2b20c5cb5_b.jpg


50386746072_f4bbefbf74_b.jpg


50386570326_00893970b2_b.jpg


50386570561_7e264b6a38_b.jpg


50386570371_f6ab99fb17_b.jpg


50390252841_c7c7687221_b.jpg


https://live.staticflickr.com/65535/50389559638_5715d6cd1d_b.jpg[img]

[img]https://live.staticflickr.com/65535/50389559403_33488280c0_b.jpg


Thanks again for all the help with questions during the rebuild. I’ll update the thread here as our adventures continue, you can also follow me on instagram @weebeastie1969 (y)

50386745927_7a4c0b2516_b.jpg


Katie
 
We’ve been making the most of the late summer/early autumn weather and using it as much as possible, loving every minute of it!


....that's the real fruits of your labours...I'm looking forward to the first high-res image of a squashed fly on the front. ;) You put my car to shame and I just want you to have one tiny temporary flaw. [emoji1]
 
Last edited:
Wonderful work and a very impressive resto+. You've helped motivate me to go tackle more little projects on Martina and stop putting it all off till "the big resto". Cheers!
 
Absolutely brilliant! Watched from start to end, as other members have said you have been an inspiration to all of us�� . When can I deliver mine for a rebuild! I think you should " give up the day job" & start a Fiat 500 rebuild service. I want to be the 1st in line.

You could be onto something. But I'm not sure you would want to wait 4 years :D

It's an epic rebuild. Loved this thread, will contiune to follow the adventures on Insta and here!
 
That is a wonderful restoration, no good for me as I could not cope with all the cleaning. One thing I would say is do not hang too much weight on the ignition key as it can damage the switch after a while. Thought you might have gone for an MPH speedo. I was always unnerved by speed cameras when I could not remember the conversion KPH to MPH. I assume to aid cooling the 126 had a louvred engine under tray. With a tiny mod around the exhaust they fit straight on the 500 which I think is a good idea if you up the engine size.
 
Katie, I did note that no wing mirrors yet. Are you going to fit any ?
Rob

I hadn’t planned to add any wing mirrors (not going to be overtaking much on the road) but I’d like to use it more first before making my mind up totally. I also ride motorbikes and therefore I’m in the habit of using the lifesaver (checking over your shoulders rather than relying on mirrors) and so it doesn’t seem like a necessity at the mo. I may change my mind with use though.
 
Thanks for all the lovely comments. Re it’s cleanliness: it has been built for use and will be used (and then cleaned afterwards ;) ). It is currently sat in the garage with plenty of flies/mud/cow sh*t after its weekend blast. It will be thoroughly cleaned, polished and waxed at the weekend, something we haven’t gotten around to doing yet. I also have some clear dynax UC to apply as an added layer of protection.
 
It is currently sat in the garage with plenty of flies/mud/cow sh*t after its weekend blast. It will be thoroughly cleaned, polished and waxed at the weekend,.

I get the impression that there might be someone in your household who really likes doing that ;).....you're onto a winner if that's the case....happy driving.(y)

That was a great tip from Dave Toshi 975 about the undertray; I didn't know about that and have never seen it mentioned before. You'll also find that the exhaust guard, which you trimmed in a very professional way, can be replaced with the stock item for the "R"; it then clears the exhaust perfectly.

I am definitely on to a winner, he does a great job :)

Thanks for the tip Dave, I’ll look up the 126 under tray. The R exhaust guard was what I thought I’d ordered but I must have picked the wrong one and was too impatient to wait another few days for it to arrive and so trimmed to fit.
 
What a fantastic job, lovely looking car! I think i first posted on here back in june 2014 so mine still not finished. Getting close though, just the six years so far. ?
 
Back
Top