Technical Thermostat housing

Currently reading:
Technical Thermostat housing

AndrewRL

Member
Joined
Feb 29, 2016
Messages
183
Points
65
Location
Oxfordshire
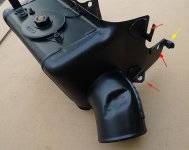
Has anyone replaced the whole thermostat housing in a 500 (499cc)? Can it be done with the engine in place? It looks simple enough in theory (unbolt the old, bolt on the new) but I know there will be problems undoing the old bolts especially round the "back" (front?) of the engine and then getting the housing out and in.

And some related questions :) :
- how many bolts are there round the blindside of the engine to undo (obviously I can see the ones facing the back/side of the car but can't get my head in far enough to see the others :D)?
- recommendations for removing old nuts/bolts without damaging/breaking them
- what do you do with the old nuts/bolts - clean and reuse them or replace them?

Thanks for help/advice.
 
Hi i've just taken mine out but i've also just taken out engine and gearbox.i can imagine it being difficult with the engine in place as there are numerous bolts hidden out of view also the temp sender is connected via a rod to the air vent which has to be undone from within.it may be possible with engine in situe.:slayer:
 
It definitely can be done with engine in place. You just have to remove that black housing it sits in. I think there are only a few bolts/nuts keeping it place that should be accessible on the other side.
 
Andrew,
I currently have my thermostat housing off. In the photo below, you can see where the four bolts are on the front/blind side (arrows). My motor is a 650cc but I think that my housing is from a 500cc engine. To aid in finding the two top bolts, the front side of the cylinder head is a near mirror image of the what you see looking at the rear of the head. So, as you feel around the front side, it should look like the rear of the engine. One of the bolts will be hollow. That needs to go back in the same location. Note the nut welded to the housing (yellow arrow). The left and right air housings are attached together at this point. The bolt that goes into this nut is removed from the left-hand side of the motor. If you have a small mirror, you can get a view of where the bolts are on the front side.

I can't comment on whether the housing can be taken off with the exhaust in place. I know mine can't. I'm pretty sure you have to take the distributor off, too. There are posts here on how to set the timing again once you re-install the distributor.

As for removing bolts, I've been lucky that all mine backed out easily. I have had great luck in the past with frozen bolts/nuts by applying Liquid Wrench and letting it sit overnight before removing. Others may have more input on removing carbon steel bolts from the aluminium head and housing.

You'll get a variety of answers as to whether to replace them or not. From an aesthetic point, some will reuse them, especially if they are stamped with the "Fiat" name. From a rejuvenation perspective, others will replace them all. Mechanically-oriented, others will replace just those with stripped/worn thread or heads.

When putting the housing back on, be aware of the exhaust elbows. They easily scratch the paint off the housing as you're maneuvering the housing back in place.

Are you wanting to replace the housing or just the thermostat?
 

Attachments

  • tinware 1.jpg
    tinware 1.jpg
    274.9 KB · Views: 92
Thanks all for the help/suggestions. Happy to say that Phase 1 (removal) went OK and could be done with engine in place :) but did need the removal of the distributor :mad:. I also found most of the bolts earlier and spent a week squirting those with penetrating oil - whether it helped or not I don't know but at least they all came out.

Yes I do need a new thermostat but decided to replace the whole housing as there was no thermostat holder at the top (so had a hole approx 5cm); the flap also looked pretty knackered. Probably could have done some remedies instead but as a newbie to all this it is easier to replace (I think).

I think that the bolts were as shown in the photo (one may have been missing as I think I only removed three from the blindside but am not at home to check). I will try and clean them up. Any suggestions on how to clean them? Should they be greased when putting back?

I just hope that Phase 2 (cleaning up the side of the engine where the housing came off, purchase of new housing and reinstallation) goes well. Mainly worried about the distributor and whether timing will be out.

Thanks again
 
I usually put copper grease on threaded fixings, but on the hex setscrews which secure into the aluminium I used the weakest grade of thread lock fluid.
The threads may already be weakened, the screws are subject to a lot of vibration and you can't afford to risk over tightening them.
Thread lock helps with all that and if future removal worries you then you can always soften the adhesive with a bit of heat from a blowtorch.
The only problem is that it's not easy to clean the internal threads optimally.
 
Last edited:
If you still have 'points' ignition (as against 'electronic') it is very easy to set the timing 'statically'. There are timing marks on the timing case cover, and you can do it with a very simple test-light. The 'static' timing for the 500/126 engines is 10deg BTDC (or, if it is an old engine with only the TDC mark on the timing cover, 14mm BTDC). There is a corresponding 'notch' on the oil-filter pulley. When you do set up the timing statically, DO NOT FORGET TO PULL THE KING-LEAD FROM THE COIL (and then re-connect it when you have finished. If you don't do this the engine COULD start--messy!! It is very easy to pull the engine over (CLOCK-WISE looking from the rear) by holding the alternator/dynamo belt tight onto the 2 pulleys with your fingers and pulling the engine round at the same time.
If you have 'electronic' ignition on the engine, you will need a timing light as you cannot set 'electronic' ignition up statically.
The main thing is to remember where the rotor-arm pointed when you removed the distributor, and DON'T turn the engine over with the distributor out. All the best.
thumb.gif
smile.gif
 
Thanks. Cover back on but car won't start :mad: - turns over well but won't fire; I am assuming that means I have messed up the timing when I removed the distributor (??).
So further assuming I need to check/adjust the timing, can I check (as a complete novice)...
What is a simple light test? Presumably rig some bulb between two points and wait for the light to go on (or off?).
Is it the bolt below the distributor I need to loosen and move the distributor round in the slot and then tighten back up at the relevant point?
Is the king lead the one that runs from the coil to distributor?
Finally - when I removed the rotor there only seems to be one position to put it back...or am I missing something?
Apologies again for such basic questions and thanks for any help/advice
 
Back
Top