Technical 650cc Engine with electronic ignition

Currently reading:
Technical 650cc Engine with electronic ignition

Nice work there getting the engine running. If I remember correctly there is some adjustment on the crank sensor.
Btw the flywheel in these is also a bit heavier than a standard 650 engine.
When are you planning the transfer into the 500?
 
Nice work there getting the engine running. If I remember correctly there is some adjustment on the crank sensor.
Btw the flywheel in these is also a bit heavier than a standard 650 engine.
When are you planning the transfer into the 500?

I need to change the drive shafts for the 500 ones, give it a clean up. It makes sense to change the clutch whilst I am at it.

I managed to get it in neutral today and it literally started on the first turn of the key with no choke and was ticking over really sweetly. It seems to have an oil leak behind the oil filter pulley, so I am hoping it's just the filter seal and not the crankshaft oil seal?
 
As promised on another thread a quick update.

I had to strip the engine down because once taking the tinwork off I discovered that both base gaskets had really bad oil leaks and there appeared to be an oil leak on the front crankshaft oil seal, which all explain why the engine and gearbox were covered in such a messy oily grime.

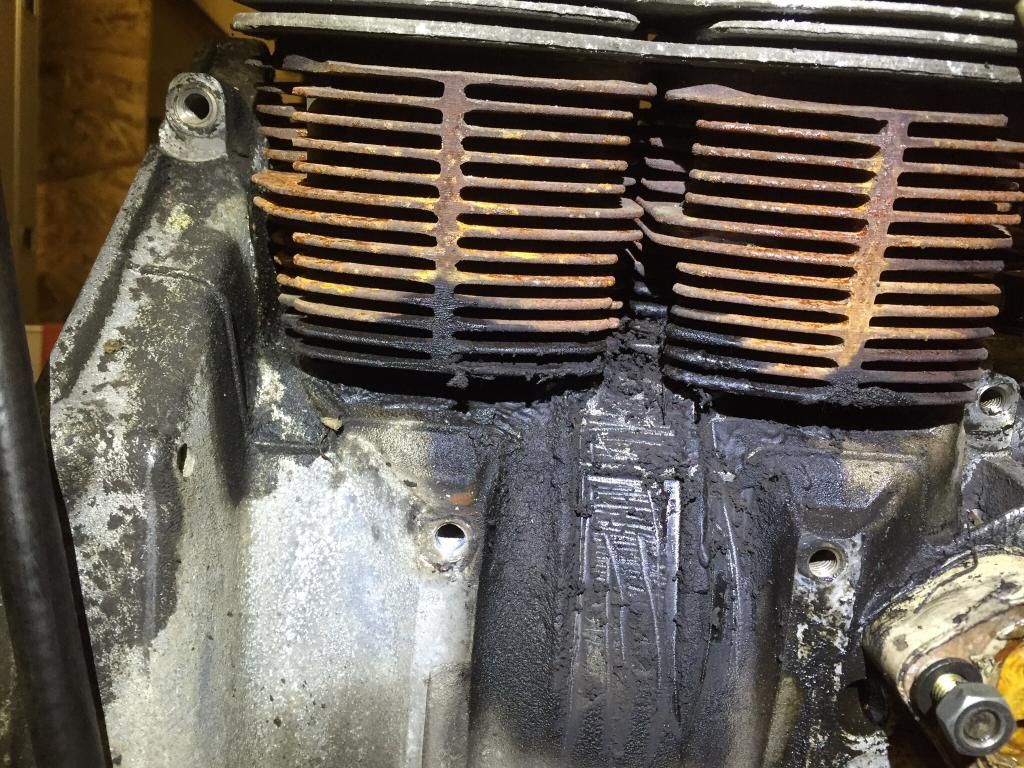
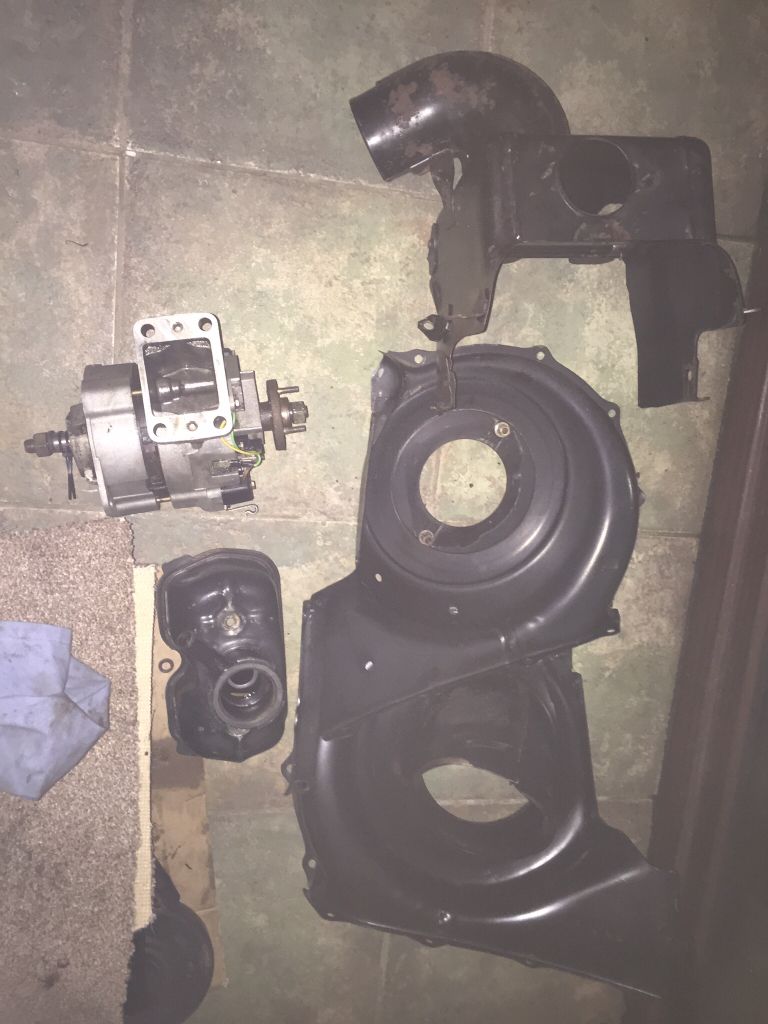
So after removing the engine cowlings I discovered this.

image.jpg1_zpsfib1q6qg.jpg


So the whole lot had to come apart. As you can see it is covered in oil under the cowlings.

image.jpg1_zpszisbnwo5.jpg


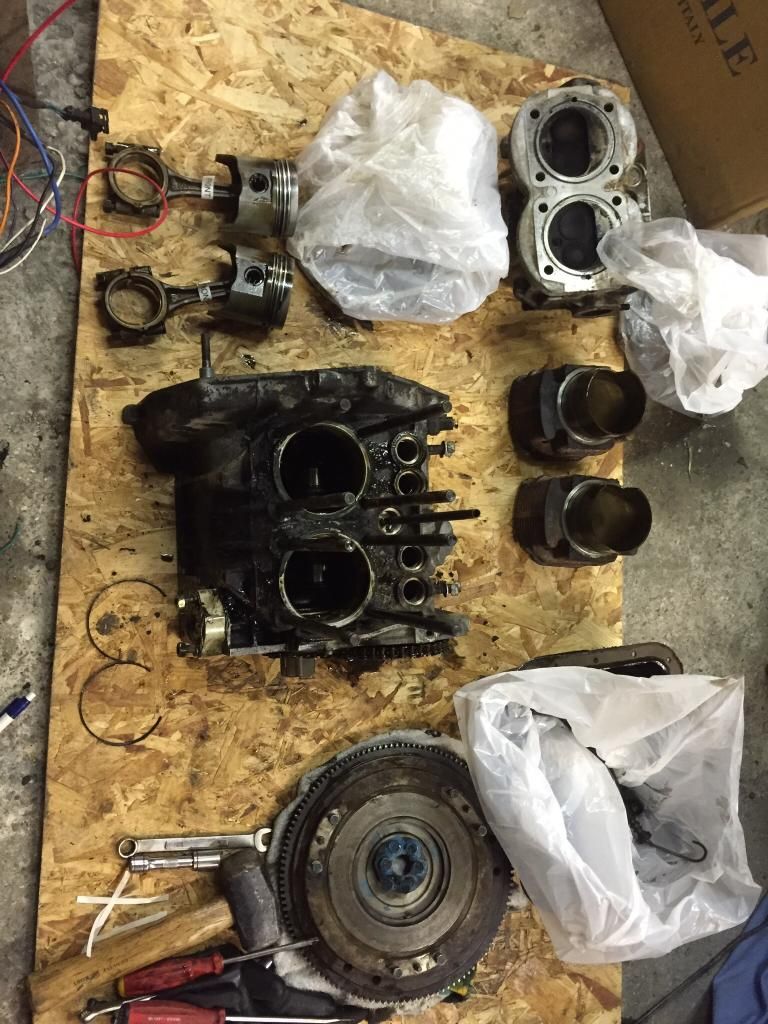
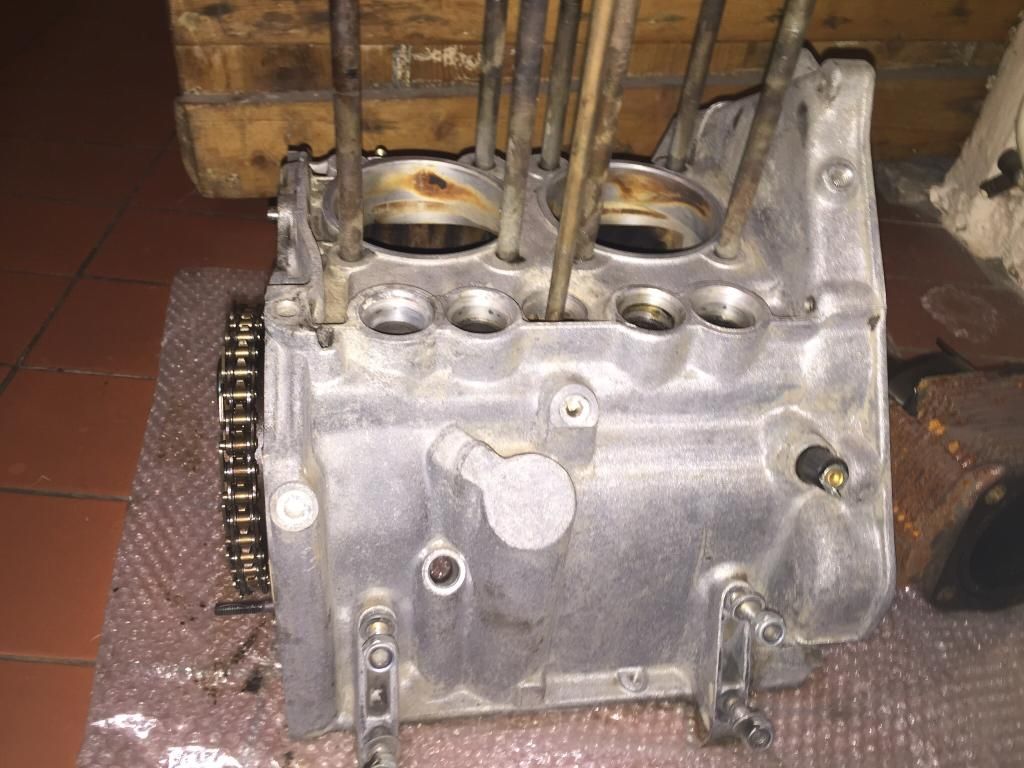
But a bit of cleaning of the block and looking a lot healthier. The barrels and pistons were all in good condition and the crown of the pistons just needed a clean up along with the cylinder head. On the cylinder head there was a sheared bolt that had quite a lot of the bolt sticking out but it wouldn't shift, so I had to drill it out and fit a Helicoil.

image.jpg2_zpszvgd4m3c.jpg


image.jpg3_zpswu0fofib.jpg


The timing chain was really sloppy and needed changing, so that was replaced along with the gears and a new oil seal put on the timing chain housing. The centrifugal oil filter was filthy I don't think it had ever been cleaned and the gasket was flat as a pancake.

image.jpg4_zpspip82g27.jpg


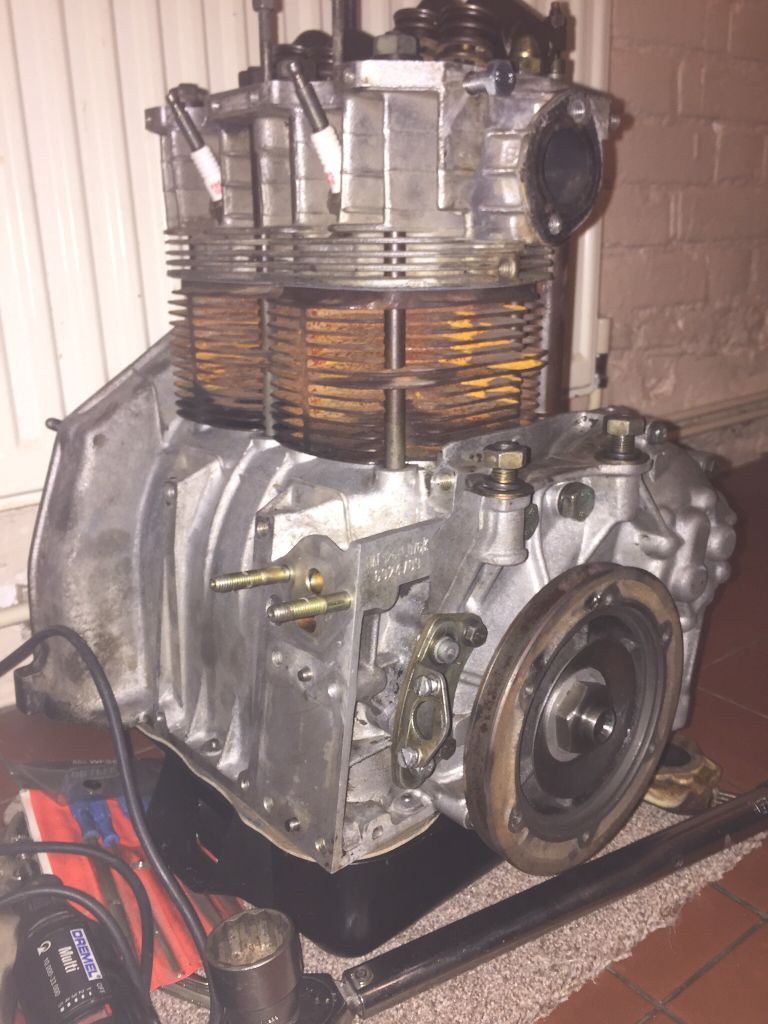
Big ends were changed, main crank bearings were fine along with the rings, so all could go back together, with new gaskets and seals on the pushrod tubes. It needed a new sump as the cooling channels were all crushed from when it was removed from the car and dumped on the ground.

67ea6eb09fd1095f4684922d0e5bed2e_zpsd34ea88a.jpg


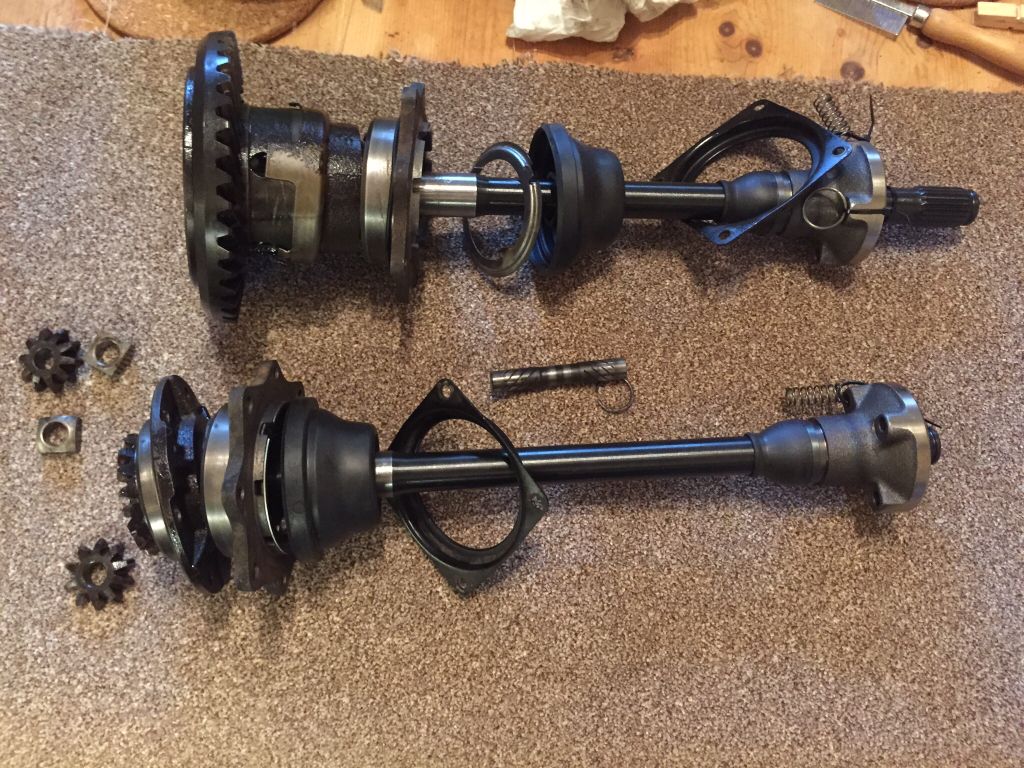
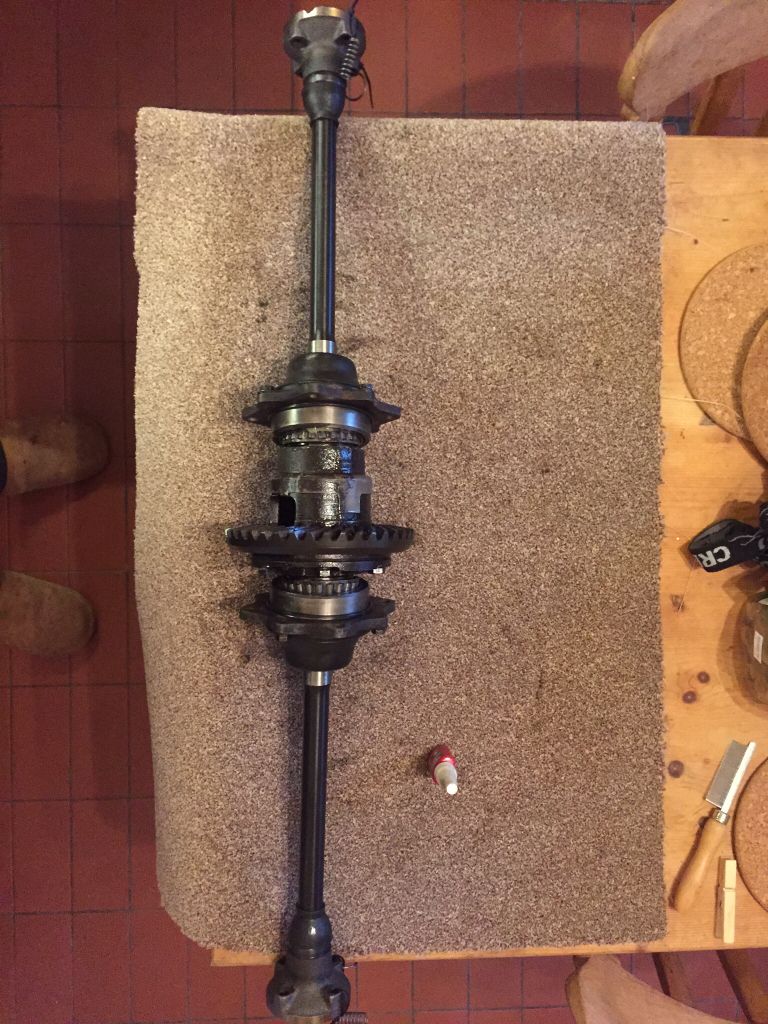
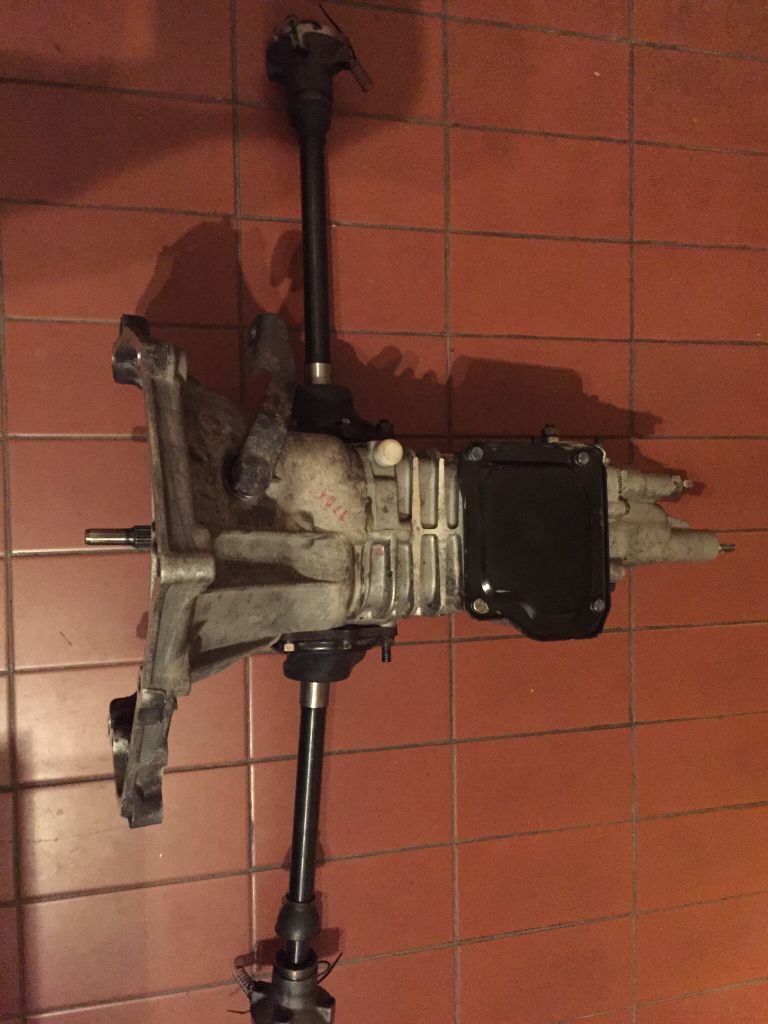
I have also done a lot of work on the driveshafts and gearbox but I will post another update on that tomorrow or I will be on here all night.
 
As the 650 engine came from a 126 it needed the drive shafts replacing for the shorter 500 ones. Also the outer bearing rubber seals were pretty shot and needed replacing. They are quite easy to take apart and replace the shafts themselves but fiddly to put back together, as I said on a previous thread best done if the driveshaft that has the crown wheel on it is reassembled first to prevent the side gear from dropping out. I found it best to reassemble them inside a cardboard tube that is placed on its end and the drive shaft lowered into it to, so that it rests on the diff bearing housing. Then reassemble the other drive shaft in the tube and lower the one with the crown wheel on to the one in the tube, making sure the little lines on the diff housing match up and bolt together to the correct torque with a little Loctite just to be safe. If you try and do it on the horizontal the side gear keeps dropping out.

e493bcf40505e6466c27512e12aa8432_zps495ad649.jpg


5176d5fda4b356da4f80fb3286410917_zpsc7876e09.jpg


Then it's simply a case of putting the diff back into the gearbox and bolting on the bell-housing, using some Blue Hylomar on the faces of both sides as there is no gasket on this joint.

I
b758872056e89dabf60c020742d435d7_zps83dd9a69.jpg


Now both the engine are ready to be joined together, next is to clean up the other bits and see what condition they are in and whether the tinwork needs respraying? Then I can hopefully bench test the engine in a couple of weeks when it is all complete.

As the starter motor on this engine is fitted with a solenoid, I managed to source a brand new Fiat 850 ignition switch that will fit in the existing hole on the dashboard of my 500F and replace the existing switch. This will allow me to turnover/start the car from the switch using the key, simply by running an additional wire from the switch to the solenoid and does away with the lever start. I managed to source the switch quite a bit cheaper than most places sell them for and it is original part with Fiat embossed keys.

9a7c1feb569cb4e0ce6459d340b20f62_zps45614c4a.jpg
 
ehmmmm let me think!!! Er maybe not.

Out of interest how many kilometres does your L have on it?
 
I spent the day cleaning up the tinwork for the engine and the alternator.

The engine must have had oil leaks for sometime judging by the amount of grease and grime that seemed to cover everything. The fan housing tinwork was in surprisingly good condition and I could get away without spraying it, the worse is the thermostat housing, if I didn't paint all of it, it may be mismatched so I may as well give the lot a spray.

9dc7c2a79f0240b1436ed562f8d4aae1_zpsfabc6901.jpg


I took the thermostat off the housing and stuck it in a pan of cold water to see if it was working. I brought it to the boil but it didn't move at all, so it may explain the oil leaks if it has been running too hot for a long time.

The alternator is a chunky 3 phase that looks like it was made in Poland under license from Lucas. Testing it with a multimeter there appears to be some output but I need to connect it to an electric drill to get it up to a decent speed but first impressions look good. Which is good as they cost a few bob to replace. Even this was covered in an oily grime in places.

3861a1751bdc1a5a4abca58ac96f529e_zpsb39b4d1a.jpg
 
Tim personally I am with you, powder coating chips too easily. Every time you are working on the engine and accidently drop the spanner on the tinware you would be cursing for hours after if you chipped it. It would be a bit like when you buy a new car with alloy wheels and kerb them for the first time.:cry::mad::bang:
 
I also have my concerns with powder coating.
I have had many parts powder coated before. It tends to give a lot harder surface that is more durable to solvents, brake fluid etc. But it causes problems with threaded holes etc as it will go in any crevis or hole. If I recall the metal part has an electrical charge put through it and then the powder is sprayed all over and is attracted to the metal. This is then baked at a higher temperature than normal car paints.
The finish can be quite good, but as Tony said, it can chip very easily and is very difficult to match with paint afterwards.
Personally I think it is great for things like brake drum backing plates and rocker covers etc as it will with stand the heat or nasty chemicals. But if you use the latest type brake fluid this shouldn't be an issue.
The fan housing should be okay painted in normal aerosol paint, plasticoat (Tony has shares in this stuff) or better still 2pack car paint as this is more durable.
 
Yes I am Mr PlastiKote as Sean pointed out. I use their enamel paint for the tinware, as you can see in the picture below it is heat resistant upto 121°C, resistant against chemicals, petrol and corrosion? I painted the ones on my 500 engine about 19 years ago and they only needed a light blast last year when I rebuilt the car to smarten them up a bit.

Also it drys really quickly. It's not the cheapest paint around but it is very durable.

6926d7c649904fde6c88a486ba44e1bd_zps35b48037.jpg
 
I need to order the following parts.

Clutch spring for the actuating arm, thermostat, rubber seal for the oil filler cap and the rubber hose that runs from the carb to the air filter. I have priced them up on Axel Gerstl website at €13.90 so I sent Fred a request for shipping costs and it came back at €11.90, which I thought was a bit pricey considering the cost of a much heavier package I recently received was only €10.00 but apparently it is more expensive to send smaller one off item or in this case four off items.

Anyway that works out at €25.80 so £19.00. I thought I would check on the website of a UK supplier for the same parts and they cost £38.00 and that's without any shipping costs. None of these bits are parts that are going to be assessed as being better quality from one supplier or the other but the difference in cost is amazing.
 
Last edited:
I have noticed that also !
UK is very expensive for parts
 
Motobambino is the cheapest but they don't have seem to have everything the others have. Peter says their quality is good though.

To rebuild my 650 engine the bits were £273 from Germany, from the UK I priced them at £573 that a massive difference.
 
Hi Tony,
I have just stripped my engine down. Head, cylinders & pistons all look ok.
Just need to find a socket to fit the front pulley then get the rest apart.
I looks okay at the moment apart from the usual items ie the pushrod tubes.


Has your fan housing got the additional vent flap on the top flat section between the air filter & carb? whats it for? how is it operated I cant see anything on mine that would operate it.


I might take that engine block off you as I think I will convert it over to a dizzy.
Good news, if I use this in Franko then I can use my old engine to help rebuild the 500D if it needs any parts.
 
Back
Top