So it looks like the tabs might simply be somewhere for the handbrake cable to take some support from?


You are using an out of date browser. It may not display this or other websites correctly.
You should upgrade or use an alternative browser.
You should upgrade or use an alternative browser.
Technical Project Paolo
- Thread starter Paolo66
- Start date
Currently reading:
Technical Project Paolo
So it looks like the tabs might simply be somewhere for the handbrake cable to take some support from?
Yeah that's what appears in Joe's picture. I suppose it makes sense.
OP
OP
Paolo66
Established member
- Joined
- Feb 6, 2013
- Messages
- 1,004
- Points
- 235
Keep getting let down by shotblasting companies so have decided to shelf that idea. What's the best way to clean the thick underseal off from under the car? I guess a scraper and heat but any tips greatly appreciated
Damian
Damian
Damian I wouldn't use direct heat as in flame from a blow torch in case it sets it on fire. You can get a heat torch gun that is like a really hot hair drier that is used for heat shrink insulation tubing. You could use that to soften it up and then petrol and a wallpaper scraper to remove it.
I did it on my engine bay but mine had been painted in under seal that was quite soft, so just I needed petrol and a scraper. But it is a really messy job, I ended up covered in the stuff but once you get the worse of it off it is it's not too bad.
Tony
I did it on my engine bay but mine had been painted in under seal that was quite soft, so just I needed petrol and a scraper. But it is a really messy job, I ended up covered in the stuff but once you get the worse of it off it is it's not too bad.
Tony
As Tony said, I just used a hot air gun which softens the underseal and then scrape it off. I had my shell blasted and they then sprayed it with a weld through primer. They done a brilliant job, however get as much underseal & sealer off that you can because the sand blast just doesn't remove it.
OP
OP
Paolo66
Established member
- Joined
- Feb 6, 2013
- Messages
- 1,004
- Points
- 235
Ahhhh ahhhhh! always looks worse when you start cutting into panels. I have always found that whatever rust you can see, there is usually 2 to 4 times as much that you cant see.
Just think how much stronger it will be when it is finished, and how pleased you will be knowing that rust wont appear a year after you have spent a fortune having it painted.
Keep up the good work Damian.

Just think how much stronger it will be when it is finished, and how pleased you will be knowing that rust wont appear a year after you have spent a fortune having it painted.
Keep up the good work Damian.
OP
OP
Paolo66
Established member
- Joined
- Feb 6, 2013
- Messages
- 1,004
- Points
- 235
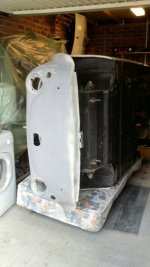
At least it gives you a bit more room in the garage with it on its side

Yo Damian, you joined the sandblasting club.?
OP
OP
Paolo66
Established member
- Joined
- Feb 6, 2013
- Messages
- 1,004
- Points
- 235
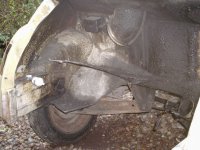
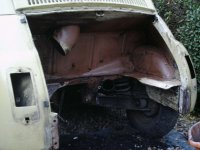
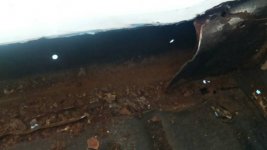
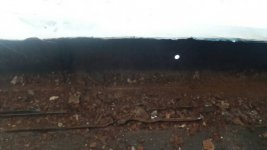
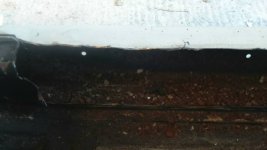
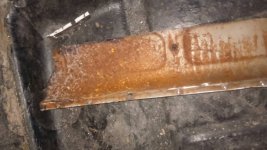
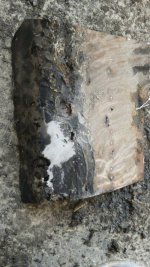
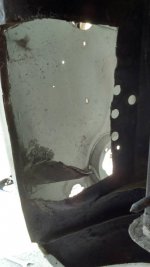
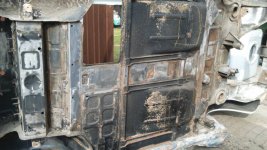
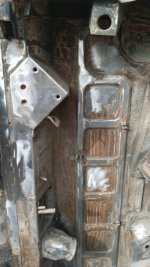
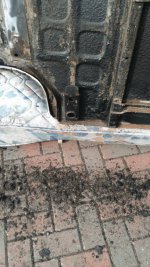
Have enjoyed the restoration so far but not todays job, removing the 49 year old underseal. Tried every top tip on the internet and every chemical and grinder wheel I had in the garage to no avail. The only thing that would touch it was a heat gun and scraper. Had to work in sections about 3 inch square and slowly try and get it all off. Once you get the majority of it off you can then try your petrol, grinding wheels etc to get it to bare metal. Not quite finished but broke the back of it, obviously didn't bother with the floor pans as these are getting replaced. In the last photo there is the extra bit to the front of the floor. My new floor panels don't come with them and I haven't come across them on parts sites. What do they do?
Damian
Damian
Attachments
Lovely stuff Damian. I missed on that pleasure because what little was left, after the floorpans were refitted seemed OK to me and I let it be. But your obviously going for a finer finish.")
I think you are maybe asking about the support pads are you?....the raised plate with flanges and a pressed out circular hole. I the car body can be rested on them if any front mechanical work is being done..probably mostly used when originally assembling because there's a similar setup with those rear turrets. I have since seen them for sale, maybe Axel Gerstl? but I made one out of heavy gauge steel. You might be able to grind off the old ones when you remove the floor, clean them in your sandblaster and re-use.
You're in deep now..keep the pics coming, not everyone does/
OP
OP
Paolo66
Established member
- Joined
- Feb 6, 2013
- Messages
- 1,004
- Points
- 235
Thanks for that Peter. I have just found them on Van Der Laan but I think I will do as you suggest and re-use the old ones. Recycle where possible. The underseal was original, I think, and was tatty in most places. Around the tunnel it was up to 5mm thick and in other places there was barely any! You also can't paint over it and I want the underneath to be the same colour as the body (baby blue). I have sourced some underseal from Soudal that looks good stuff and I will apply this myself to get an even coating. It can then be painted over and should last another 49 years (although at this rate I don't reckon I will). I've found out today that these cars really are a labour of love!
Looking good Damian. I bet you had sore arms after doing that for hours and needed scrubbing down yourself afterwards.
I only did the engine bay and that was mucky enough. It took me about three sessions. I found it best to get the majority of it off with the scraper and heat gun and then next two sessions attack it with petrol to remove the leftovers.
Tony
I only did the engine bay and that was mucky enough. It took me about three sessions. I found it best to get the majority of it off with the scraper and heat gun and then next two sessions attack it with petrol to remove the leftovers.
Tony
PS. Probably easier to weld the brackets on before you fit the new floor....just a thought to avoid upside-down welding.
PPS. Probably all the preceding also applies to the seatbelt mounting nuts and plates.
PPS. Probably all the preceding also applies to the seatbelt mounting nuts and plates.
Last edited: