

You are using an out of date browser. It may not display this or other websites correctly.
You should upgrade or use an alternative browser.
You should upgrade or use an alternative browser.
Technical Project Paolo
- Thread starter Paolo66
- Start date
Currently reading:
Technical Project Paolo
OP
OP
Paolo66
Established member
- Joined
- Feb 6, 2013
- Messages
- 1,004
- Points
- 235
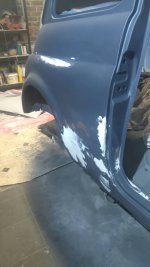
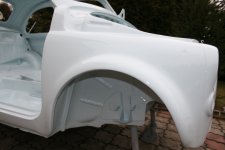
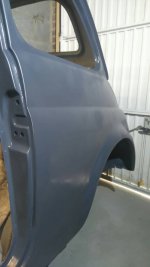
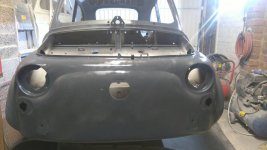
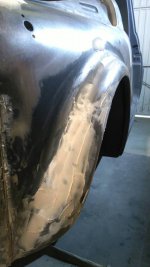
Live updates from the garage. Completed one side and bonnet outer surface. Bonnet is only placed on before anyone mentions shut lines")
Attachments
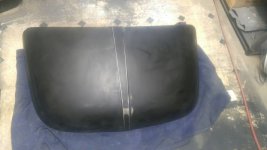
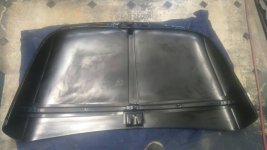
Nice shut-lines.
OP
OP
Paolo66
Established member
- Joined
- Feb 6, 2013
- Messages
- 1,004
- Points
- 235
Somewhere in this thread I asked about dampers and how you can tell when yours are knackered. I now have the answer as I have bitten the bullet and bought new.
Basically there should be tension against both extension (rebound) and compression (bump). This should always be checked with the damper in the correct orientation. My originals had no bump damping at all. I had planned to refurbish them myself (I was a damper engineer in motor-racing for 10 years) but decided that for now it was one side project too many. Next winter maybe?
Basically there should be tension against both extension (rebound) and compression (bump). This should always be checked with the damper in the correct orientation. My originals had no bump damping at all. I had planned to refurbish them myself (I was a damper engineer in motor-racing for 10 years) but decided that for now it was one side project too many. Next winter maybe?
You're becoming a little obsessed by this project. I bet your wife is thinking she will never see the 500 on the road again!
I must admit I am getting to that stage where I keep getting stuck by those little items, screws, nuts, wiring, terminals, the odd things that just don't fit right or work correctly because they are crap new items.
One step forward, 2 steps back at the moment.

I must admit I am getting to that stage where I keep getting stuck by those little items, screws, nuts, wiring, terminals, the odd things that just don't fit right or work correctly because they are crap new items.
One step forward, 2 steps back at the moment.
OP
OP
Paolo66
Established member
- Joined
- Feb 6, 2013
- Messages
- 1,004
- Points
- 235
Has anybody replaced the door hinges and pins? I have had to cut the old ones off and now just the need to get the rusty old pins out the door. The new pin has a head at one end and plane shank at the other. Do you just peen over the plain end? How best? The door isnt exactly something you can stick in a vice or a press!
AndrewHarvey
Established member
- Joined
- Jan 17, 2015
- Messages
- 1,471
- Points
- 290
My replacement pins had no head - just straight dowels with nylon inserts - just the same as were fitted
The originals were held in with a tack weld - so I just did the same
The originals were held in with a tack weld - so I just did the same
Hi, im restorating fiat 500 and fiat 126 in Poland.
My prices are nice and quality is good.
I added some of my cars so you can see the quality.
I also have ready build cars.
So if you need help give me a wink
My prices are nice and quality is good.
I added some of my cars so you can see the quality.
I also have ready build cars.
So if you need help give me a wink
Attachments
OP
OP
Paolo66
Established member
- Joined
- Feb 6, 2013
- Messages
- 1,004
- Points
- 235
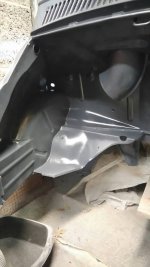
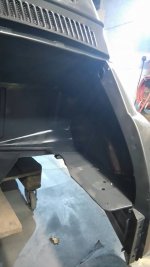
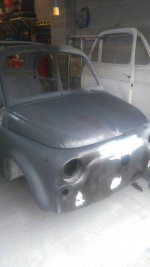
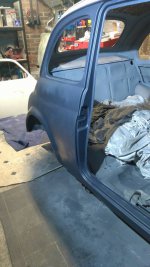
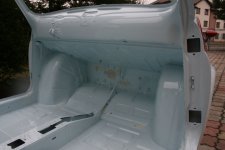
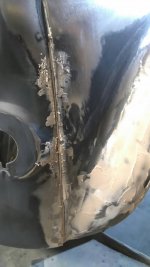
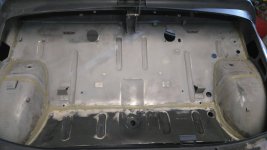
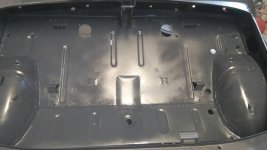
Not posted in a while as life keeps getting in the way but a couple of updates for you. Decided to coat the engine bay in POR15 rubberised coating. This should protect it better than just paint and should provide a little sound deadening! Hope to get the L/H side done today which will just leave me with the inside to do. Got to replace the hinges on the doors which is proving a real challenge. The pins are stuck in good and proper. Seam seal it all and then ready for painting hopefully by end of April?
Attachments
Your going through the difficult phase Damian where it just feels like you are not getting anywhere fast.
I have always set my self a goal to work on 2 panels at a time.
While you are waiting for filler to cure on one, work on the other and once you are happy with these give them a coat of etch. Make sure they are complete before moving on otherwise you may miss a few bits if you don't come back to them.
Keep going mate, you are doing well!
OP
OP
Paolo66
Established member
- Joined
- Feb 6, 2013
- Messages
- 1,004
- Points
- 235
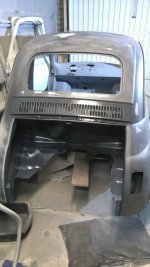
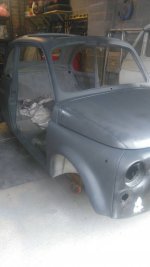
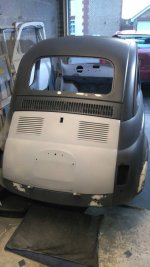
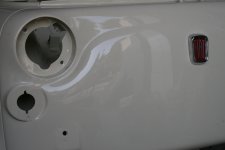
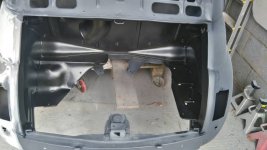
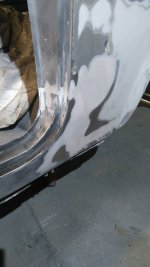
I can see a small light at the end of a long tunnel. Just the inside and front compartment to dress and then the doors. Will have to revisit a couple of places to make them perfect.
Attachments
OP
OP
Paolo66
Established member
- Joined
- Feb 6, 2013
- Messages
- 1,004
- Points
- 235
Life keeps getting in the way of my project and the painting deadline keeps getting put back! Aiming to have it all prepped now for end of May. The thing I'm struggling on at the moment is replacing the door hinges. Cut the old ones off with the angle grinder but the old pins are stuck solid. Will not be beaten though and will get them out somehow.
Attachments
OP
OP
Paolo66
Established member
- Joined
- Feb 6, 2013
- Messages
- 1,004
- Points
- 235
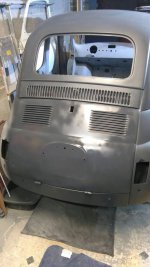
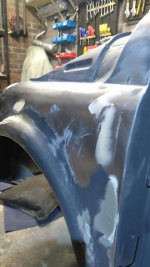
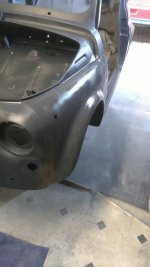
Have enjoyed every single stage of this restoration apart from this one. Having an OCD when trying to get perfect panels isn't good. Gonna get all the easier bits done and then I'll be left with the imperfections to revisit.
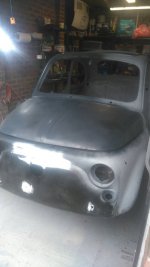
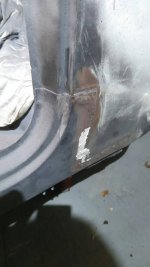
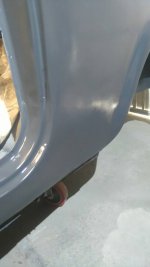
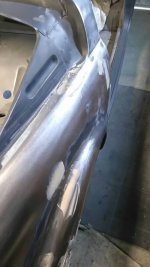
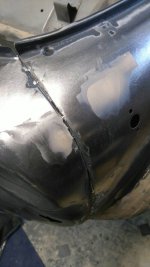
Need to add a panel line where the front wing meets the front panel to keep originality
Need to add a panel line where the front wing meets the front panel to keep originality
Attachments
Damian, if you've ended up with no joint line or a badly defined one, I would be tempted to fill it over rather than try to simulate one. Although if you did, lead-loading might be advisable for longest lasting looks.
That joint line is pain to get right at the best of times, as any slight misalignments, manufacturing errors or tool marks from the alignment process all get magnified as soon as paint is put one.
On one side of my car, in spite of great care taken, there are a couple of places on the very sharp radius of the flange on the wing where the paint has chipped away. I think that the sealant in the gaps doesn't help with this. I'm currently scratching away trying to do as invisible a repair as possible.
I can't help you with the hinge pin. As far as I'm aware, don't these have nylon bushes? Where is the pin stuck? Do you have a photo? You can get hinge-pin removal tool but I've not used one. On my camper, which has very basic hinges, getting the pins out is the only realistic way to remove the door. It looked impossible; but I burned off the paint, wire brushed it soaked in penetrating oil repeatedly over several days, and then used a tapered punch and 4 pound hammer to get them moving. All six pins came out textbook fashion. I treated myself to an early tea-break that afternoon.
As you say...you "will get them out somehow."
Good luck.
AndrewHarvey
Established member
- Joined
- Jan 17, 2015
- Messages
- 1,471
- Points
- 290
I had great fun getting the hinge pins out.
Both doors had dropped - bought the kit from MBG
Had to drill three of the four pins out and then spot welded the new ones in place
Both doors had dropped - bought the kit from MBG
Had to drill three of the four pins out and then spot welded the new ones in place
OP
OP
Paolo66
Established member
- Joined
- Feb 6, 2013
- Messages
- 1,004
- Points
- 235
Peter
I am tempted just to fill that panel line over the only problem being it won't look original and we all know how some people on here crave originality
Andrew
I have actually drilled one pin out but its difficult to do it straight. I guess my hinges are original and after 50 years have welded themselves to the bush which in turn has welded itself to the door!
AndrewHarvey
Established member
- Joined
- Jan 17, 2015
- Messages
- 1,471
- Points
- 290
Mine were impossible to drill out straight also BUT had just enough wiggle room to get them out with minor damage to the hinge
Welded new pins in so they hopefully will be fine.......
Welded new pins in so they hopefully will be fine.......
Peter
I am tempted just to fill that panel line over the only problem being it won't look original and we all know how some people on here crave originality
.....and there's a lot who don't. The funny thing is that there are some cars where de-seaming is the way to go.I'm more of a pragmatist than a purist.