Technical Project Paolo

Currently reading:
Technical Project Paolo

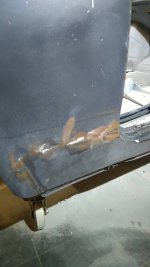
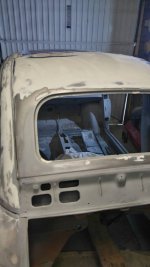
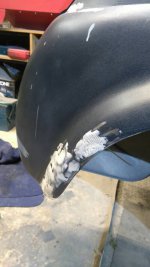
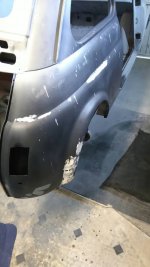
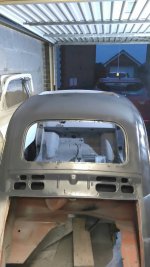
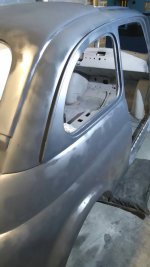
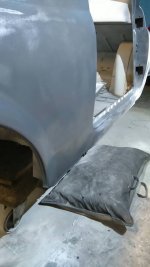
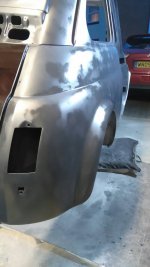
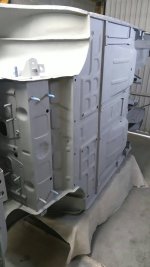
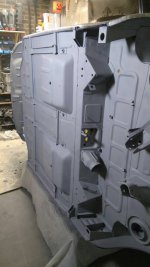
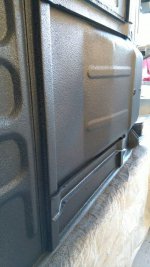
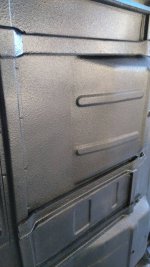
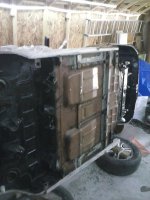
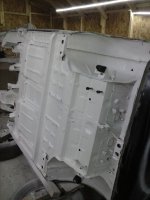
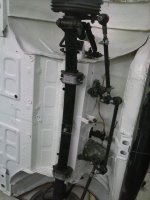
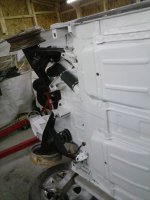
Rubbed my first panel down today. I can see this being a long old process! Taking it all back to bare metal and starting from scratch. It's amazed me how once you put a light coat of etch primer on you see the slight bumps and imperfections that will require filler
 
Still a work in progress but it's getting there and at least it's all the same colour. The ocd in me is saying keep going until it's perfect but the practical me is thinking it's the floor and you are going to cover it with underseal so who will know?
Damian
 

Attachments

  • 1447589391828.jpg
    1447589391828.jpg
    43.2 KB · Views: 38
  • 1447589405673.jpg
    1447589405673.jpg
    51.8 KB · Views: 33
You are setting the bench mark Sean of which I am following. Hope to get it all finished and seam sealed today and then apply the underseal next weekend!
 
A little bit more progress
 

Attachments

  • 1447601884163.jpg
    1447601884163.jpg
    86.5 KB · Views: 36
  • 1447601900928.jpg
    1447601900928.jpg
    86.1 KB · Views: 36
Only used 1 at the moment Sean which has put a light coat on both floor pans. Got Soudal anti gravel which you put on with a Schutz gun via the compressor. Like the look of it, not too thick and gunky, and dries rock hard. Can be overpainted if we decide to go down that route. Got another 1ltr tin left and just ordered another 2. £15 for 2 tins which I thought was really cheap compared to others.
 
Yeah that's not a bad price. I did use 5 tins but also painted over for additional protection and looks nice.
If you are not painting it then make sure it is all well coated as the road water & salt will get the rust starting very quickly.
 
I can personally recommend Dinitol 4941 for a final coat. I've used this several times on Land Rovers that got a lot more abuse than a normal road car, and it's very good at protecting and lasts really well.

2L would be more than enough to cover the whole underside of a 500 and you can use the Schultz gun too.

cheers, Steve
 
One of the decisions I am pondering with at the moment is whether to paint the underneath the same colour as the car. Of course it's up to me but I thought I'd ask opinions on here. I can see pro's and con's for both sides. I think we have changed our minds on the colour now from baby blue to antique white and I think it will be too much white. The underseal I have used is a nice texture and is going on nice and neat, a lot better than the messy original stuff.
Opinions/views please?
Damian
 
Paint it!....


It all depends on if you want it as an everyday driver?
If so, plenty of sealer and stone chip will be suffice. Painted finish wont last too long with all the abuse it gets on the good old British roads


If you want it for a sunny day car or max return then go for the painted finish.
 
I'm at pretty much the same stage - I used a black bitumen based aerosol underbody spray sealant on the engine bay and front underbody prior to applying 6 litres of white MIPA Stone Chip (@ £6/litre tin inc p&p) with a Schutz gun. I worked on the 'you can't have too much underseal protection' principle. The black bitumen bled very slightly through the MIPA which turned it very slightly off-white. I also found the stonechip to be easily marked so I applied an overcoat of white cellulose RFU paint to give a surface that will hopefully stop mud from sticking too easily. It seems to have taken very well albeit not to the highest standards possible since it was a bit experimental for my spraying technique.
I'm returning the colour to it's original Avorio Antico 234 from it's current Piper Giallo so I thought that a white underside would be fine given that you cant really see much of it anyway.
 

Attachments

  • CAM00371.jpg
    CAM00371.jpg
    831.4 KB · Views: 40
  • CAM00374.jpg
    CAM00374.jpg
    767.7 KB · Views: 38
I'm edging towards painting but doing it myself with aerosols. The suspension parts that I have got looking like new will stand out better against a light background. I figure it's not worth paying to get the bottom sprayed when it's just over a rough underseal. I can then fit all the suspension parts so the shell can be wheeled into the spray shop rather than going in on a trolley/rotator
 
The suspension parts that I have got looking like new will stand out better against a light background

I agree that the suspension looks much smarter against the light floor.
 

Attachments

  • CAM00480.jpg
    CAM00480.jpg
    1,009.1 KB · Views: 56
  • CAM00485.jpg
    CAM00485.jpg
    965.3 KB · Views: 56
Cleaning up all the welds and filling where needed. Will put up a couple of before photos and then post the after ones when I'm happy with the finish. Really enjoying the satisfaction of this phase of the restoration.
 

Attachments

  • 1455386785133.jpg
    1455386785133.jpg
    42.5 KB · Views: 30
  • 1455386797324.jpg
    1455386797324.jpg
    48 KB · Views: 32
  • 1455386812776.jpg
    1455386812776.jpg
    50.5 KB · Views: 31
  • 1455386828697.jpg
    1455386828697.jpg
    49.5 KB · Views: 35
A couple of after photos for roof and rear right wing. A little bit more filling on wheel arch and sill repair required. Paint was still drying when photos were taken and it needs flatting back but slowly getting there
 
Attach photos you idiot!
 

Attachments

  • 1455738867938.jpg
    1455738867938.jpg
    58.7 KB · Views: 24
  • 1455738884059.jpg
    1455738884059.jpg
    45.7 KB · Views: 27
  • 1455738899749.jpg
    1455738899749.jpg
    44 KB · Views: 28
  • 1455738912761.jpg
    1455738912761.jpg
    46.1 KB · Views: 27
Great job Damian, it's a messy job filling, and can be quite tedious but it's a great feeling when you apply a coat of primer and see all the right contours.
Only you will know what lies beneath the surface. Just take your time to finish the filler properly before attacking with the primer.
I usually wait until the primer dries then you can wipe a small bit of filler into any pin holes. Just don't apply too much otherwise you will end up damaging all the hard work you have done.
It won't be long now until you are nearly ready for painting. What colour were you going for?
 
Back
Top