Technical Transmission Rebuild

Currently reading:
Technical Transmission Rebuild

Karlton

New member
Joined
Dec 26, 2018
Messages
10
Points
4
I am going to attempt to rebuild the transmission of my 78 124 Spider. I am not a mechanic (not even close) and this will be the first time I've even SEEN a transmission up front. I'll be taking photos as I go and asking for your valuable opinions and comments.

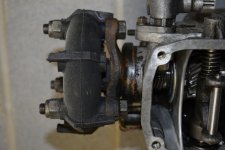
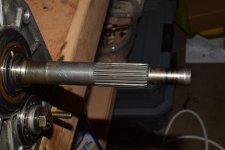
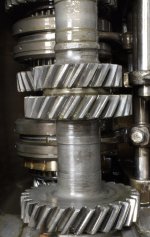
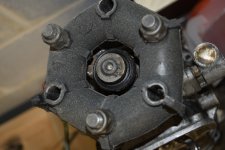
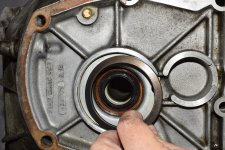
This is a starting photo after I took off the plate with the drain plug. Is the resolution sufficient and is the photo close enough to be useful...trying to gauge how to take the remainder of the photos. (if you see anything that needs addressing or appears broken please let me know!!)

Thanks All!
 

Attachments

  • Transmission.jpg
    Transmission.jpg
    146.6 KB · Views: 96
It sounds like you`re being very brave. For a reluctant mechanic the gearbox is probably not the best place to start! Why are you pulling it apart? What are the symptoms? I won`t be much help to you though because I`ve only ever been in a gearbox once. (Not a Fiat). Just be careful of what falls out when you move anything! Spacers are the worst things for bafflement I`ve found. Take plenty pics.
Good luck. (y)
 
I've rebuilt a few of these gearboxes (transmissions), was a Fiat Dealership Mechanic, back in the 70's.

They're a pretty reliable unit, main problems are synchro wear on 3rd + possibly 2nd gears and bearing wear after a high mileage. Occasionally, the tip of the mainshaft that runs in the needle roller bearing inside the input shaft wears also.

A decent workshop manual would be very useful to guide you.

3 tips about disassembling this gearbox :-

1. First, remove the reverse (back-up) light switch from the rear of the gearbox before starting work, otherwise it's easily damaged.

2. To loosen the large nut on the output shaft (rear of gearbox at rubber doughnut coupling) and the bolt on the front of the layshaft (2nd motion shaft ), visible when the bellhousing is removed, - engage 2 gears at once to lock the gear shafts. This can be done by first engaging any forward gear, then remove the 10mm headed pinch bolt from another selector fork and engage another forward gear.

To remove the circlips compressing the 'Belleville' spring washers on the other shafts, it's easiest to use a hammer and drift to pop them off and fit new ones on reassembly. Compressing these Belleville washers can be difficult without the correct Fiat special tools but when you get to the reassembly stage, I can give you some suggestions on how to do this at home. Incidentally, when fitting new circlips, they should be fitted with their 'square' edge away from the Belleville washers, otherwise they may pop off in use.

When you have the gearbox disassembled and cleaned, post pics of anything
you want a second opinion on and I or, I'm sure, others on here will try to help.

AL.
 
Last edited:
You hit the nail on the head with your tip about removing the donut. I was just going to post and ask for suggestions.
 

Attachments

  • _DSC0030.JPG
    _DSC0030.JPG
    2.2 MB · Views: 66
  • _DSC0031.JPG
    _DSC0031.JPG
    2 MB · Views: 78
Just needed an impact wrench. A few more photos after removing the bell housing
 

Attachments

  • DSC_0011.JPG
    DSC_0011.JPG
    2 MB · Views: 35
  • DSC_0015.JPG
    DSC_0015.JPG
    1.9 MB · Views: 58
  • DSC_0016.JPG
    DSC_0016.JPG
    1.7 MB · Views: 52
  • DSC_0020.JPG
    DSC_0020.JPG
    1.8 MB · Views: 53
  • DSC_0025.JPG
    DSC_0025.JPG
    2 MB · Views: 74
What's the best way to take off the round spacer on the output shaft?
 
Re: Transmission Rebuild - How to Remove Spacer

Any suggestions for removing the round spacer on the output shaft? I don't want o damage it with a wrench..appears to be screwed on. Here's a picture.
 

Attachments

  • DSC_0028.JPG
    DSC_0028.JPG
    1.6 MB · Views: 77
Re: Transmission Rebuild - How to Remove Spacer

No answers, i hop you got it off by now.
What i did is is pried it off using two bars on resting on one of the three eyelets and the other wedged under the spacer after that i alternated the prying one lob at a time, this will kill the rubber bushing behind it.
The spacer is NOT screw on it is a very tight fit.
 
Back
Top