

I don't know how topical this is anymore. I removed, repaired and replace the right headlight this afternoon. Very easy:
2 bolts in the engine compartment; 1 bolt easily accessible with a long extension up behind the bumper; 1 bolt in the wheel well behind the plastic liner.
2 bolts in the engine compartment; 1 bolt easily accessible with a long extension up behind the bumper; 1 bolt in the wheel well behind the plastic liner.
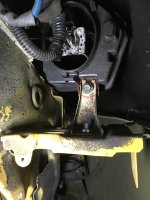
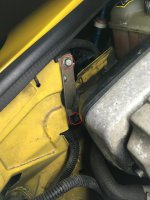
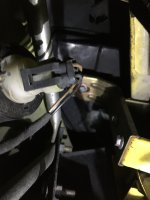
") Galvanized 10 mm hex bolts screwed into electroplate metal U clips. Everything comes apart very easily. The power cable is long enough not to be a problem. The plug is waterproof, so make sure it is properly seated for re-assembly. The cable runs through a flex-pipe that may need to be pushed aside to re-seat the light.
Galvanized 10 mm hex bolts screwed into electroplate metal U clips. Everything comes apart very easily. The power cable is long enough not to be a problem. The plug is waterproof, so make sure it is properly seated for re-assembly. The cable runs through a flex-pipe that may need to be pushed aside to re-seat the light.