Right, here goes:
First off, this is how I did it, I wouldn't take it as gospel and if anyone has any comments on ways to do things differently, then go for it.
")
Once i get some more time and feedback pending, I'll post this in the how-to section.
List of tools:
- 3/8 Rachet spanner
- 3/8, 300mm extender bar with elbow joint
- 3/8, 100mm extender bar
- set of Allen/Hex sockets for 3/8 driver
- E12 interal Torx socket for 3/8
- Screw driver that takes different bits
- Allen/hex bits
- Trox(star) driver bits
- A torch
- flat head screw driver
- thin cutting disc on angle grinder or dremmel
- An extra EPAS unit
- 22mm socket or pump plier/grips
I got my EPAS unit, off a 05 stilo, from ebay for £40 inc. P+P, utter
BARGAIN!
For that price what have I got to loose? If it didn't work, I swap back the old unit and go back to the drawing board.
They usually go for a bit more: £70-80 mark. This one however had no steering wheel & no ignition barrel housing, so I had to put more work in, which I didn't mind as I was on a budget.
You can buy them with everything, steering wheel & the lot (bar the ignition key barrel itself).
So, with that, I took photo's of the steps I took to swap
EVERYTHING over to the new unit.
Disconnect battery before carrying out this work!
Turn your steering wheel so the wheels are facing forward.
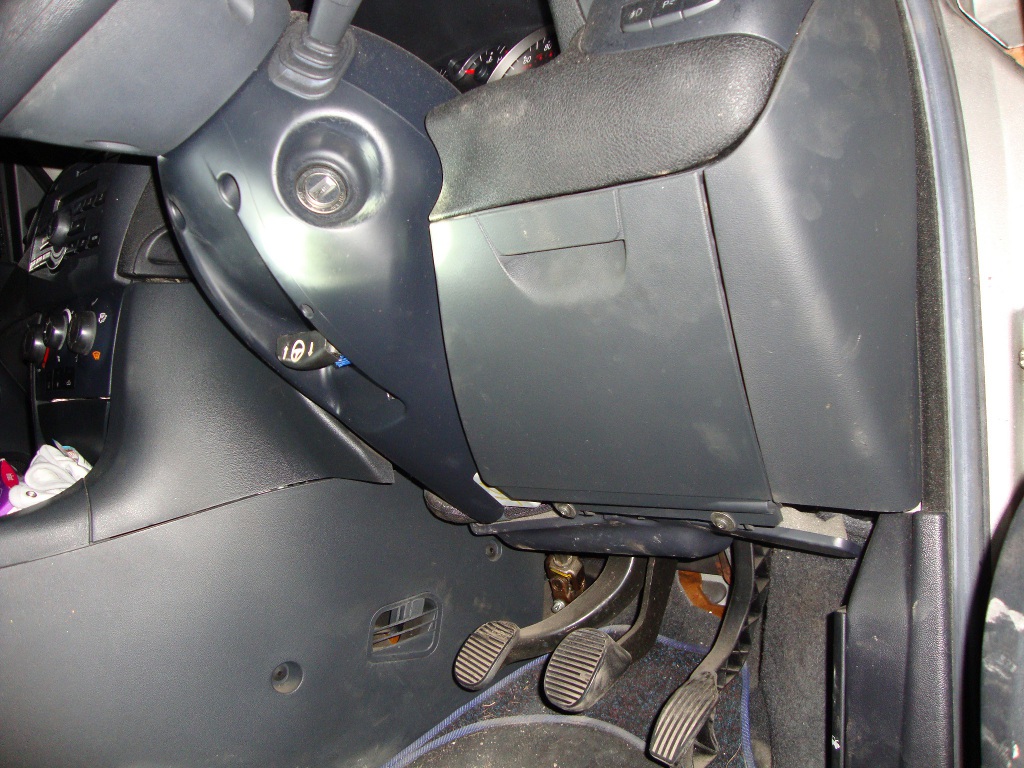
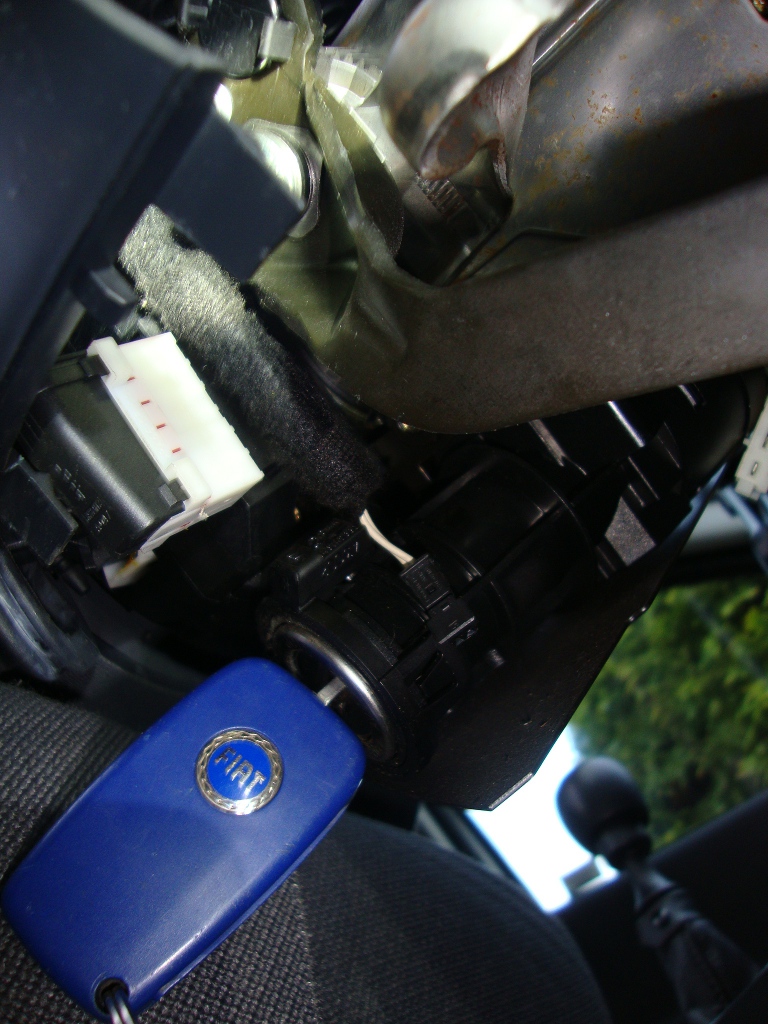
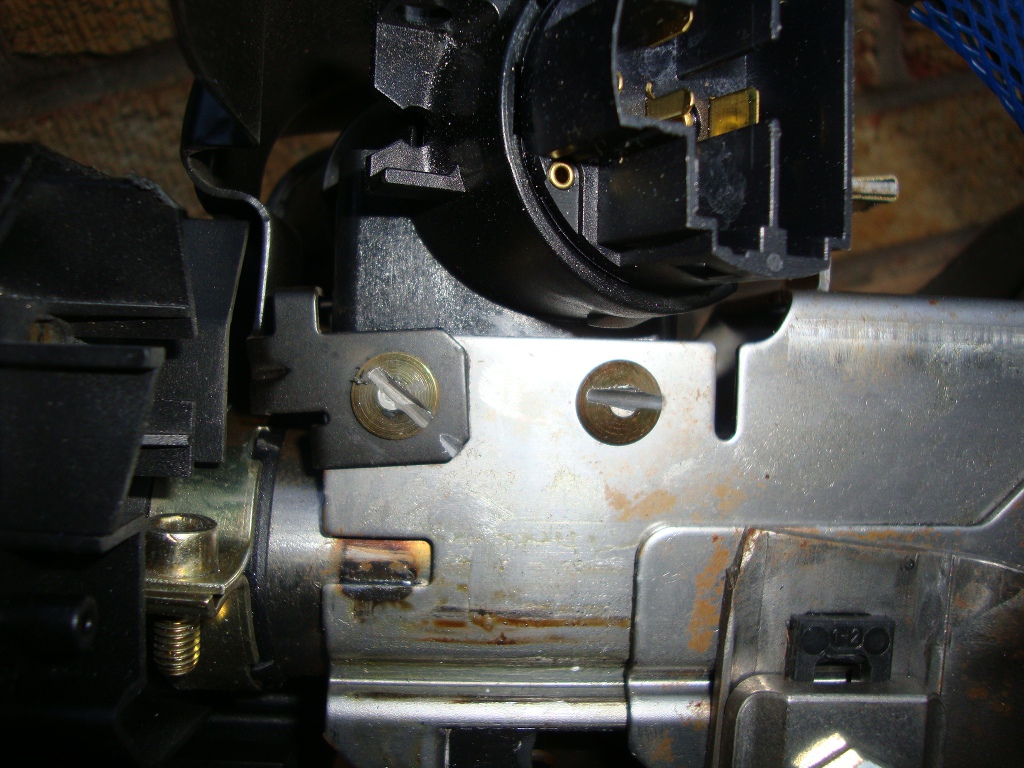
ok, so here's the area you should be looking at:
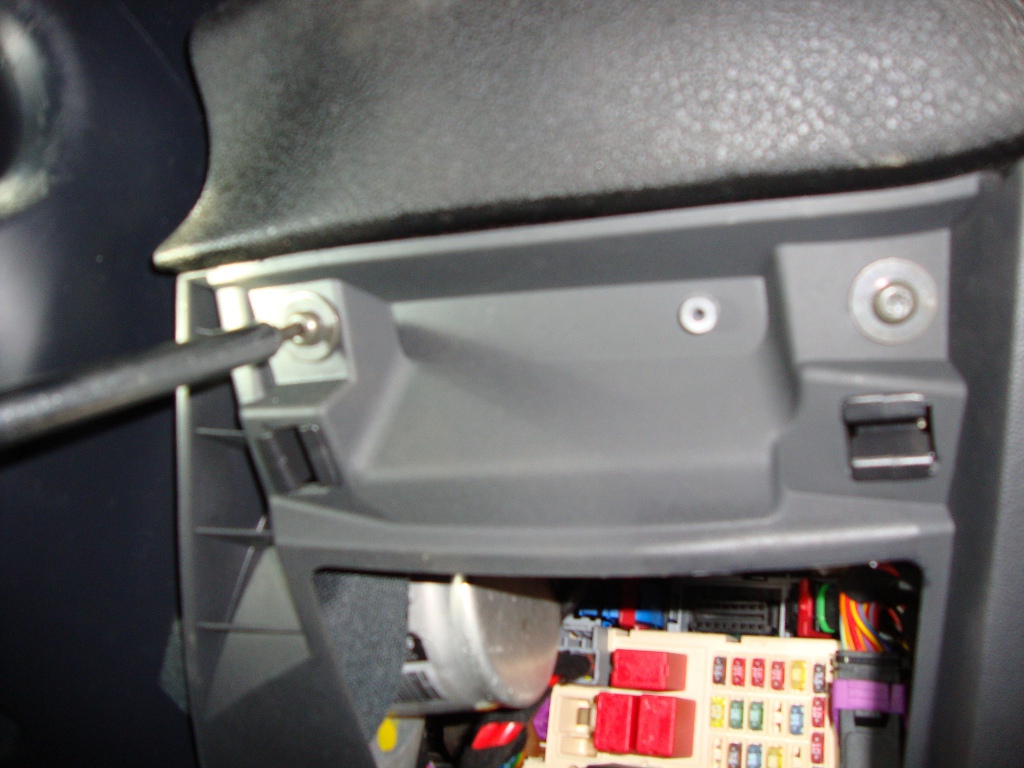
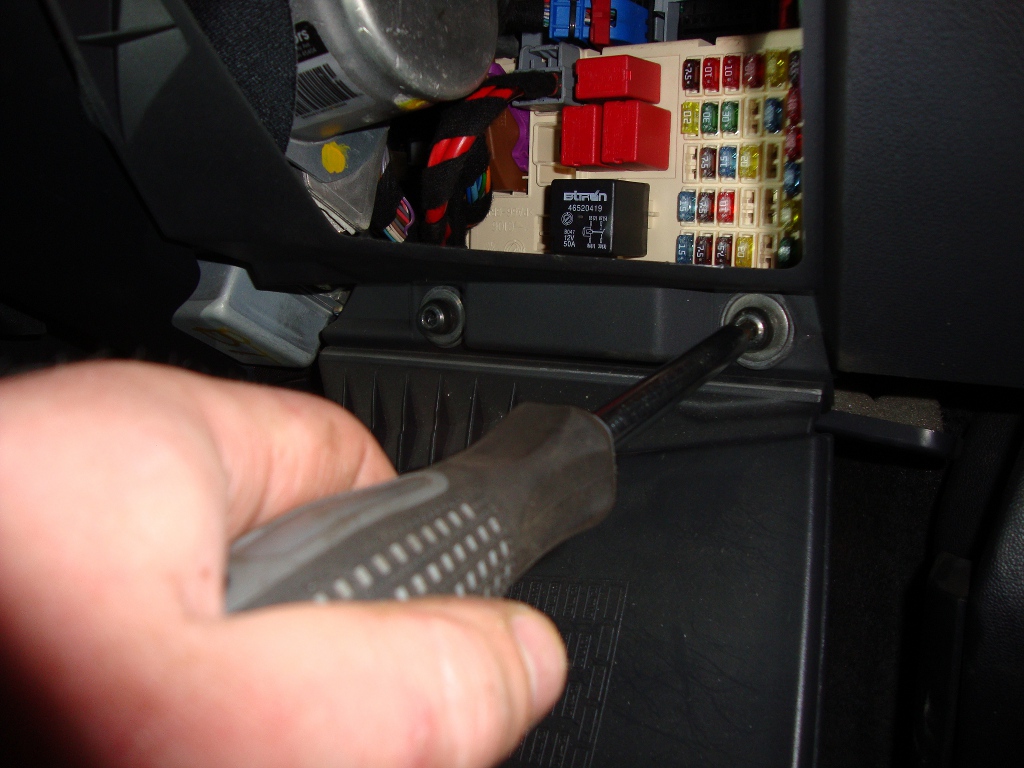
open the fuse-box cover and undo the 2 bolts on the top edge with a torx/star bit, and the 2 near the hinge with an Allen bit:
Next; take a 4mm allen bit and remove the 3 bolts holding the under cover of the steering column as shown:
Remove the cover with the column adjuster in and then out once you've freed it up:
You should be at this point now:
using a 3mm allen bit, remove 2 bolts on either sized of the steering wheel, between the wheel and storks to free up the top cover of the steering column:
This will require you to be on your back in the footwell, I couldn't get photos cos the area where the bolt head was difficult for the camera to pick out, but you should be able to see where the bolt heads are.
I want to point out that I know some of these pictures, I've dropped the column before removing the wiring connections. This is so I had a good angle on all the photos I took.
Also, I found you cannot accidently put the wrong connector in the wrong socket, so if it don't fit putting it back together, then stop pushing
ITS THE WRONG HOLE!So on-ward to removing the connections:
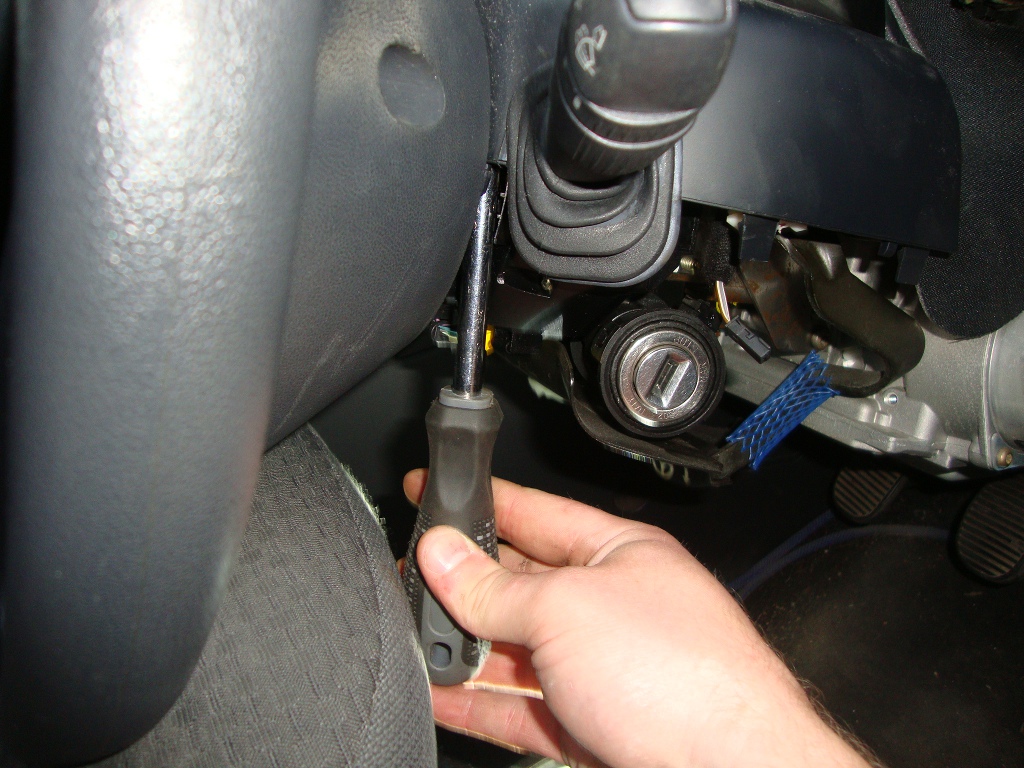
Pull the connections out of the back of the ignition barrel:
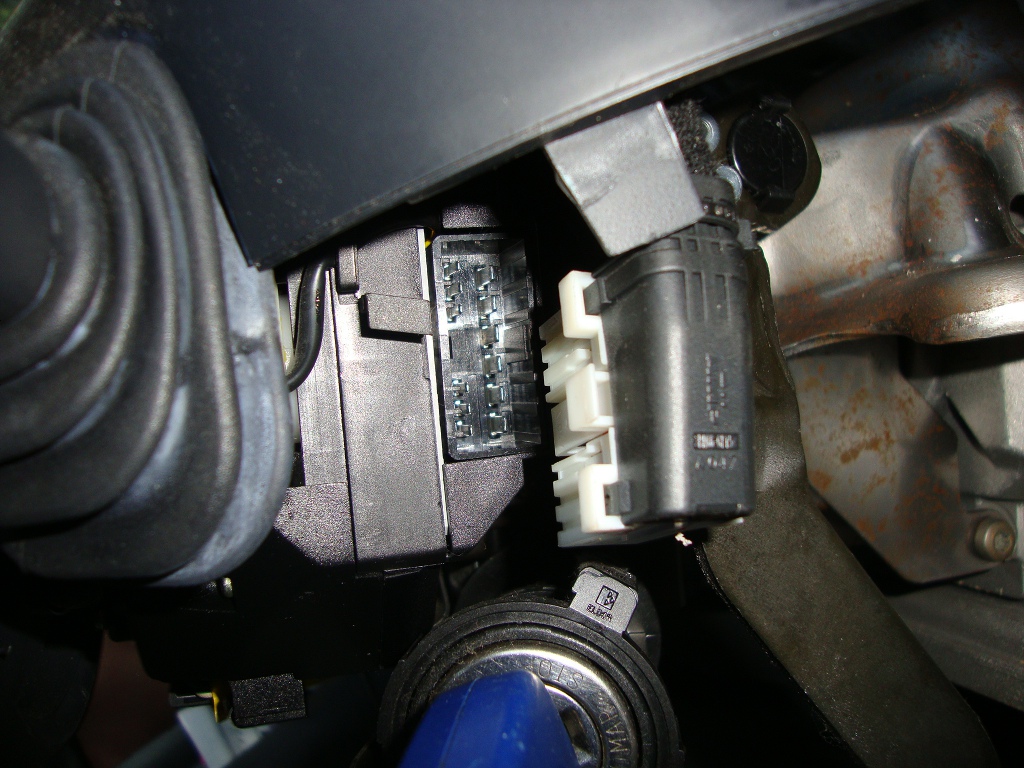
On the entry end of the Barrel is a connector on top of the barrel with a Black and white wire, remove that:
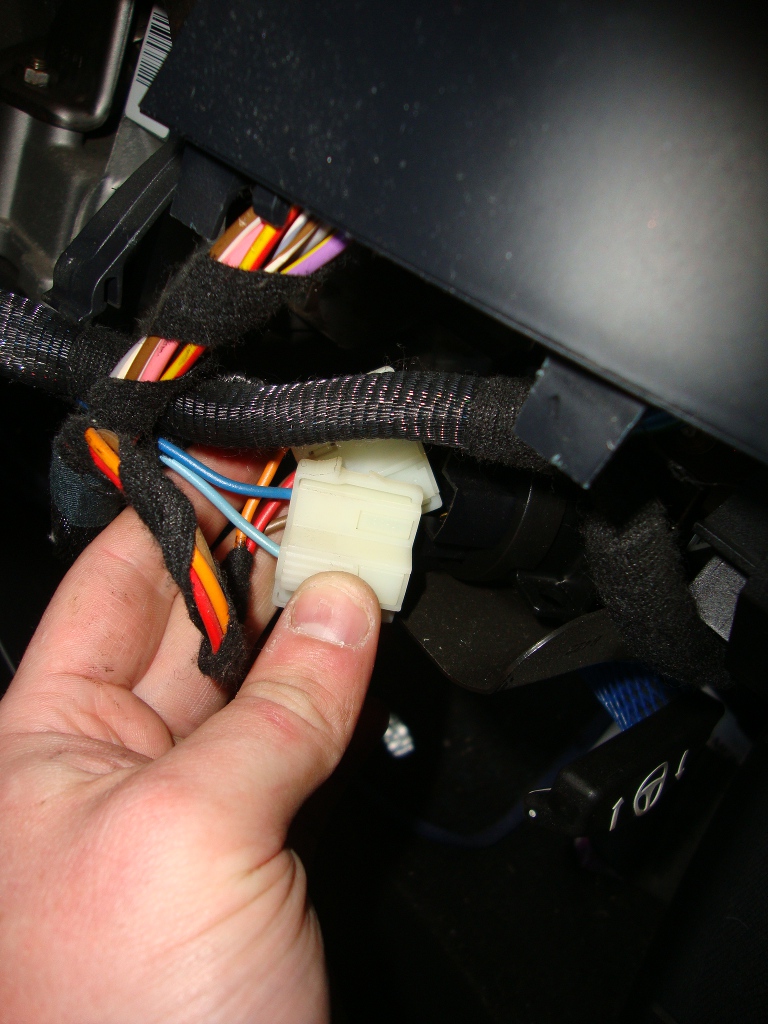
Then remove the white connector (wipers control):
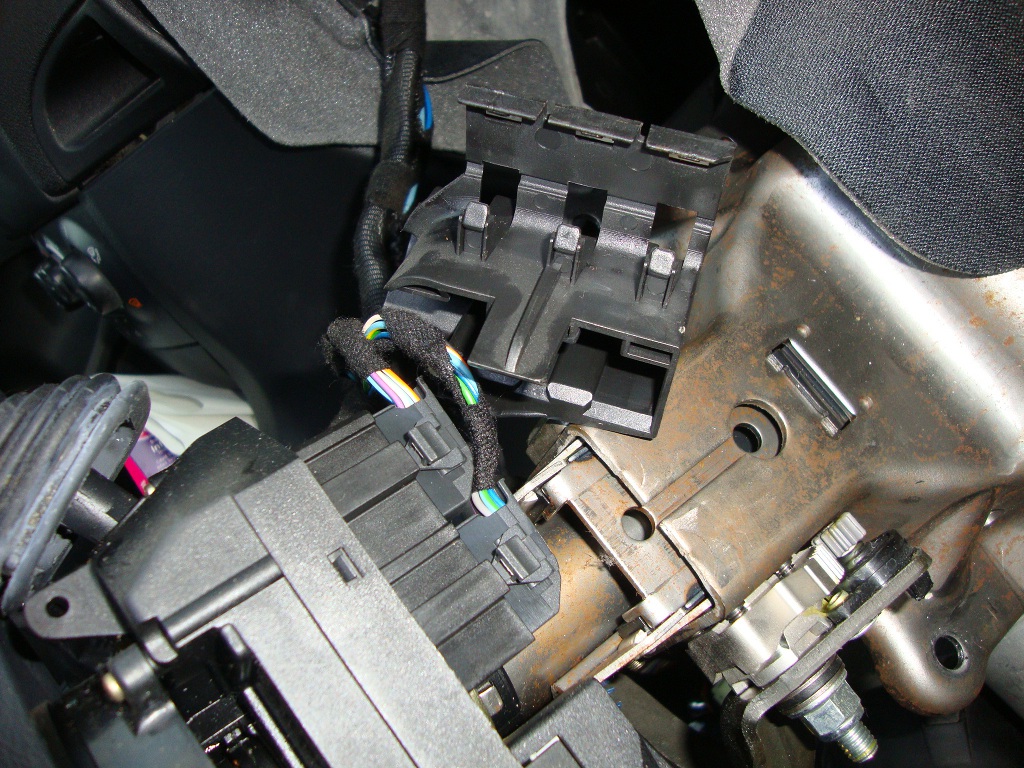
on the top of the colunm is a backshell with a cable clip. Lift up the clip to free the 2 connector. Sdjust the colunm so that is fully out and remove the backshell, and remove the 2 connectors shown (indicators & lights):
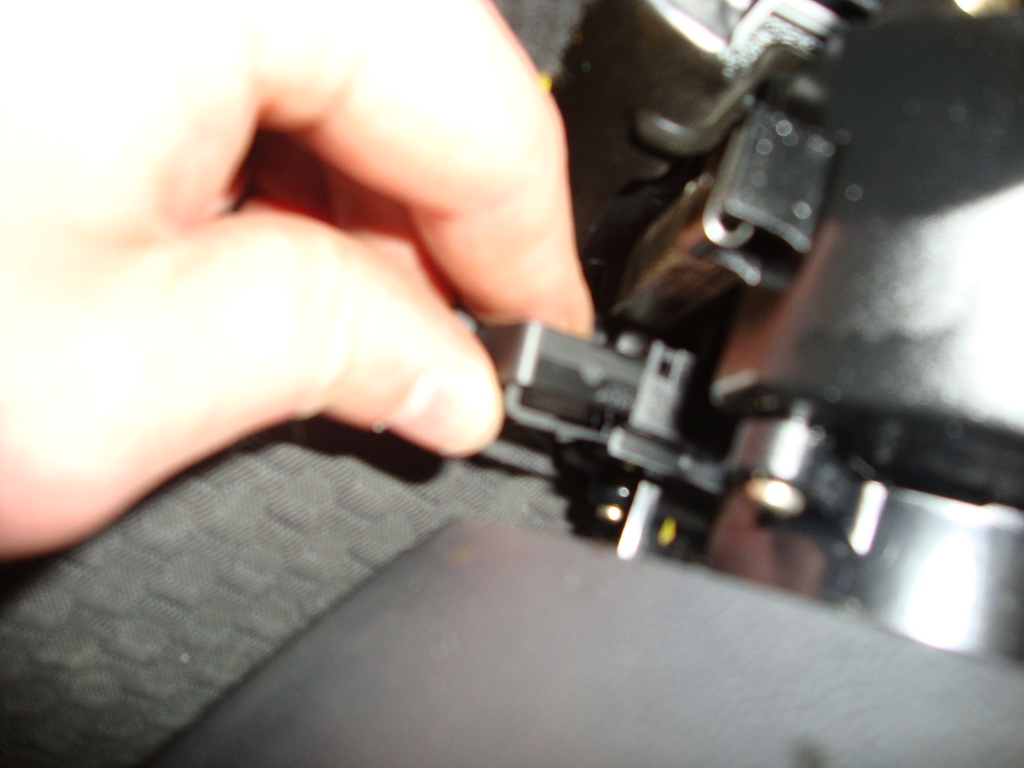
Go underneath the steering wheel to find another connector and remove it (horn & airbag):
This should now free up the loow from the steering wheel:
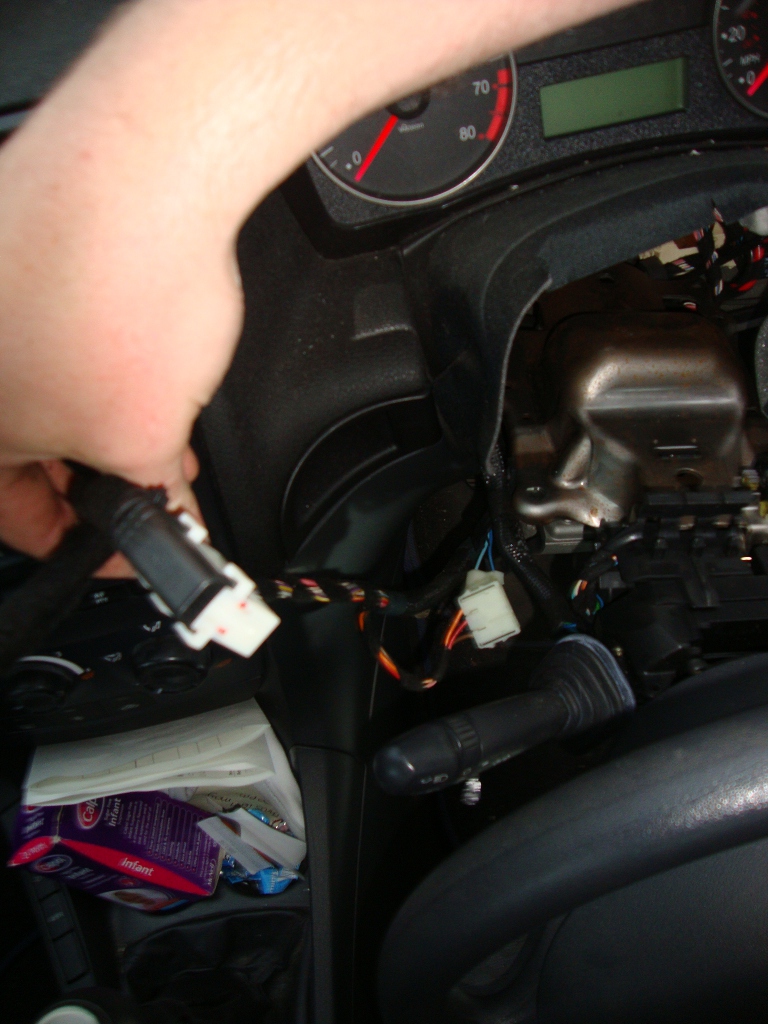
Now disconnect the connections to the Power steering unit:
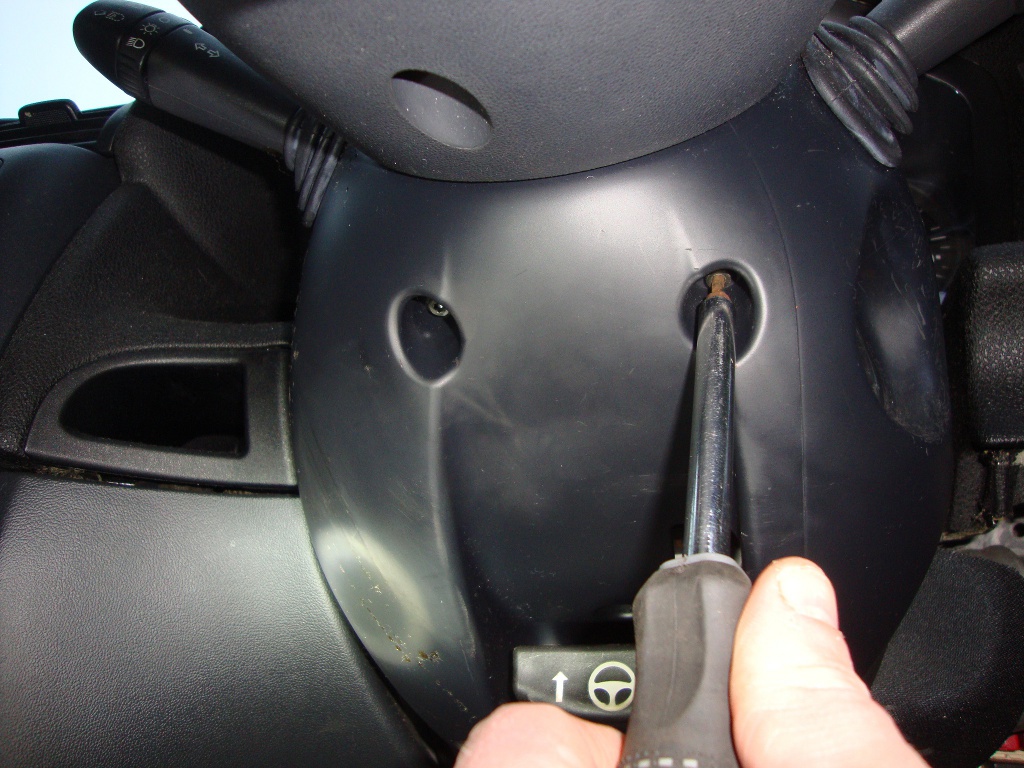
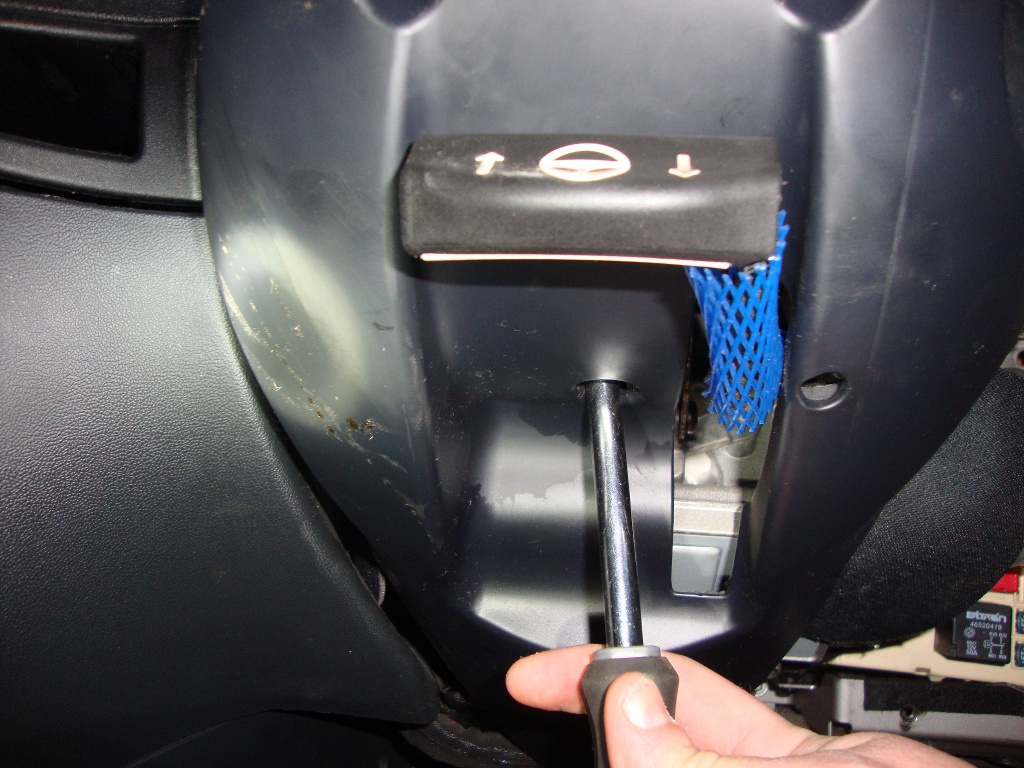
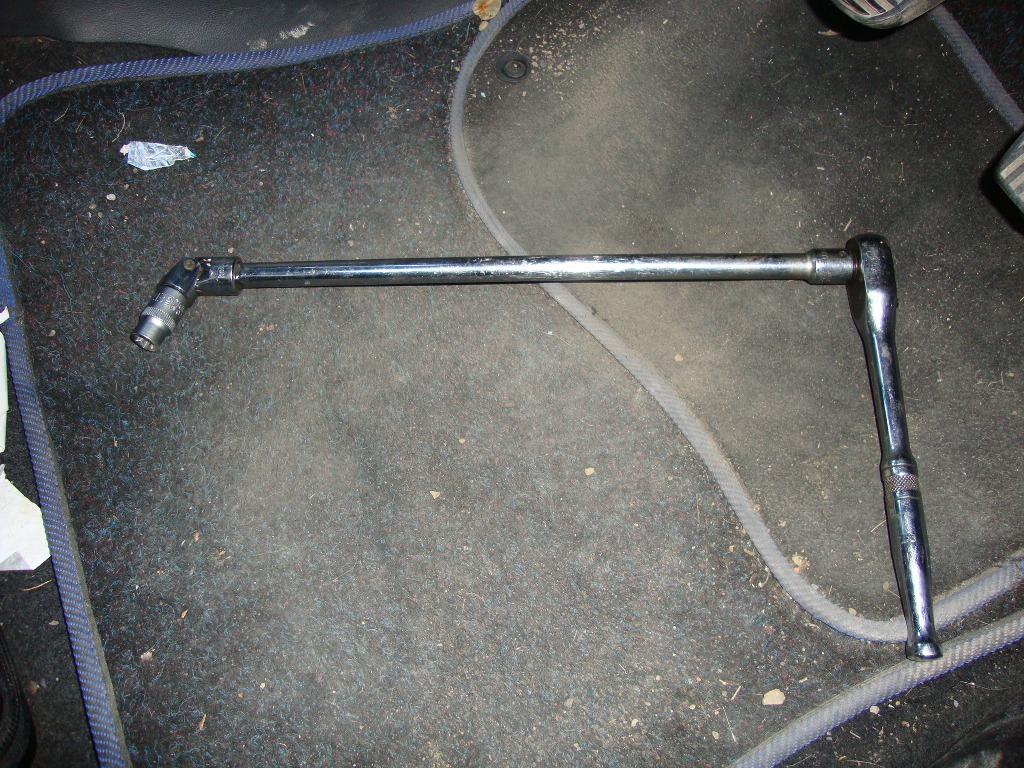
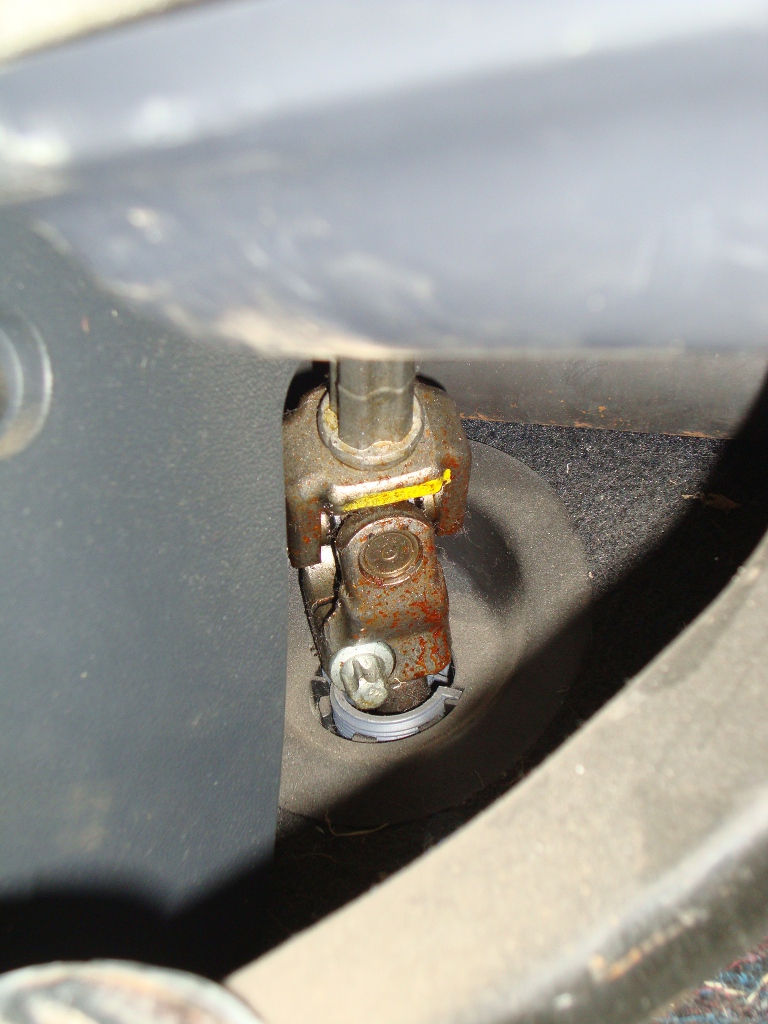
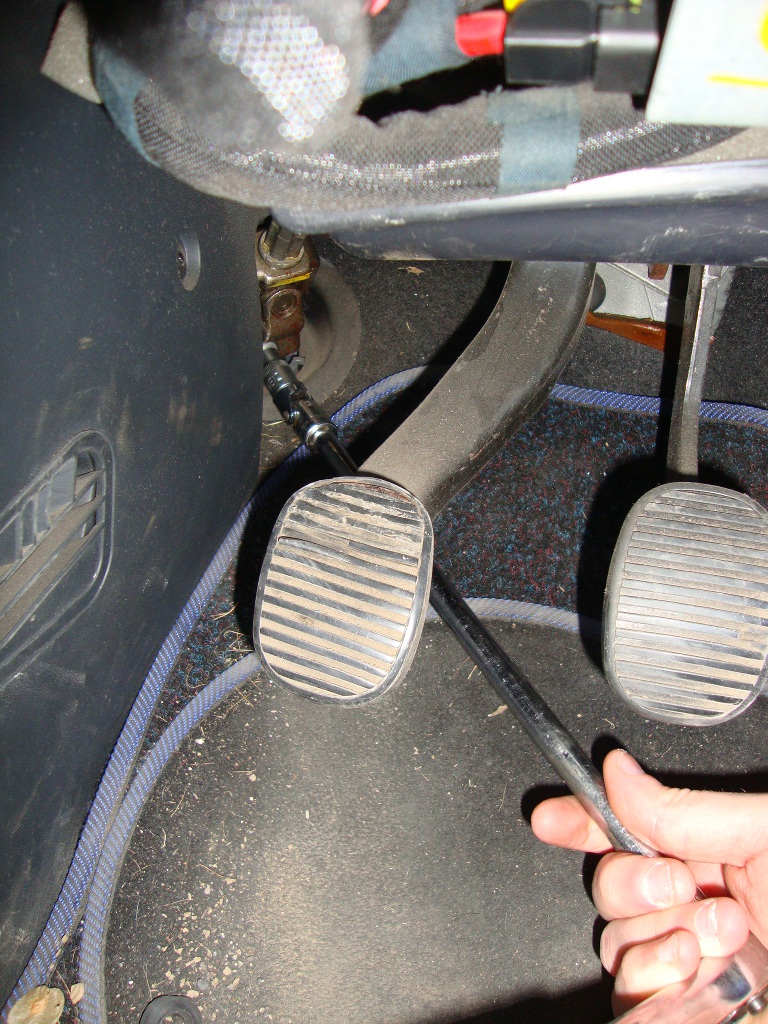
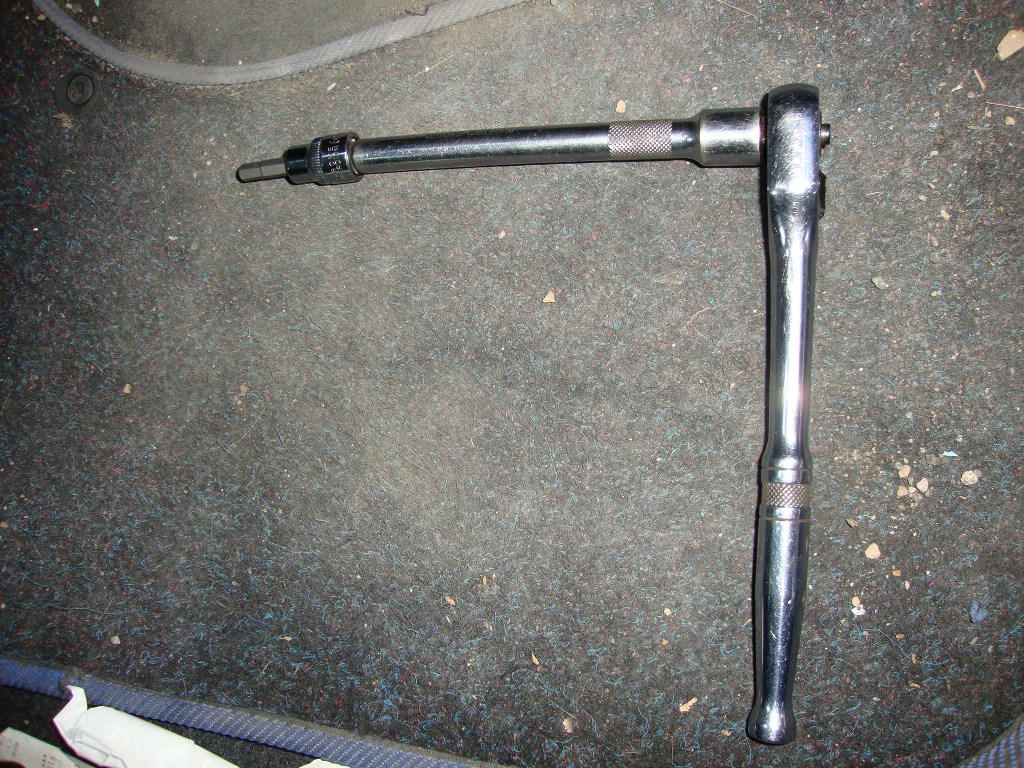
Now the fun starts! Take the internal Trox driver + rachet setup (see below) and undo the Torx bolt on the elbow joint behind the clutch pedal:
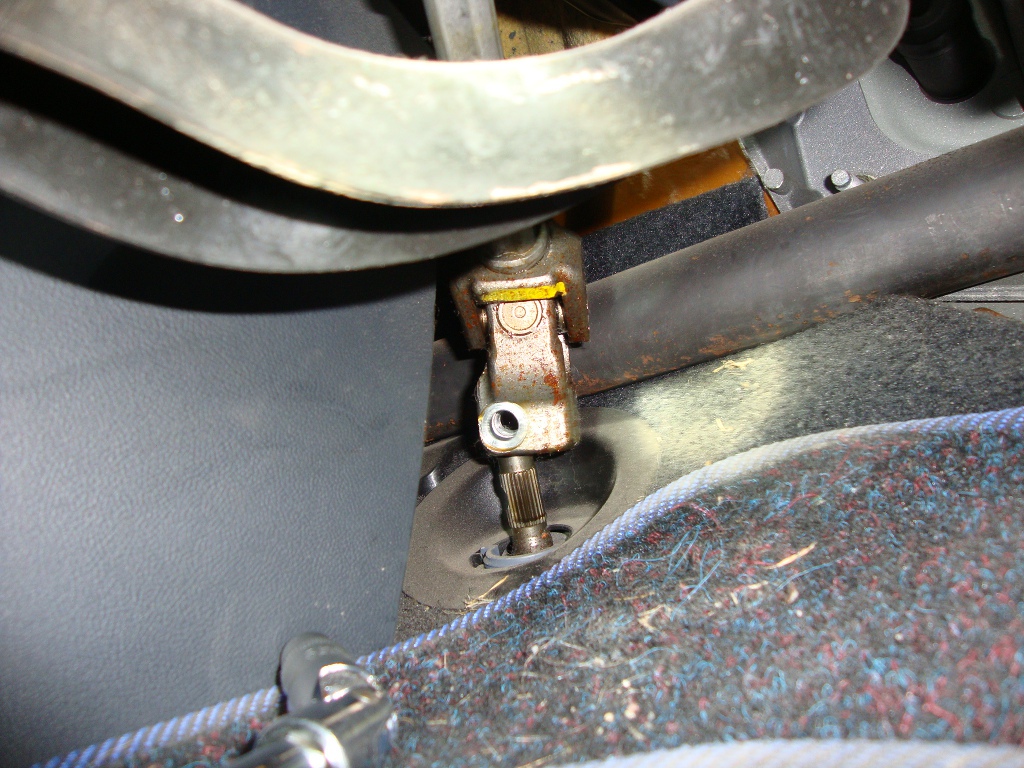
Pull the bolt out and with some very gentle persuasion, the joint should come off the splined stub. You'll notice in the picture below that theres is a small recess taking out of the stub, thtas where the bolt passes through, use this a reference point when putting the joint back on the splined stub:
This next part WILL require and extra set of hands to stop the unit falling on you whilst you undo the bolts!
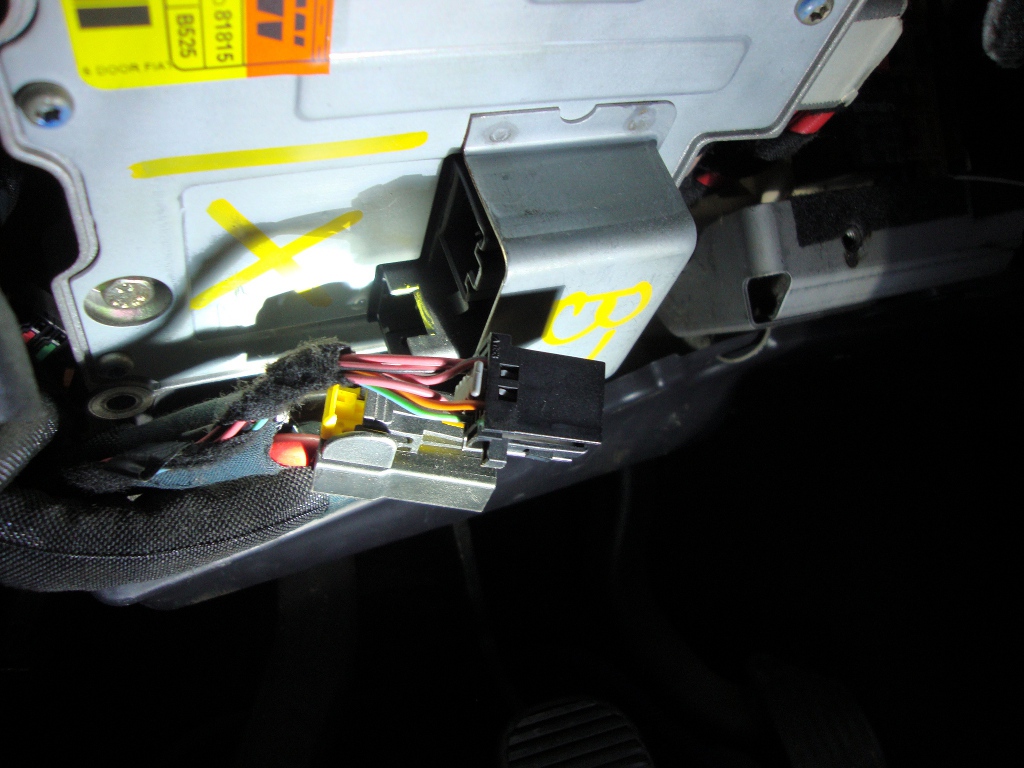
There are 4x hex bolts holding up the unit to the dash. Get on your back in the footwell and locate them:
Get your missus to bring out a brew - I mean it, your gonna need one soon!
Whilst she's there ask her to hold onto the steering wheel whilst you undo those 4 bolts. Use a hex bit socket on an an extension bar, which should provide you with enough torque to crack the bolts:
mine had a rounded end, so you've got some wiggle get a better angle.
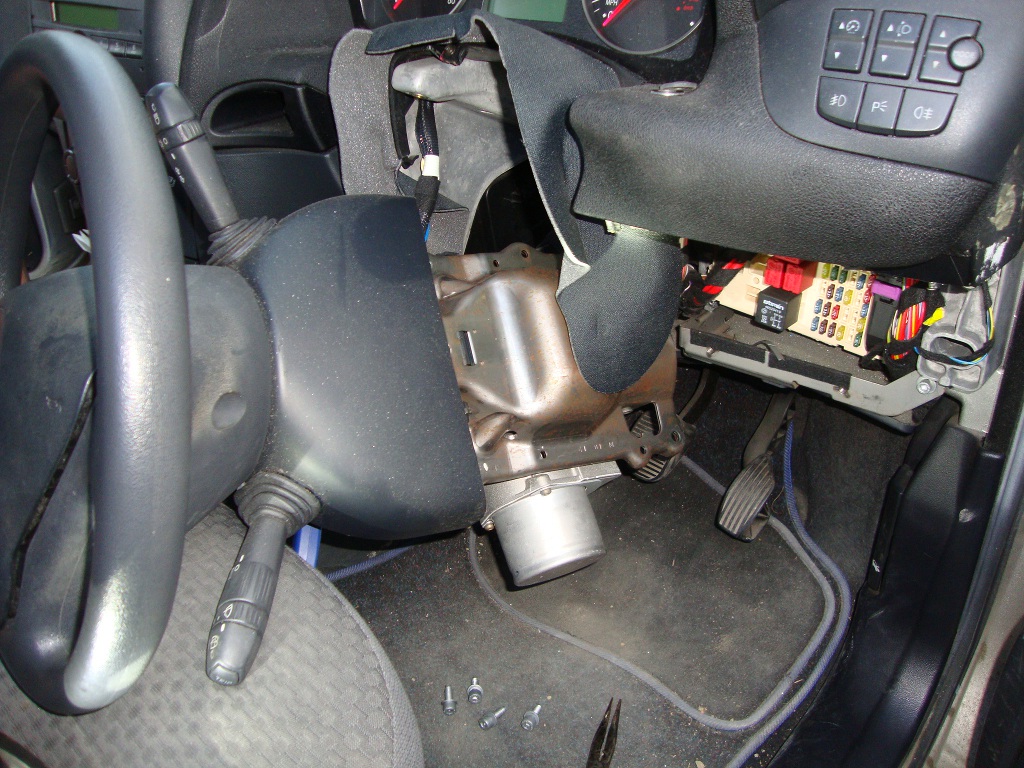
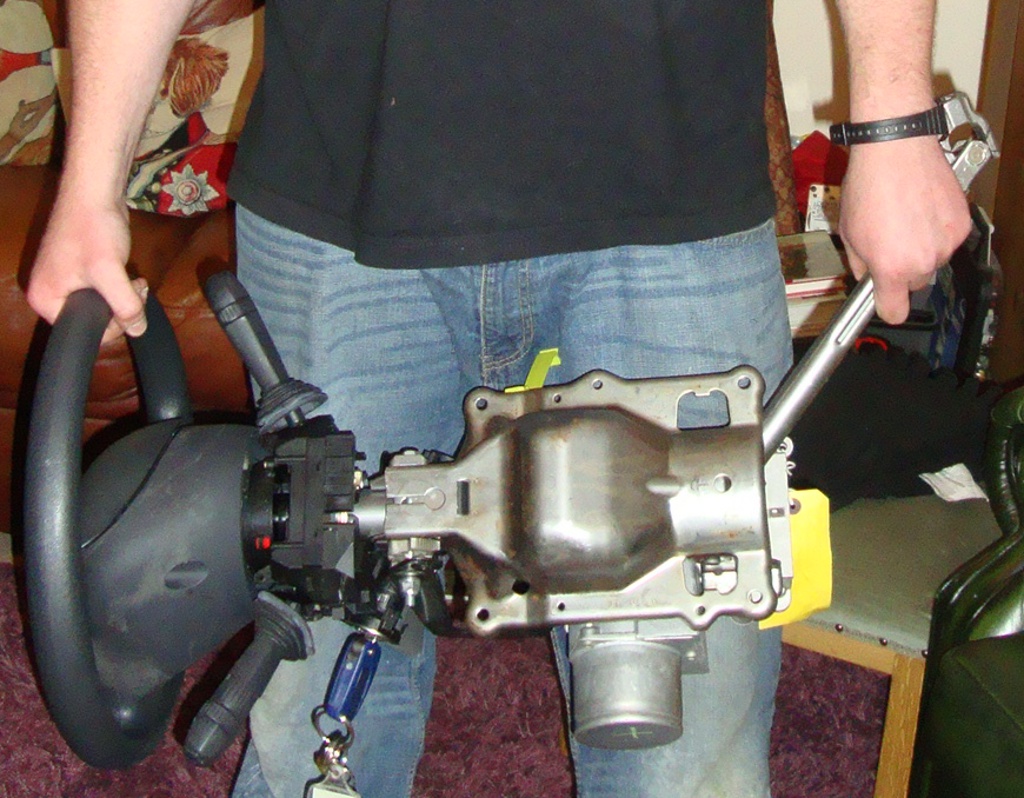
Hopefully, if all wiring connections have been freed, and you took the joint off the spline you should be able to pull the unit out:
Sup brew!
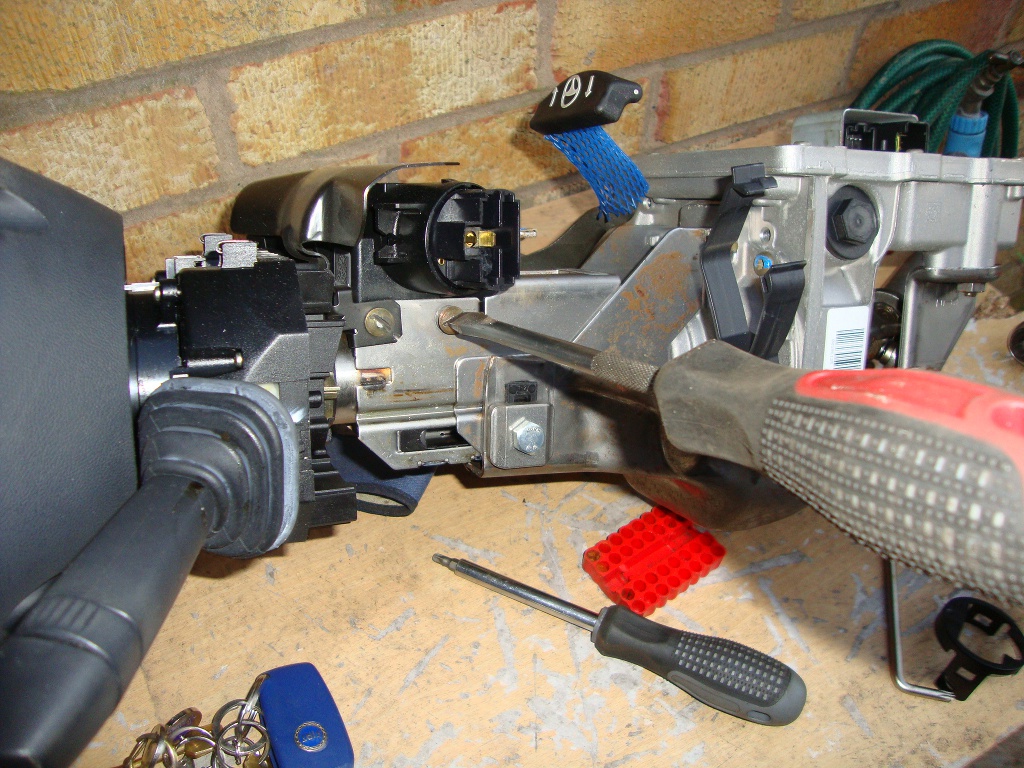
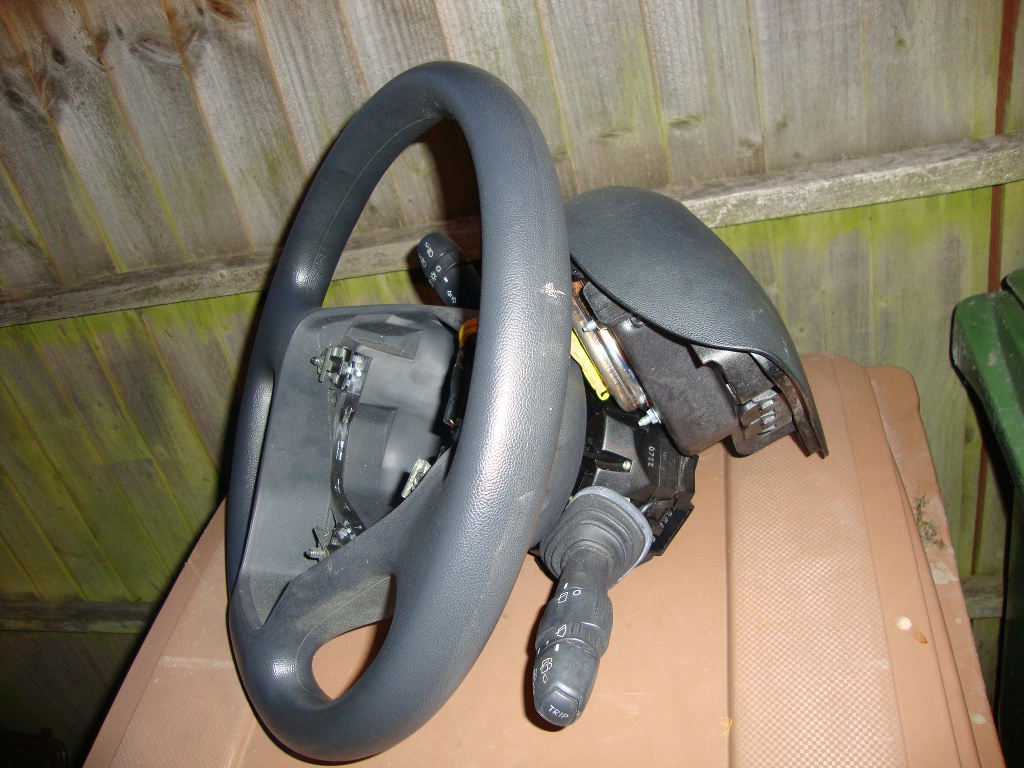
So heres the unit, next to my replacement:
now I have to get the ignition barrel, storks & wheel off the old unit and onto the new!
Now, alexGS, I know you said that I'd have to destory the bolts holding the igition barrel holder to the column, but I came up with a better way that doesn't mean find replacement bolts!
Take an angle grinder and fit the thinnest cutting disc you can find. then cut a slot into the heads of the blanked out bolts holding the ingnition barrel to the column.Alternatively, you can use a dremmel tool with a cutting disc:
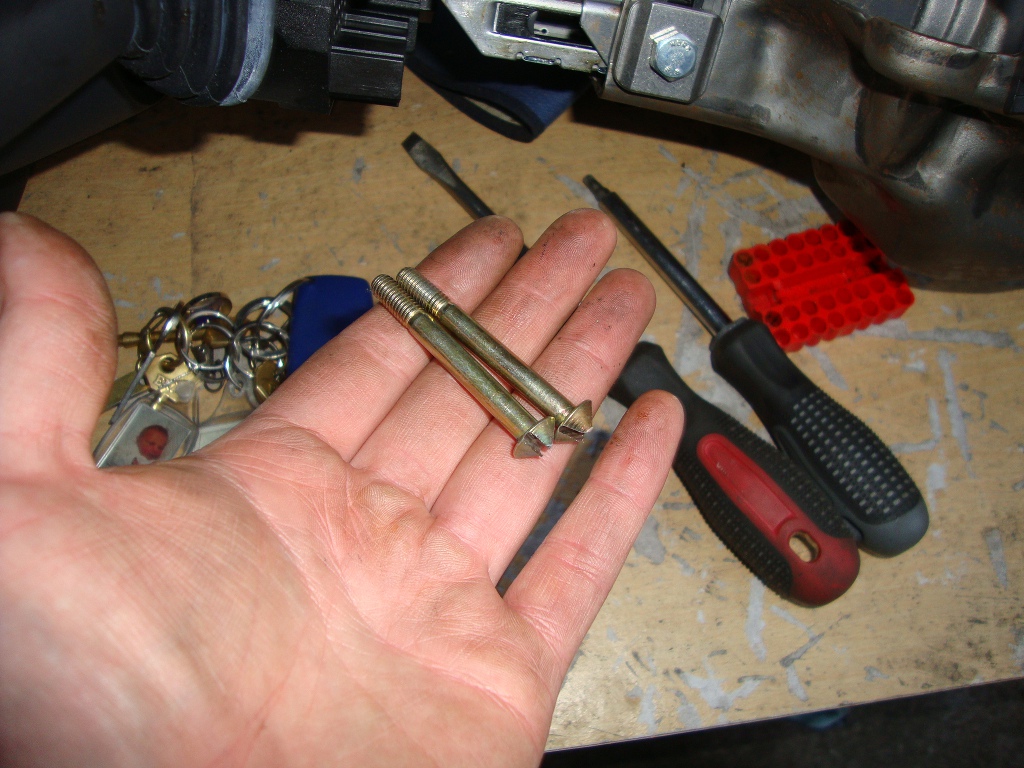
Then its just a case of undoing them with a flat bladed screwdriver and viola! bolts you can re-use:
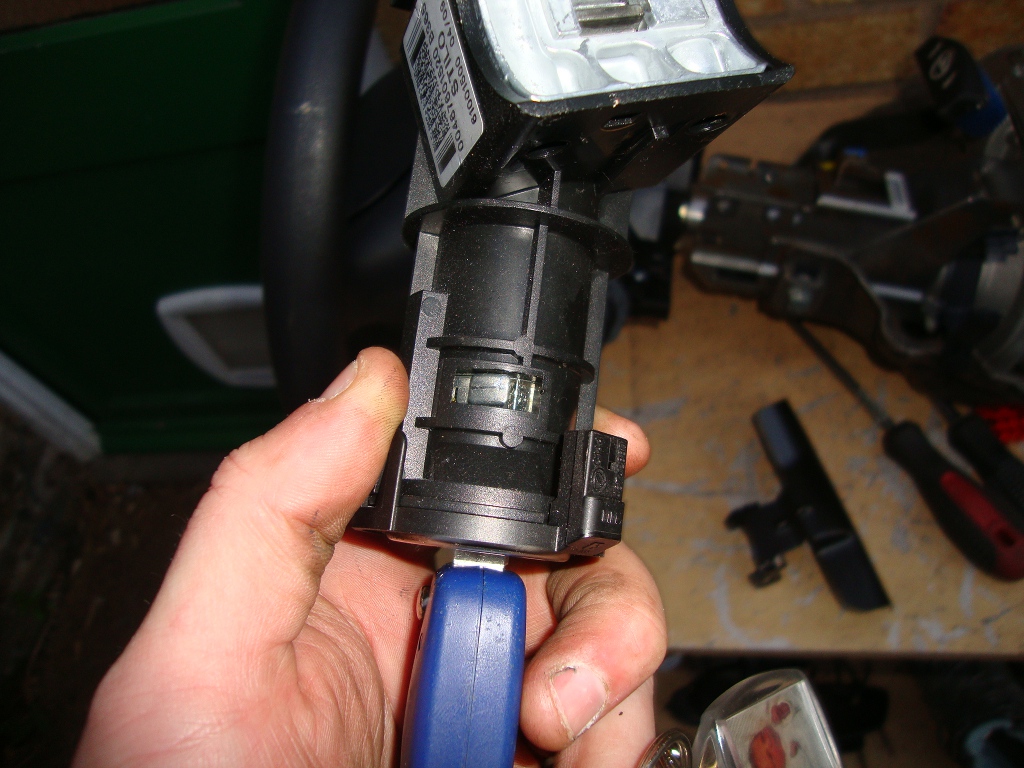
Take the ignition barrel holder off the old unit and fit to the new:
you can see the spring tab where you can take the whole key part of the ignition out. With the key in and a screwdriver pressing on this tab, you can remove this and put it into a new column, if it already has a holder.
Here's the new holder fitted:
Next, undo the hex bolt holding the brass clip:
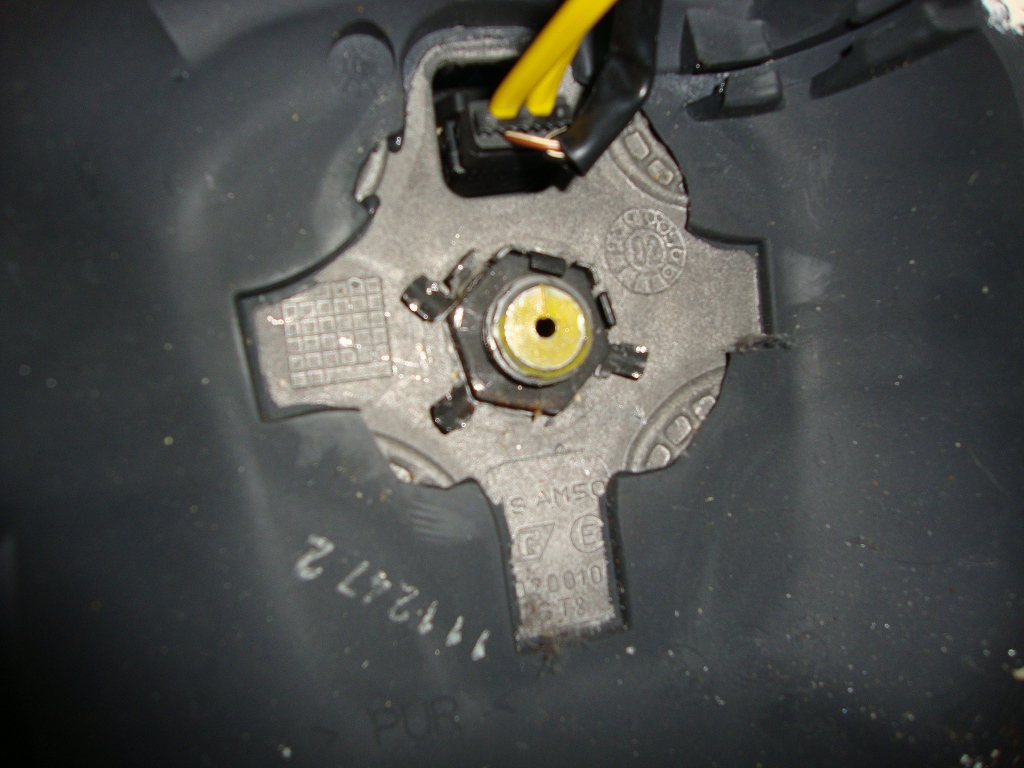
Then undo the 3 bolts in the back of the steering wheel holding the airbag in place, with an allen/hex bit. (sorry it appears I forgot to take photos of this bit!)
Carefully move the the airbag unit out of the way. Then using a screwdriver...I mean chisel
+ a hammer, remove the nut cage around the 2 locking nuts holding the steering wheel to the column:
This will destory the cage, but its not going to be missed (so far I've driven it for a week and the steering wheel's not come off). Then using a 22mm socket or pump pliers or grips, undo the 2 locking nuts.
They are quite thin, and you can't really undo both at the same time, so you have to try and undo 1 at a time with the tool your using.
There is a plastic collar that fits round the column underneath the brass ring clip, just below the storks. on this collar is a cutout that accepts a metal clip on the column. Now, I broke this trying to get the wheel off the column, its not too important if broken, but you should use it as a reference when fitting the wheel back onto the new column
With this clip freed, the storks + wheel should come off. Cos I bust mine I just let the weight of the unit pull itself away from the wheel:
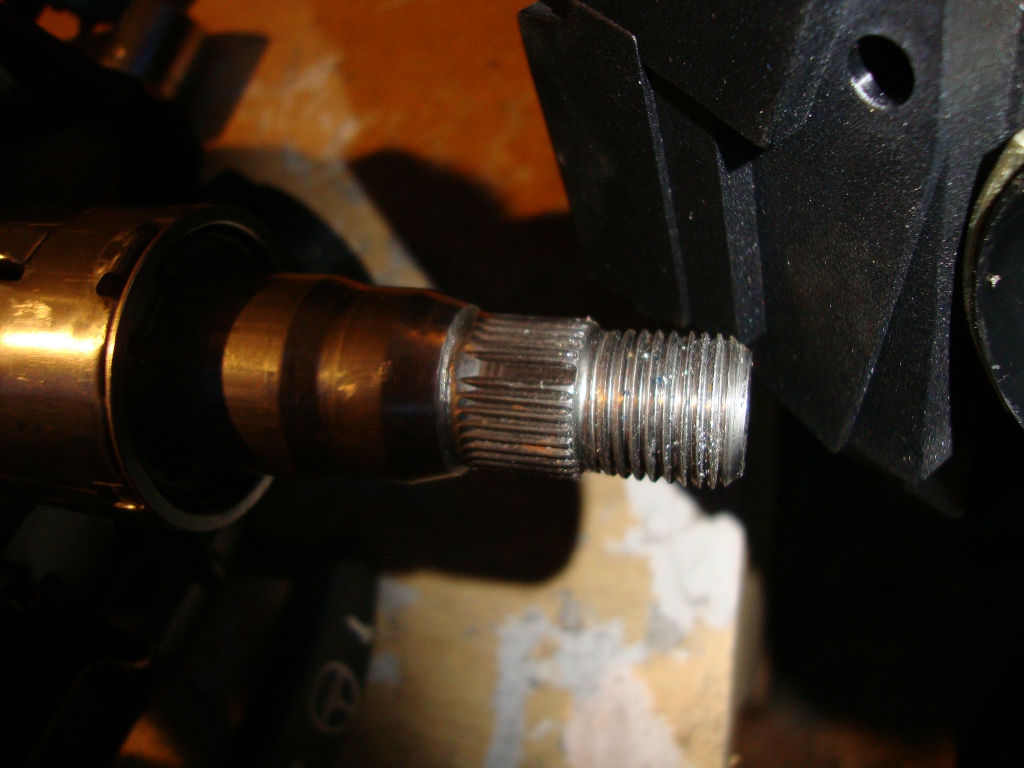
Now looking at the splines on the end of the steering rod:
you will notice there are 3 wider splines around it. They are different widths apart so you can only put the wheel back on one way. Try and lines these up with the grooves on the wheel's splines and fit the wheel back onto the unit.
Re-fit the locking nuts, tighten up the brass ring clip + fit the airbag unit back into place and HEY-PRESTO:
Now its just a case of fitting it back in by doing the steps in reverse.
Word of warning though:
When re-fitting the unit back into the car, make sure that wires and looms are clear of the 4 main fixing points before you torque up the bolts. I didn't and ended up with an alternator fault showing and the drivers side indicators not working cos I'd pinched the wires!
once you have unit back in place, all connectors back in place, don't put the covers on just yet, fire her up and check that all the important things are working: indicator lights, side lights, horn etc.
If not check you put all your connectors back, if you have then check that you've not pinched any wires whilst refitting the unit.
Your EPAS fail warnings may still come up as per usual, but so far we've been drving with it on for a week now and the steering works fine! So we plan to get it cleared if & when we sell the car. Hopefully clearing it won't cause a confliction, it shouldn't.
like I said before, I wouldn't take this as gospel, I did this all by eye and no manual, user beware and all that.
But if you do need a reference or proof it can be done yourself, then here you go.
Let me know what you think,
Cheers