General Painting my wheels

Currently reading:
General Painting my wheels

Joined
Jul 13, 2004
Messages
5,471
Points
1,084
Location
Papamoa Beach
I didn't find too many other threads about repainting wheels - so thought I'd share my little project.

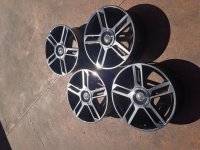
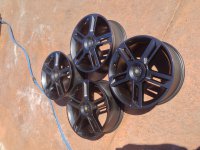
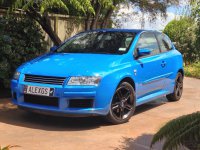
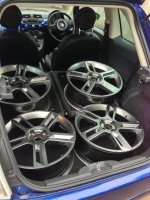
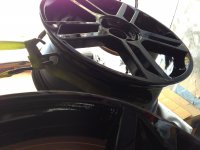
First step was to fail the Warrant Of Fitness (WOF, like an MOT) with three tyres needing replacement - this provides a good excuse to put the Stilo up on axle stands and remove all four wheels, which fit (just) into a FIAT 500 to take into a tyre shop. Tyres and tyre valves removed. Four wheels without tyres fit easily into a 500 (picture below).

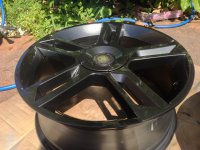
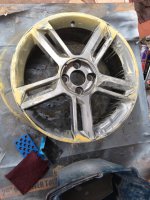
Next step: wire brush and fill the various gouges made by kerbs - after years of using clever hard materials (like powder and superglue), I now just use ordinary filler for this - much easier to sand.

This was about three weeks ago. It's obviously been a busy time since - loads of other work, Christmas, and New Year.

(I can only attach one picture per message, so the next message follows on...)
 

Attachments

  • image.jpg
    image.jpg
    665.4 KB · Views: 50
Last edited:
After filling and sanding, some aerosol primer-filler helps to disguise the last of the irregularities. This is always a risk, since the next paint layer might react with it, but then again it might not and I haven't had any problems with this particular 3M product before (it claims to be an enamel). It's had a couple of days to harden just in case.

Here's a nice messy wet-sanding session - about an hour and a half should do it - with purple Scotchbrite used to abrade the surface in awkward places, such as those grooves around each spoke on the outer rim.
 

Attachments

  • image.jpg
    image.jpg
    951.9 KB · Views: 39
Last edited:
The wheel centres need painting along with the wheels, to assure a match. I thought it would be easy to carefully pop the badge out. One shattered badge later, I managed to obtain a replacement centre in the wrong colour - it had already been repainted in a light silver with a few flakes revealing the darker colour beneath.

Next was a tricky sanding session to get around the badges. I use 400 grit wet sandpaper for this and the wheels.

Then it was time for some thin green masking tape stretched around each badge.

Two of the wheels threw an unexpected surprise today - alloy corrosion under the black powder coat, all over the inside of the wheel. I used 120 grit sandpaper to smooth it out ready for a coat of paint, which will probably hold the corrosion off for long enough. It must have been a bad day at the wheel factory - with that and all the flaking/black dot problems.

Since I now need to paint both the inside and the outside of the wheels - that will call for special manoeuvres. I don't want to take two days per coating - so I need a way to reach both the inside and the outside at the same time :chin:

Ten preparation hours have now passed - just one wheel to go now...
 

Attachments

  • image.jpg
    image.jpg
    596.6 KB · Views: 23
Last edited:
Last time I painted wheels (two months ago), I put them on a trestle table made of a folding ladder covered with a tarpaulin. The idea was to get them off the floor of the garage, to reduce the dust problem. However, after sitting there for four hours (long enough to get several coats of paint on), two of the 15kg wheels jumped off while I was away. :bang: They made a noise clearly audible inside the house, something like a cross between a church bell and a coin settling down. One had managed to roll out of the garage so as to evenly contact the concrete driveway right around the rim - instant kerb damage and back to square one.

This month I have come up with a better solution. It involves four ratchet tie-downs bought today... If these slightly-lighter-than-last-time wheels come down, they'll bring the garage roof with them.

By this time it was 8:37pm and I bravely decided to give up. It's just too dark in that outside garage to see black paint going on.

The actual painting starts tomorrow and will have to be spread over the next three days, as the black basecoat must cure first before the silver goes on, and then the clear.

-Alex
 

Attachments

  • image.jpg
    image.jpg
    513.2 KB · Views: 30
Last edited:
Black paint applied with a small spray pattern to get into the nooks and crannies - tried to get a good finish for the second coat, but seemed to need quite a lot of thinners, could be the high temperature and maybe the humidity too. I was getting too much orange peel and a dry spray until I added about 20% thinners (in total).

Anyway, after painting for about an hour, it was looking pretty good. Except...
 

Attachments

  • image.jpg
    image.jpg
    1.7 MB · Views: 34
...one wheel did have some problems. The yellow primer caused some 'dry' areas, but these went away after a second and third coat. The bigger problem was a sort of little-holes, rejection, orange-peel type of problem that I assume must have been contamination not removed by the wax-and-grease removal process. Not the usual craters, so there is black on there. Applying some more coats after 15 minutes seemed to help, but probably increased the orange peel further. See picture below.

Oh well. I might try to wet-sand and polish that area before the chrome silver goes on - but that makes me nervous that I will introduce more contamination and fine scratches, which the silver will accentuate.

-Alex
 

Attachments

  • image.jpg
    image.jpg
    1.4 MB · Views: 25
I think it was Saturday that I finished the painting - the day after my birthday - there was a party that night and then I spent Sunday at a racetrack with my Uno Turbo - naturally, getting that ready (a service and a CV boot replacement) took the lion's share of the time.

Nevertheless I moved the wheels outside and sprayed on many light coats (about ten) of PPG's 'Chrome Shadow' - costs about $600 (£305) per litre - just kept dusting it on, making sure the wheels were all the same colour. Much easier to judge this out in the sun than it would be in the garage.

With the last few coats, the silver didn't seem to want to go any lighter, so I settled for a dark colour - you could call it charcoal. Tends to look a lot darker than original (please note this, if you're considering PPG's product). I used about 200mL.

The wheels were by now too hot to touch, in the direct sun, and with the air temperature near 30 degrees C, I put about twice as much thinners (20%) into the clearcoat mix. It was a perfectly still day, so I sprayed the clearcoat outside, watching it very carefully as it went on. I sprayed the sides of all the spokes first, then gave the angled part of the rims a full coat, and finally sprayed a thick coat onto the flat top surface, making sure it was thick enough to flow out.

I had one run which I absorbed with a paper towel, then resprayed that area with the spraygun turned down to a circle spray.

I realised today that the side of one spoke is lacking the black basecoat :eek: 
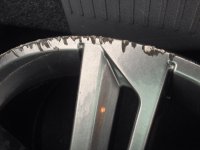
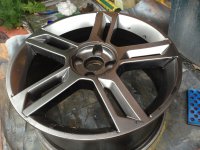
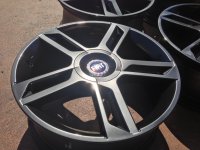
so the silver is patchy-looking near the rim - oh well!

Other than those two defects, I think they turned out well. Here are three pictures:
 

Attachments

  • image.jpg
    image.jpg
    2.1 MB · Views: 24
Last edited:
I was relieved to find the masking for the wheel centres had worked correctly.

The silver glints so brightly, it's hard on the eyes - I was surprised the iPhone's camera coped with it :eek: Has a lot more 'flip' than the original finish (bet the original paint didn't cost $600/litre :p)

The three hours of high surface temperature (65+ degrees) must have baked the paint quite effectively. It was hard work removing the paint from the inside centre where it bolts to the hub (I used a drill with a Scotchbrite strip disc).

Today I had four Pirelli P7s fitted - half usual price, just $200 each. I was surprised at how heavy the tyres were, and 215/45 seems a huge width for a hatchback :)

I've bolted the wheels on, but there isn't room to get a trolley jack under the back axle until tomorrow when I can get the garage open... so it'll come off the stands then.

-Alex
 

Attachments

  • image.jpg
    image.jpg
    2.1 MB · Views: 33
Last edited:
Thank you :)

But "OMG", what a day yesterday! :eek: got a fresh Warrant of Fitness and drove out to the FIAT specialist half an hour away... then while an older friend was testing my car (I wanted his comment on what to do about the suspension), Engine Control System Failure and the Selespeed stayed in 3rd. Then after restarting, it would only drive in 1st and 2nd.

As he was trying to reverse, the car rolled forward into a kerb, damaging the left front wheel, because the engine stalled and won't run at all (will start, but no throttle action). Also has an electric steering failure.

We had to push it out of the way - and I had to borrow a 156 Sportwagon to get home. I'll go back to try and fix the Stilo today :(

-Alex
 
Got the engine fixed - new MAF sensor - confusingly, one off a wrecked Stilo was also faulty. I tried changing the throttle body with no result.

I fitted a genuine Bosch MAF even though it was a bit more expensive than aftermarket (about 30% more).

Power steering is now quite consistently faulty with 'internal assembly errors', so I'm about to replace the column. What an expensive week :(

-Alex
 
A month on - the wheels are going well, and the rest of the Stilo is OK too. The colour of the wheels is rather dark (I'm told they're just a dark grey), but when the light hits them in the right way, they look all right, I think. The Pirelli P7s are excellent tyres.
 

Attachments

  • image.jpg
    image.jpg
    2.4 MB · Views: 17
Last edited:
Back
Top