HOW TO REMOVE A STILO FRONT STRUT
This is on a 1.6 engine Stilo - models may vary
Ring a round and find a garage who will change the springs for you. Don't attempt to change springs on your own. A spring in the face is very likely and some of you are ugly enough already.
Bear in mind the reason why many people are changing springs is because they tend to fracture under stress remember? Point taken?
First of all check your tracking and make some notes as although your steering shouldn’t be altered at all or by much, you are moving some chunky suspension bits around and a mm here and a mm there may add up by the time it gets down to your wheels.
But you haven’t got laser tracking facilities I hear you say.
Can you see the sea horizon? Can you see the moon at night? Then you don’t need a laser to do tracking checks. Have a look in “How to check your tracking" and after learning how to do that you may not be visiting the tyre shops quite so much
REMOVING THE STRUT
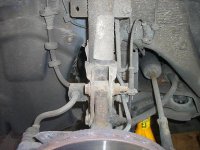
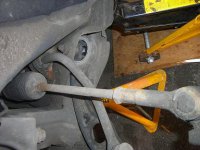
OK so do the usual, jack it up, wheel off and axle stand stuff. You can see where I put the jack and axle stand here.
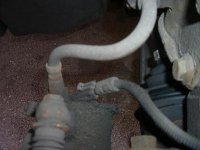
ABS CONNECTOR
Pull up the clip and disconnect the wheel ABS connector. Then pull out the brake hydraulic hose, ABS wire and brake pad wear wires from the strut
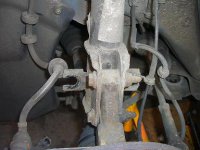
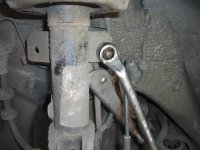
ANTI ROLL BAR LINK
Just get hold of the back of the ball joint with a mole wrench over the protective boot and undo the nut with a 16mm socket. The protective boot on the drop link is very tough so you can use a mole wrench on it to grab the shoulder of the ball joint underneath without problems. You can put on new links using this method too without problems of damaging the boot. Move the link out of the way, no need to disconnect the bottom one
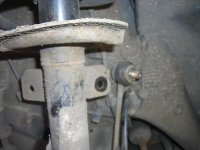
STRUT BOTTOM BOLTS
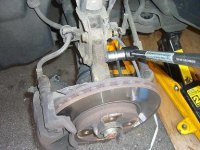
These are not as tight as you might think they are gong to be but a long bar makes easy work of them. Don’t remove the nuts entirely yet, only run the nuts up to the end as you’ll need to use a hammer to knock the bolts through and don’t want to damage the thread. BUT BEFORE YOU DO. Move the ABS and brake pad wear wires out of the way. Don’t want to smack them with the hammer
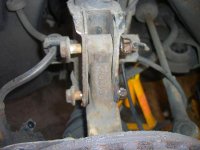
OK just knock the bolts through a bit to get them moving as they’ll have a bit of rust holding them.
TOPSIDE NOW
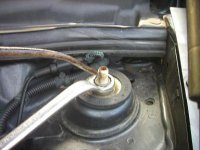
Put some oil on and get to undoing the very top nut but don’t take it off completely just yet, you’re just loosening it ready, so take it up until it’s just finger tight and then leave it ready. You may need to use a torx or allen key in the screw centre to stop the shocker spindle turning while you unscrew the nut..
BACK TO THE BOTTOM STRUT BOLTS
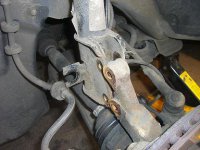
Ok you can take off the nuts and turn and knock out the bottom bolts now. Then you can lever the hub out towards you
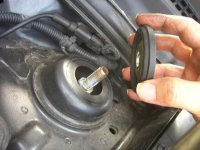
Now the strut is just hanging by the top nut and cover, so, supporting the strut with one hand underneath just undo the top nut. Take off the cover and now your strut is ready to remove from the car. It’s not very heavy.
WARNING DON'T even attempt to undo the nut shown down in here under the top cap. This is the strut spring retaining nut and is holding your strut spring on.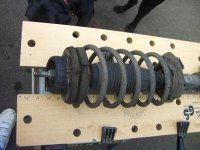
CHANGING THE SPRING
Don’t try changing the spring yourself. A garage or tyre shop will do it for you for next to nothing in just a few minutes in complete safety. The Stilo spring is very strong and goes all over the place when compressing so have a garage do it. Bear in mind why you’re changing the spring, because it tends to snap and if it’s going to snap it’ll do it in full tension just where you’re face is so don’t mess with it. It’s quick, cheap, safe and effortless in a garage.
POINTS TO NOTE - VERY IMPORTANT
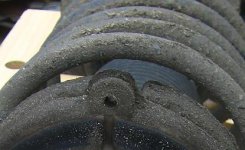
When your garage man reassembles the strut with the new spring for you, make sure they have lined up the top cap and bearing surface like this with the point on the cap and the hollow on the top plastic bearing surface all in line with the bottom bolt mounting brackets. If not then they’ll have to do it again as it determines the angle of the top mount in relation to the bottom strut
REINSTALLING THE STRUT
When you reinstall the strut, wait until the car is back on the ground again before finally tightening the top mount nut
Now check your tracking is still ok as before
This is on a 1.6 engine Stilo - models may vary
Ring a round and find a garage who will change the springs for you. Don't attempt to change springs on your own. A spring in the face is very likely and some of you are ugly enough already.
Bear in mind the reason why many people are changing springs is because they tend to fracture under stress remember? Point taken?
First of all check your tracking and make some notes as although your steering shouldn’t be altered at all or by much, you are moving some chunky suspension bits around and a mm here and a mm there may add up by the time it gets down to your wheels.
But you haven’t got laser tracking facilities I hear you say.
Can you see the sea horizon? Can you see the moon at night? Then you don’t need a laser to do tracking checks. Have a look in “How to check your tracking" and after learning how to do that you may not be visiting the tyre shops quite so much
REMOVING THE STRUT


OK so do the usual, jack it up, wheel off and axle stand stuff. You can see where I put the jack and axle stand here.

ABS CONNECTOR
Pull up the clip and disconnect the wheel ABS connector. Then pull out the brake hydraulic hose, ABS wire and brake pad wear wires from the strut


ANTI ROLL BAR LINK
Just get hold of the back of the ball joint with a mole wrench over the protective boot and undo the nut with a 16mm socket. The protective boot on the drop link is very tough so you can use a mole wrench on it to grab the shoulder of the ball joint underneath without problems. You can put on new links using this method too without problems of damaging the boot. Move the link out of the way, no need to disconnect the bottom one

STRUT BOTTOM BOLTS

These are not as tight as you might think they are gong to be but a long bar makes easy work of them. Don’t remove the nuts entirely yet, only run the nuts up to the end as you’ll need to use a hammer to knock the bolts through and don’t want to damage the thread. BUT BEFORE YOU DO. Move the ABS and brake pad wear wires out of the way. Don’t want to smack them with the hammer

OK just knock the bolts through a bit to get them moving as they’ll have a bit of rust holding them.
TOPSIDE NOW

Put some oil on and get to undoing the very top nut but don’t take it off completely just yet, you’re just loosening it ready, so take it up until it’s just finger tight and then leave it ready. You may need to use a torx or allen key in the screw centre to stop the shocker spindle turning while you unscrew the nut..
BACK TO THE BOTTOM STRUT BOLTS

Ok you can take off the nuts and turn and knock out the bottom bolts now. Then you can lever the hub out towards you

Now the strut is just hanging by the top nut and cover, so, supporting the strut with one hand underneath just undo the top nut. Take off the cover and now your strut is ready to remove from the car. It’s not very heavy.
WARNING DON'T even attempt to undo the nut shown down in here under the top cap. This is the strut spring retaining nut and is holding your strut spring on.

CHANGING THE SPRING
Don’t try changing the spring yourself. A garage or tyre shop will do it for you for next to nothing in just a few minutes in complete safety. The Stilo spring is very strong and goes all over the place when compressing so have a garage do it. Bear in mind why you’re changing the spring, because it tends to snap and if it’s going to snap it’ll do it in full tension just where you’re face is so don’t mess with it. It’s quick, cheap, safe and effortless in a garage.
POINTS TO NOTE - VERY IMPORTANT

When your garage man reassembles the strut with the new spring for you, make sure they have lined up the top cap and bearing surface like this with the point on the cap and the hollow on the top plastic bearing surface all in line with the bottom bolt mounting brackets. If not then they’ll have to do it again as it determines the angle of the top mount in relation to the bottom strut
REINSTALLING THE STRUT
When you reinstall the strut, wait until the car is back on the ground again before finally tightening the top mount nut
Now check your tracking is still ok as before


![DSCN1299[1].JPG](https://cdn.fiatforum.com/data/attachments/79/79612-871df82c717259e8d84100a3d2306a9d.jpg)